

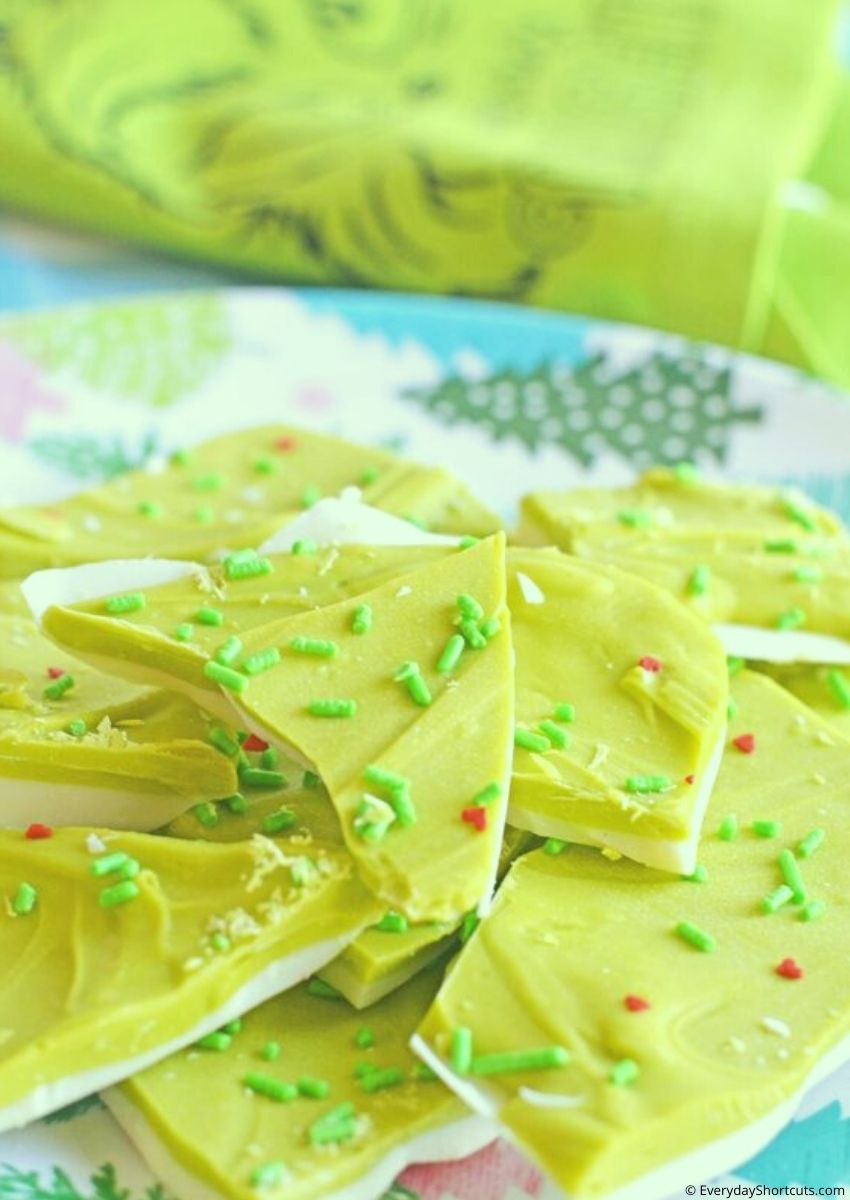
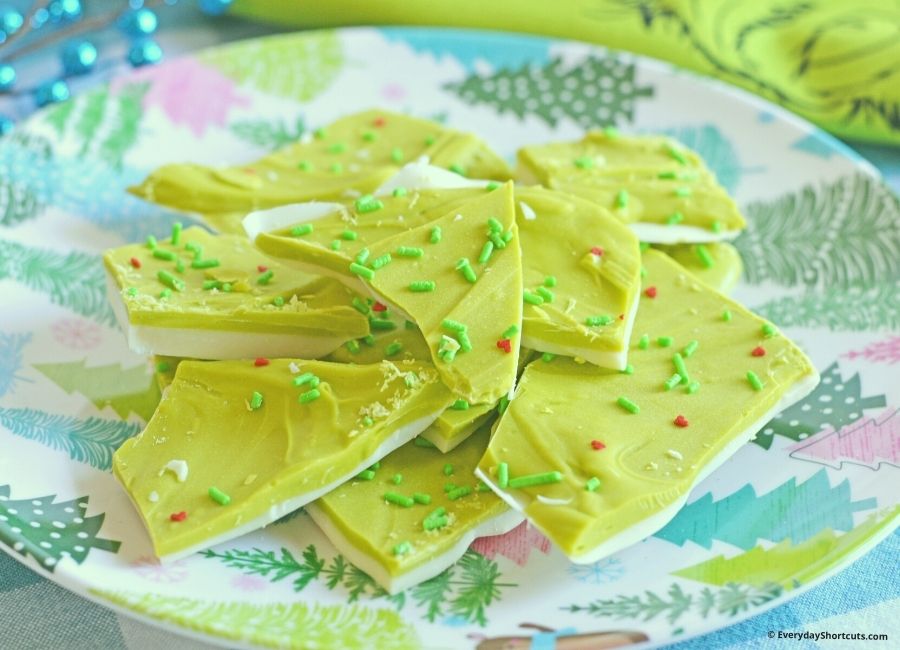
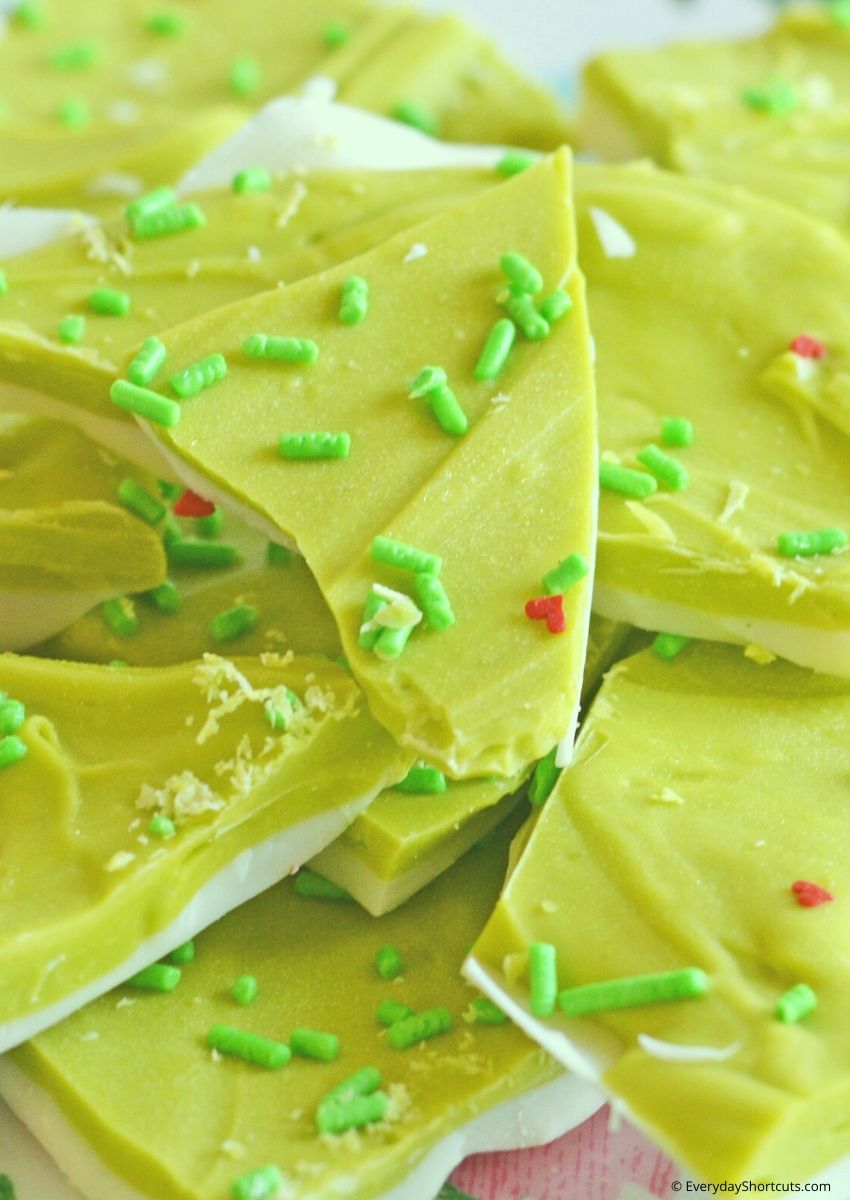
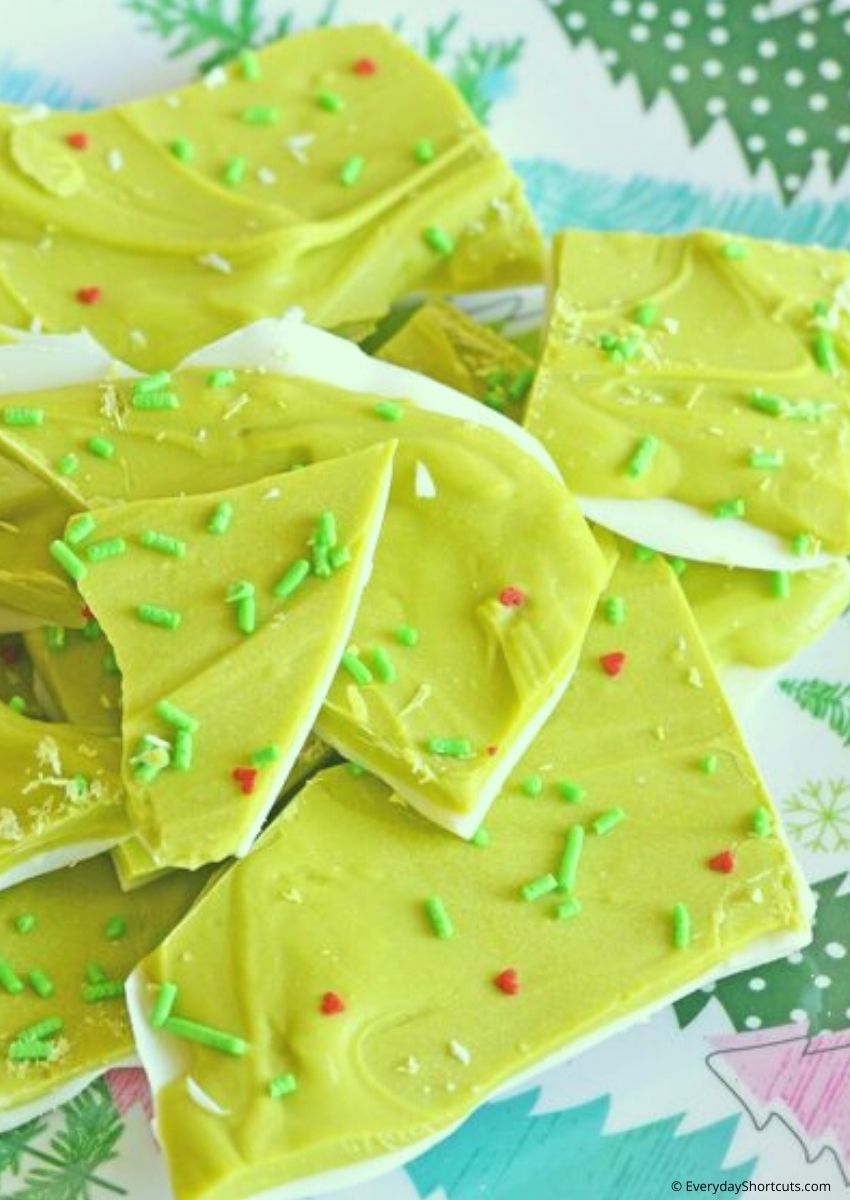
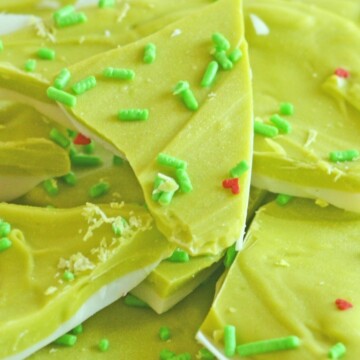
Who doesn’t love a good chocolate bark on Christmas? This no bake Grinch-inspired holiday bark is green in color with adorable red heart sprinkles that’s bound to make your heart grow three sizes too big!
Chocolate bark makes excellent holiday gifts, so be sure to give this recipe a try! It’s also a fun activity to do with your kids - they’ll love picking out their favorite toppings. Enjoy!
Fun & Delicious Variations to Try
Assembling your chocolate bark is a fun way to get creative and use up any odds and ends in your pantry. Be sure to experiment with different combinations of ingredients to find your favorite flavor profile!
- Topping the chocolate with crushed peppermint candies for a festive treat!
- Try sprinkling toasted nuts over the chocolate for a delicious and crunchy surprise.
- You can also try drizzling white, milk, or dark chocolate over the bark after you add your toppings for different flavor combinations (for example: dark chocolate with fresh rosemary).
How to Keep Your Chocolate from Sticking
Preparing chocolate bark is incredibly simple: melt the chocolate, add whatever mix-ins you want to use, spread in a thin layer on a baking sheet or cutting board, and then let it set up in the fridge! However, chocolate bark can be difficult to remove from a surface because of its tendency to stick. Here are some tips to help you get your chocolate bark off the pan and into your mouth!
Option 1: Line a baking sheet or cutting board with parchment paper. This is the best option if you need to prepare a large amount of bark or have difficulty peeling items from a non-stick surface. If using this method, let your chocolate cool to room temperature before spreading it on the baking sheet. Allow the bark to set up until completely firm before peeling off the parchment paper.
Option 2: Use a smooth work surface that is non-stick , such as marble, granite, plastic laminate countertops, or polyurethane-coated wood cutting boards. Allow your chocolate to cool slightly before spreading it on the work surface. Use a sharp knife or offset spatula to spread the chocolate into a thin layer. As the chocolate sets up, it will become less likely to stick to the work surface.
Option 3: Use a silicone baking sheet or silicone mat. These surfaces are non-stick and can be used at temperatures up to 500 degrees F. They are also easy to clean and can be reused.
Whichever option you choose, make sure that your chocolate is completely cool before adding any mix-ins. If the chocolate is too warm, it will melt the mix-ins and your bark will not hold its shape.

Grinch Bark Ingredients
10 ounces melting white chocolate
1 (12 oz.) package vibrant green candy melts
Green Jimmies sprinkles
Mini heart sprinkles
How to Make Grinch Bark
Line a cookie sheet with parchment paper.
In a microwave safe bowl, add the white chocolate and microwave in 30 second increments, stirring in between until melted.

Pour the melted white chocolate onto the parchment paper and smooth into a thin layer.
Place the cookie sheet of chocolate into the fridge for about 10 minutes or until harden.
While the white chocolate is setting, melt the vibrant green candy melts in a microwave safe bowl. Microwave in 30 second increments, stirring in between until melted.
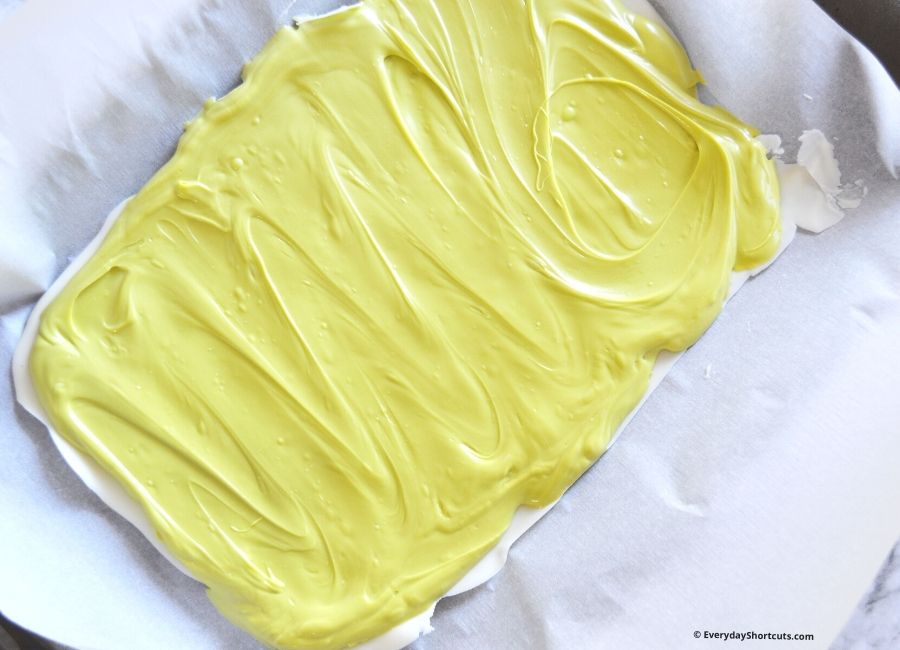
Take the cookie sheet out of the fridge and pour the melted green chocolate over top of the white chocolate and smooth out into a thin layer.
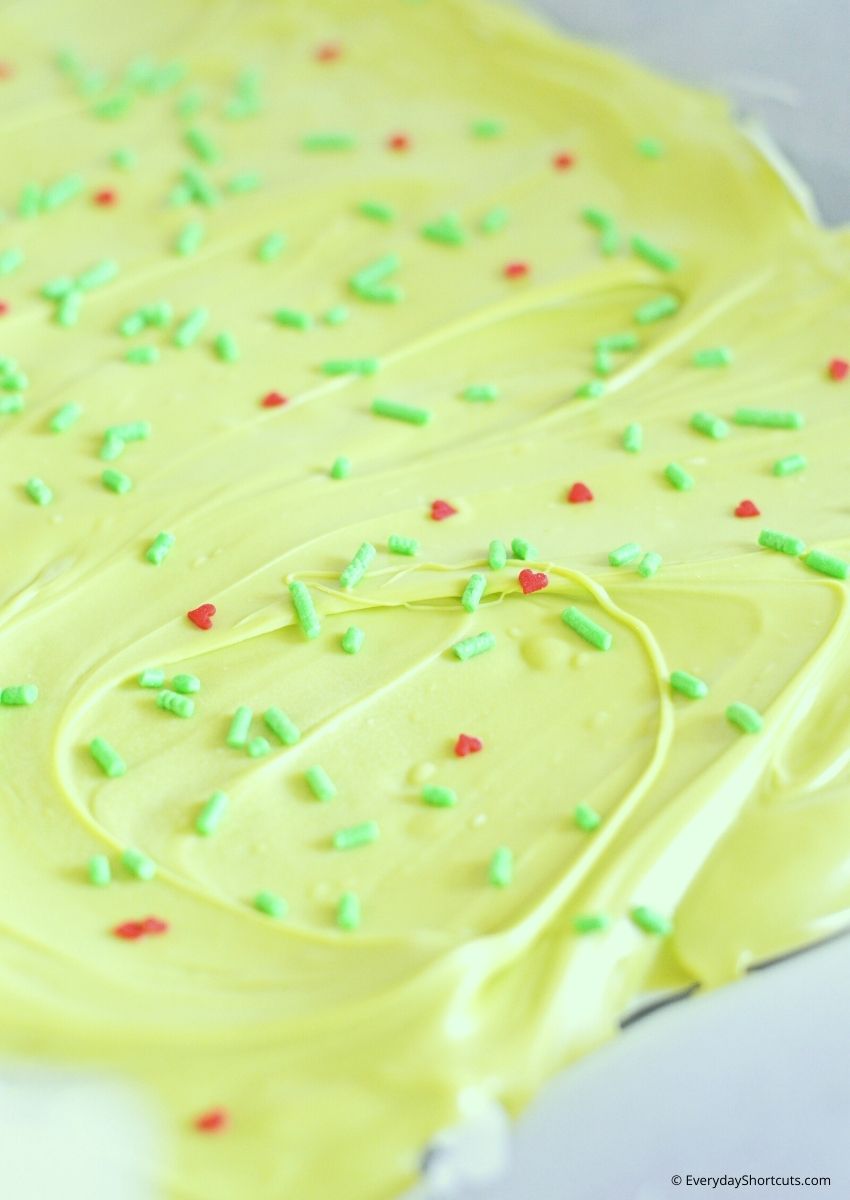
Sprinkle the green jimmies and mini heart sprinkles over top and refrigerate for 2 hours.
Once the chocolate is set completely, take out of fridge and break chocolate bark into pieces and enjoy!
How to Make Chocolate Bark Without a Microwave
One of my favorite ways to make chocolate bark is to simply melt a good-quality semisweet or bittersweet chocolate in the top of a double boiler set over simmering water. Then I spread it out on parchment paper and let it cool into beautiful shards.
If you don’t have a double boiler, here are a few tips for making chocolate bark without a microwave:
- Use a heavy saucepan to melt the chocolate.
- Make sure that the water in the saucepan is simmering, not boiling, or the chocolate will scorch.
- Keep an eye on the chocolate as it melts, stirring occasionally to ensure that the heat is even.
- If you find that your saucepan is too small to fit both the chocolate and a spatula or spoon, feel free to use tongs instead.
- If you are worried about triggering a steam burn by reaching into hot water, simply pour the melted chocolate onto the parchment paper and spread it out with a spatula.
- Once the chocolate is melted, let it cool at room temperature until it is firm enough to break into shards.
- If you live in a warm climate, you may need to refrigerate the bark for a few hours before serving.
How to Store Chocolate Bark
- Room Temperature: Store out at room temperature in an airtight container for up to 5 days.
- Fridge: Store in an airtight container in the fridge for 2-3 weeks.
- Freezer: Store in a freezer safe container or freezer bag in the freezer for up to 2 months. When ready to eat, thaw and enjoy!
More Grinch Treats
Recipe
Grinch Bark
Ingredients
- 10 ounces melting white chocolate
- 1 12 oz. package vibrant green candy melts
- Green Jimmies sprinkles
- Mini heart sprinkles
Instructions
- Line a cookie sheet with parchment paper.
- In a microwave safe bowl, add the white chocolate and microwave in 30 second increments, stirring in between until melted.
- Pour the melted white chocolate onto the parchment paper and smooth into a thin layer.
- Place the cookie sheet of chocolate into the fridge for about 10 minutes or until harden.
- While the white chocolate is setting, melt the vibrant green candy melts in a microwave safe bowl. Microwave in 30 second increments, stirring in between until melted.
- Take the cookie sheet out of the fridge and pour the melted green chocolate over top of the white chocolate and smooth out into a thin layer.
- Sprinkle the green jimmies and mini heart sprinkles over top and refrigerate for 2 hours.
- Once the chocolate is set completely, take out of fridge and break chocolate bark into pieces and enjoy!
Notes
How to Make Chocolate Bark Without a Microwave
One of my favorite ways to make chocolate bark is to simply melt a good-quality semisweet or bittersweet chocolate in the top of a double boiler set over simmering water. Then I spread it out on parchment paper and let it cool into beautiful shards. If you don't have a double boiler, here are a few tips for making chocolate bark without a microwave:- Use a heavy saucepan to melt the chocolate.
- Make sure that the water in the saucepan is simmering, not boiling, or the chocolate will scorch.
- Keep an eye on the chocolate as it melts, stirring occasionally to ensure that the heat is even.
- If you find that your saucepan is too small to fit both the chocolate and a spatula or spoon, feel free to use tongs instead.
- If you are worried about triggering a steam burn by reaching into hot water, simply pour the melted chocolate onto the parchment paper and spread it out with a spatula.
- Once the chocolate is melted, let it cool at room temperature until it is firm enough to break into shards.
- If you live in a warm climate, you may need to refrigerate the bark for a few hours before serving.
How to Store Chocolate Bark
- Room Temperature: Store out at room temperature in an airtight container for up to 5 days.
- Fridge: Store in an airtight container in the fridge for 2-3 weeks.
- Freezer: Store in a freezer safe container or freezer bag in the freezer for up to 2 months. When ready to eat, thaw and enjoy!
Nutrition Disclosure
Nutritional facts are estimates and are provided as a courtesy to the reader. Please utilize your own brand nutritional values to double check against our estimates. Nutritional values are calculated via a third party. Changing ingredients, amounts or cooking technique will alter the estimated nutritional calculations.


Leave a Reply