

This is the best Gluten Free Pie Crust you’ll ever try as it’s buttery, rich, flaky and perfect for any occasion.
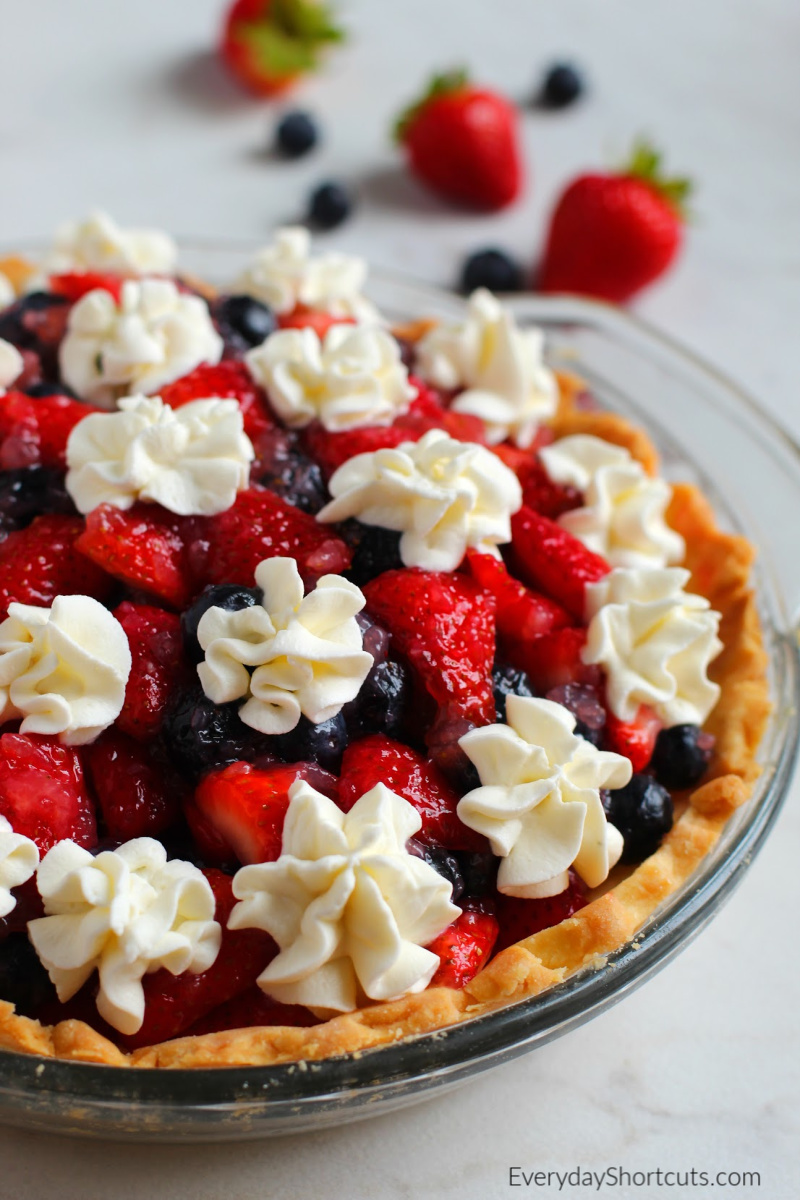
If you’re looking to get that perfect gluten free pie crust that rolls out beautifully, this is the recipe for you. It’s my go to and have used it for my patriotic gluten free pie along with other gluten free desserts that I make.
Why You'll LOVE This Gluten Free Pie Crust Recipe
- Flaky and delicious
- Easy to make
- Allergy friendly
- Great for any type of pie
- Perfect for holidays or any occasion
- Homemade option verses store bought
- Freezes well to make a double batch and save for later use
Best Gluten Free Flour for Pie Crust
When it comes to making a delicious and flaky gluten-free pie crust, choosing the right flour is crucial. While there are many options available on the market, not all of them will give you the same results.
So, what is the best gluten-free flour for pie crust? After multiple tries with different gluten free flours, I have found that Gluten-Free All-Purpose Flour Blend works the best.
If you prefer convenience, using pre-made blends specifically formulated for baking can be an excellent option as they often contain a combination of different flours that work well together.
Gluten Free Pie Crust Ingredients
- Gluten free flour blend
- Sugar
- Xanthan gum (omit if your flour blend contains it)
- Salt
- Unsalted butter, cold and diced
- Egg
- Cold water
- Apple cider vinegar
How to Make Gluten Free Pie Crust
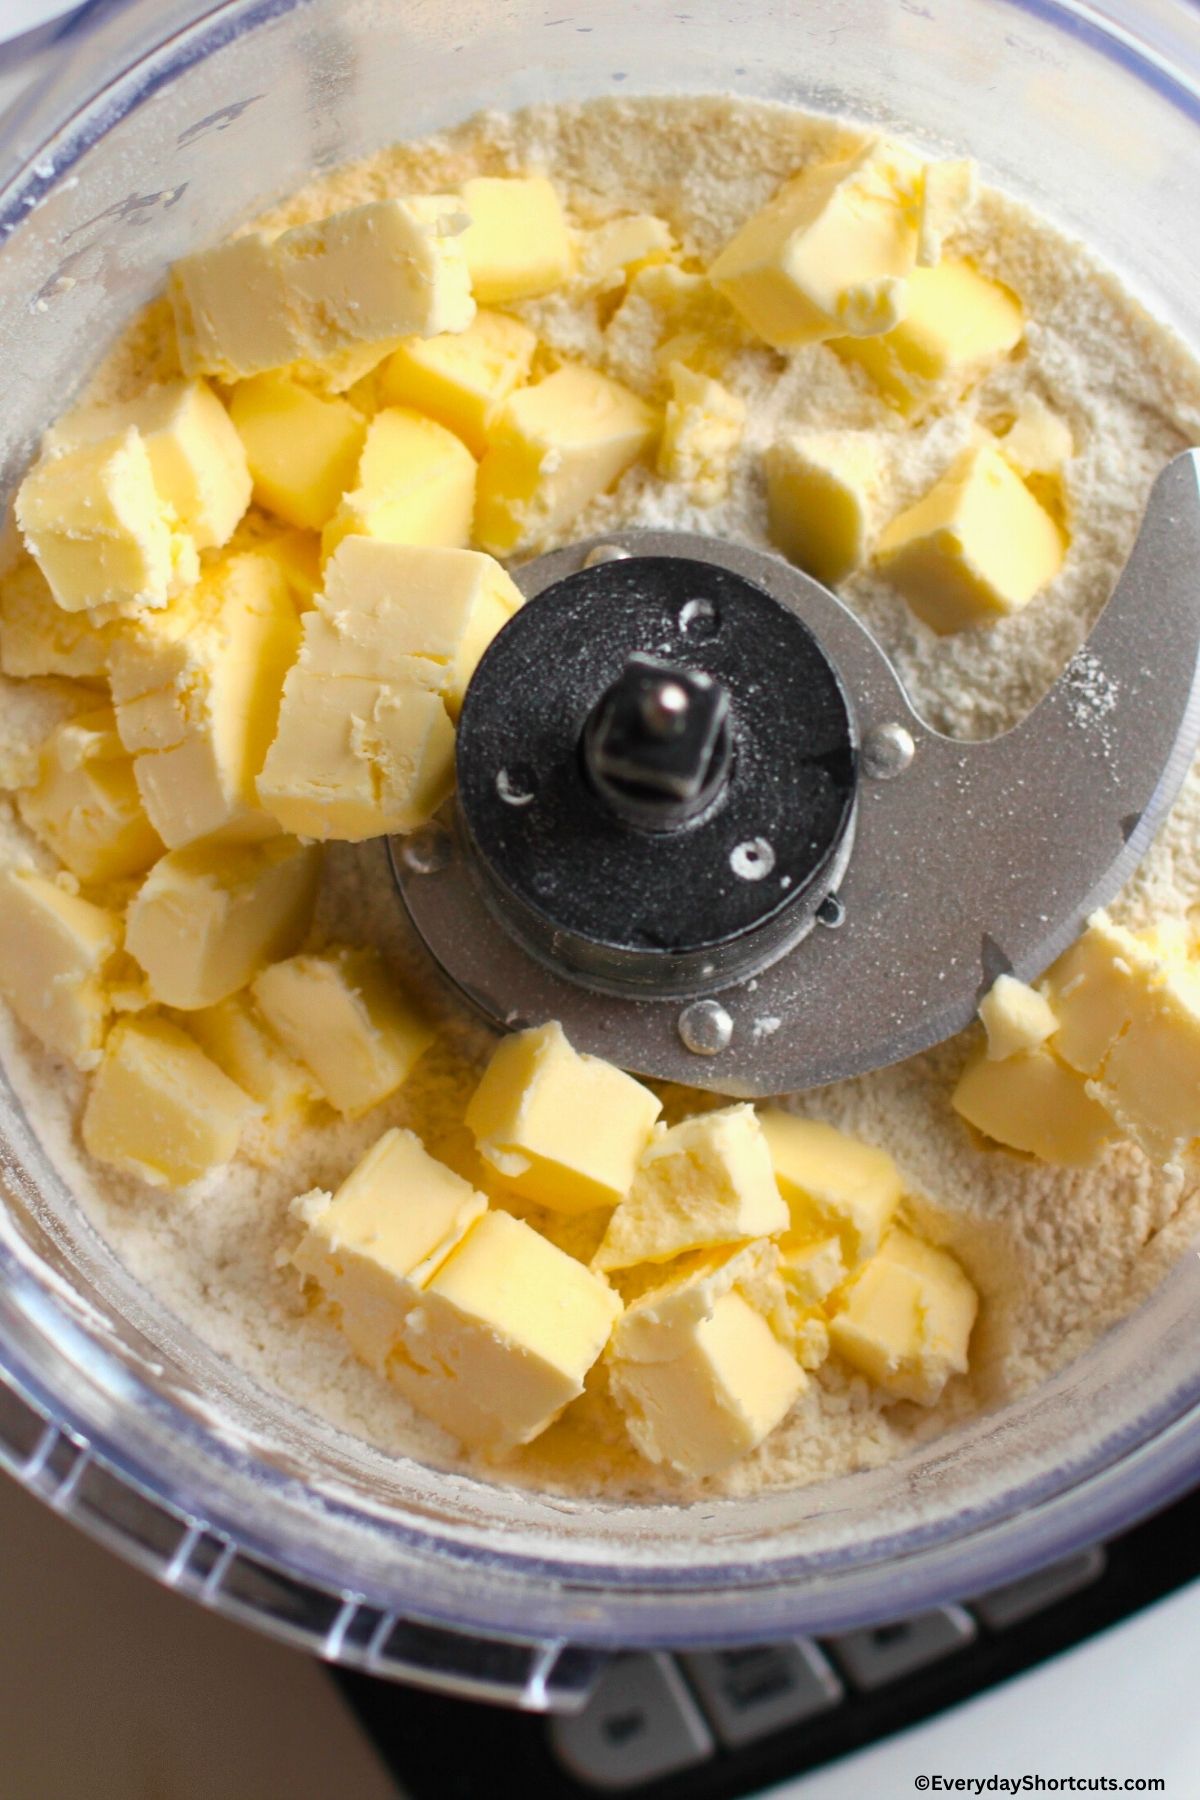
Add flour, sugar, xanthan gum and salt to a food processor and pulse to combine. Add cold diced butter and pulse until mixture resembles coarse crumbs.
Add egg, cold water and apple cider vinegar to a small bowl and use a fork to beat together the egg and mix. Pour egg mixture into food processor and pulse a few more times until dough is just moistened.
Transfer the pie dough to a glass bowl and use clean hands to shape it into a ball, slightly flattened. Cover the bowl with plastic wrap and place in the fridge to chill for at least 1 hour.
Remove chilled pie dough from refrigerator and place on counter for about 15 minutes.
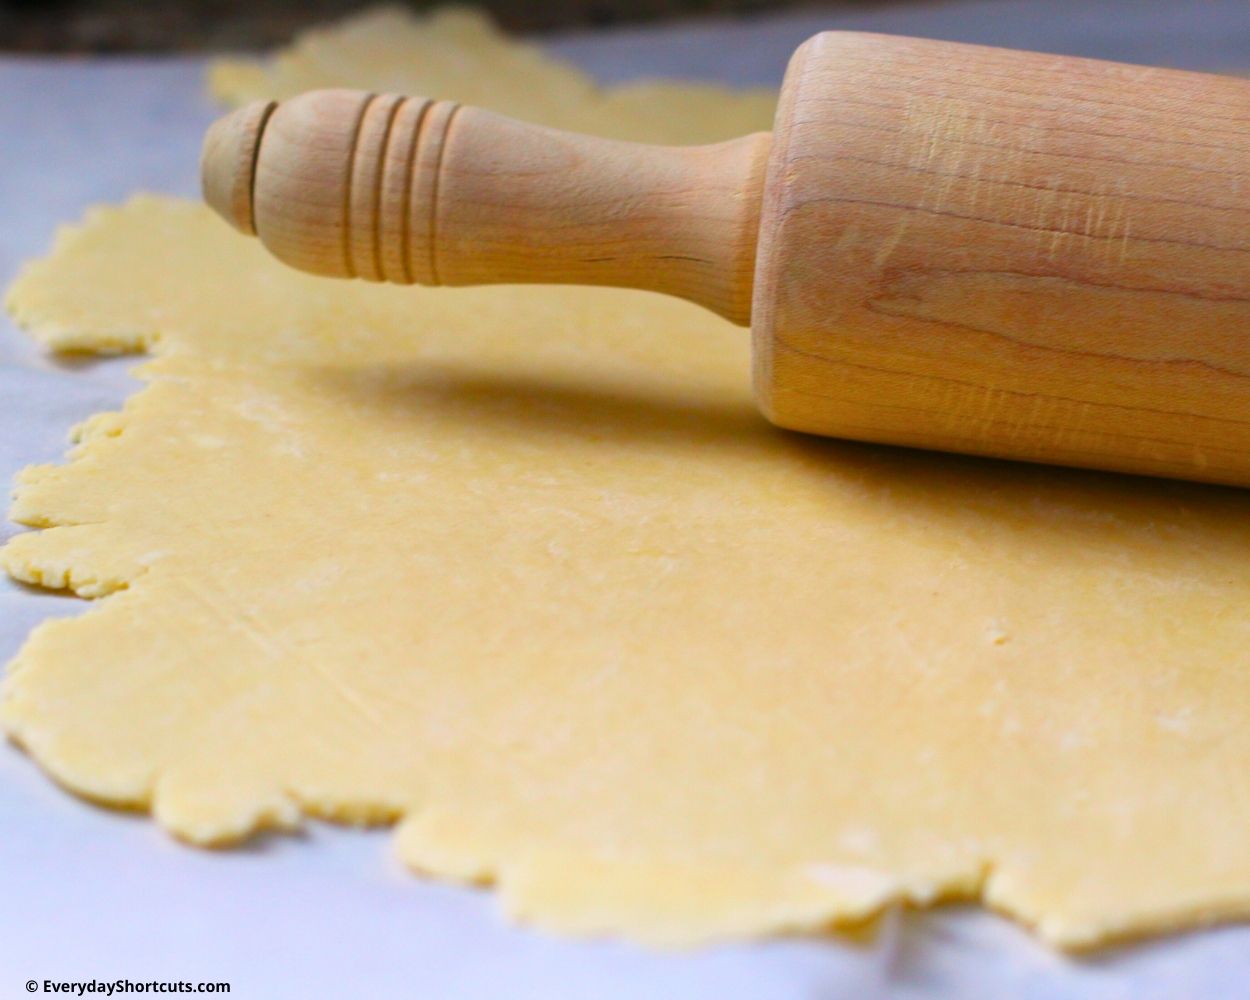
Transfer pie dough to a lightly floured piece of parchment paper. Sprinkle a little flour on top of the dough and add an additional piece of parchment paper on top. Roll out the dough with a rolling pin into a 12 inch circle.
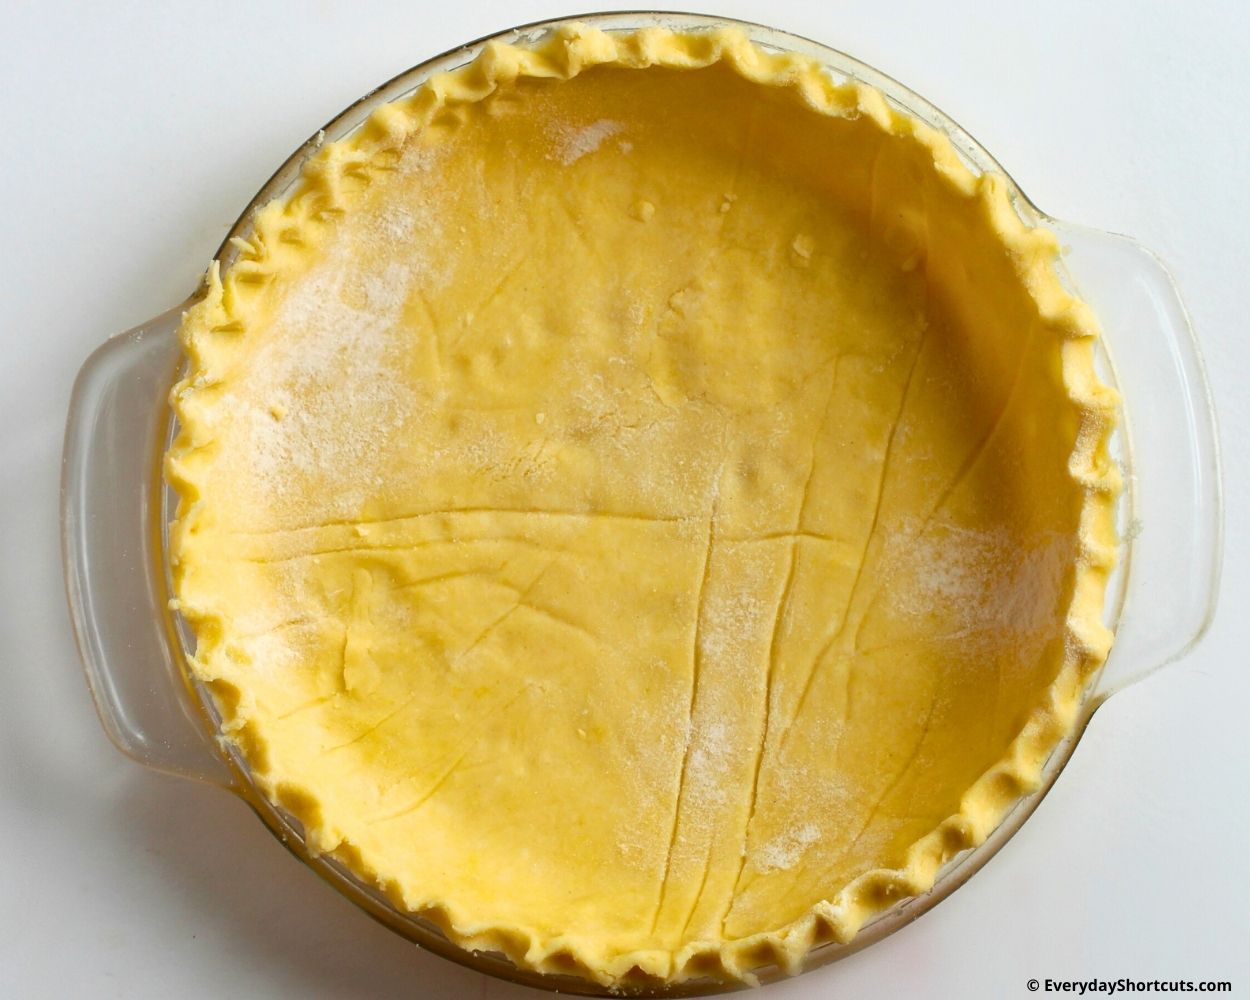
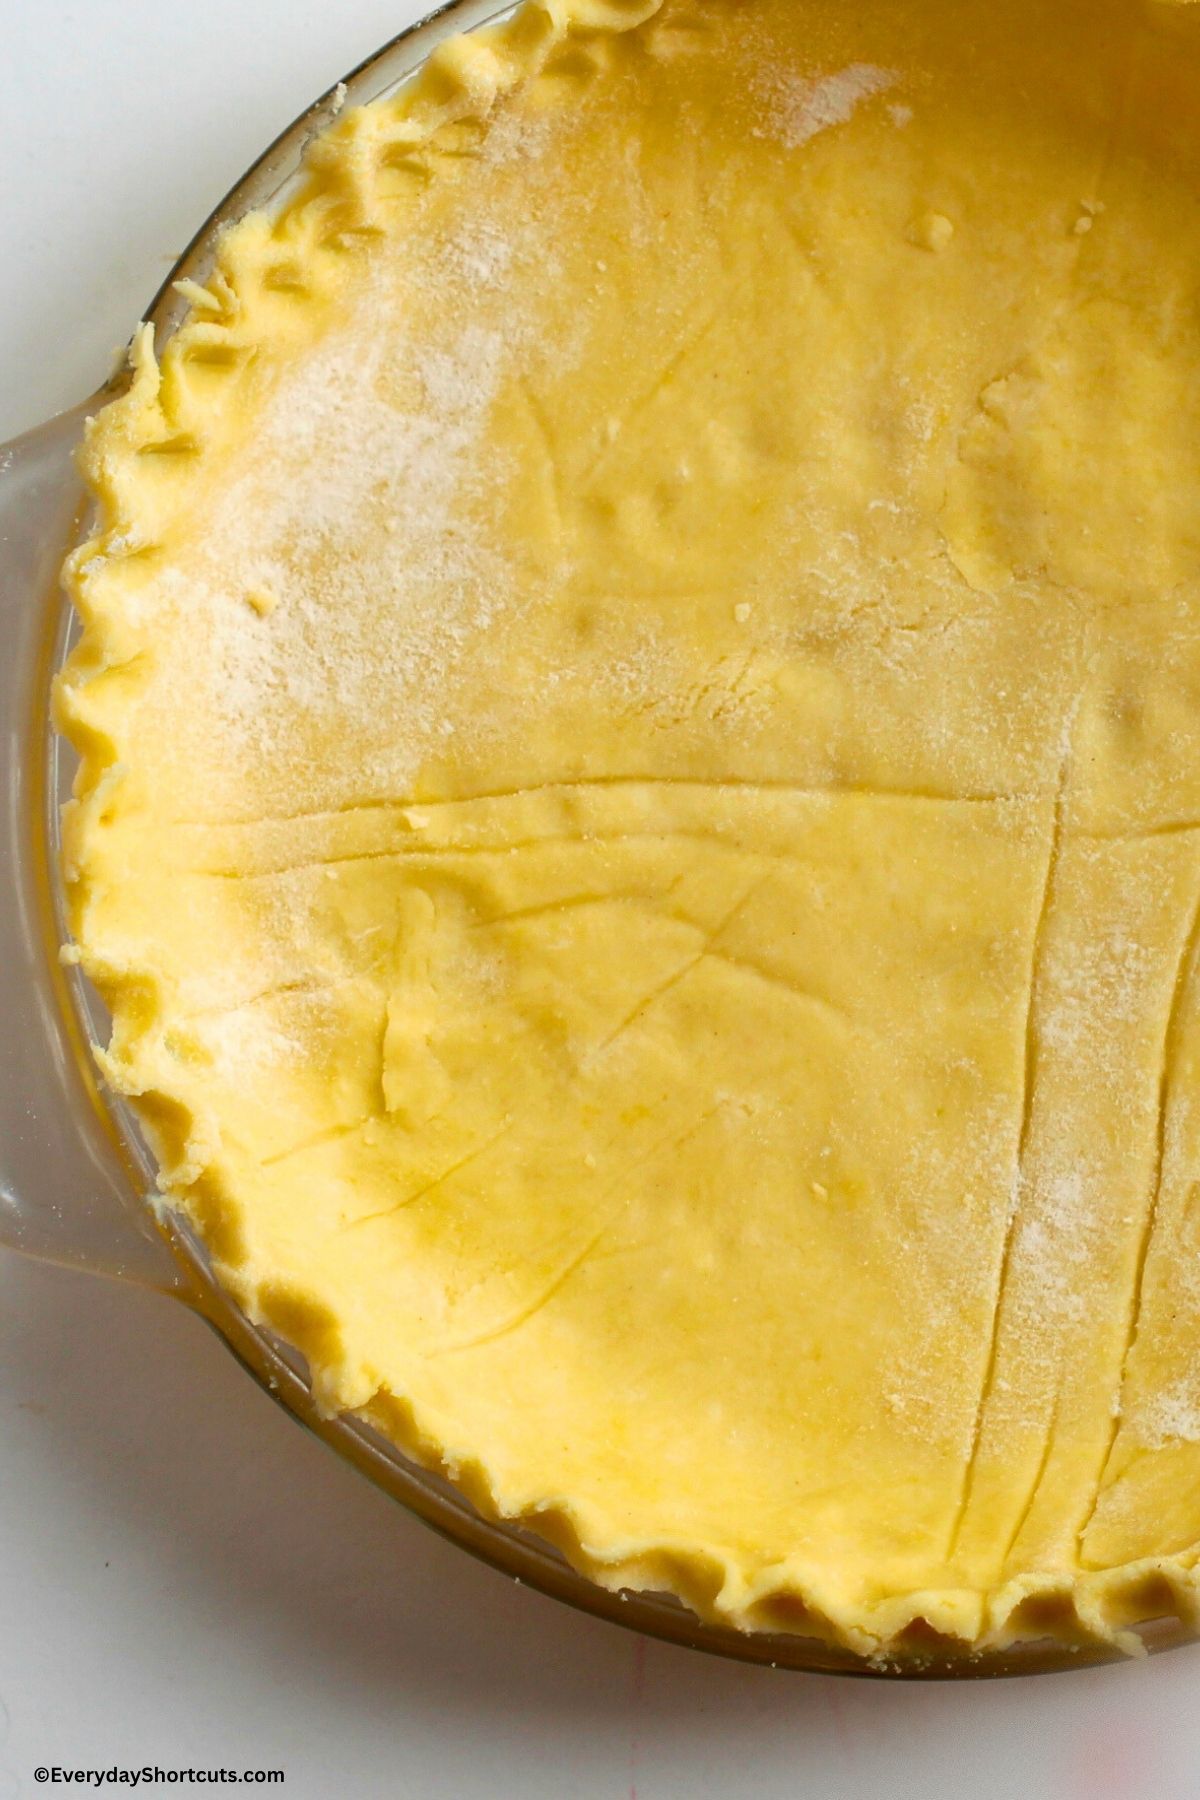
Transfer the dough to an ungreased pie pan and press into place – flattening the crust against bottom and sides as well as touching up any cracks. Trim off any excess crust and crimp or flute the edges.
Fill and bake as directed per your pie recipe.
Tips for Making the Best Gluten-Free Pie Crust
- Make sure pie crust is chilled for at least an hour. This will make it easy to roll and keep it intact.
- If crust is browning too fast, tent it with aluminum foil.
- If you don’t have a food processor, you can make the dough by hand. Whisk together ingredients and then form into dough with hands or pastry cutter.
Uses for Gluten Free Pie Crust
- Fruit pies such as apple, mixed berry, strawberry, cherry.
- Cream pies such as chocolate cream, lemon meringue, coconut cream.
- Quiches and savory pies
- Tarts and tartlets
- Mini hand pies
- Pizza crust alternative
Frozen Gluten Free Pie Crust
If you are short on time and want to get a frozen gluten free pie crust, you can make these ahead of time and freeze them. To do so, use this recipe for gluten free pie crust and follow instructions. Then, wrap tightly with plastic wrap and store in freezer bag for up to 3 months. Thaw out in fridge overnight before using.
Or you can purchase a frozen gluten-free pie crust at the store. I recommend Wholly Wholesome gluten free pie crust as it’s found in the freezer section of most grocery stores. If you can’t find that brand, I know Trader Joe’s also carries a good glute-free pie crust.
FAQs
Yes, you can certainly experiment with other gluten free flours. Just keep in mind that the texture and taste may vary slightly.
Absolutely! This pie crust can be prepared in advance and stored in the refrigerator for up to 2 days before using. You can also freeze it for longer storage, just make sure to wrap it tightly in plastic wrap or place it in an airtight container.
To avoid a soggy bottom crust, consider blind baking your pie shell before adding any fillings. Simply line the chilled dough with parchment paper or aluminum foil, fill it with pie weights (or dried beans), and bake at 375°F for about 10-15 minutes until lightly golden. This will help create a barrier between the filling and the crust.
More Gluten Free Desserts
- Lofthouse Christmas Cookies
- Apple Cinnamon Baked Donuts
- S’mores Brownie Bars
- Cut Out Sugar Cookies
- Gingerbread Men Cookies
Recipe

Gluten Free Pie Crust
Ingredients
- 1 ¼ cup gluten free flour blend
- 1 tablespoon sugar
- ½ teaspoon xanthan gum omit if your flour blend contains it
- ¼ salt
- ½ cup unsalted butter cold and diced
- 1 egg
- 3 tablespoons cold water
- ¼ teaspoon apple cider vinegar
Instructions
- Add flour, sugar, xanthan gum and salt to a food processor and pulse to combine. Add cold diced butter and pulse until mixture resembles coarse crumbs.
- Add egg, cold water and apple cider vinegar to a small bowl and use a fork to beat together the egg and mix. Pour egg mixture into food processor and pulse a few more times until dough is just moistened.
- Transfer the pie dough to a glass bowl and use clean hands to shape it into a ball, slightly flattened. Cover the bowl with plastic wrap and place in the fridge to chill for at least 1 hour.
- Remove chilled pie dough from refrigerator and place on counter for about 15 minutes.
- Transfer pie dough to a lightly floured piece of parchment paper. Sprinkle a little flour on top of the dough and add an additional piece of parchment paper on top. Roll out the dough with a rolling pin into a 12 inch circle.
- Transfer the dough to an ungreased pie pan and press into place – flattening the crust against bottom and sides as well as touching up any cracks. Trim off any excess crust and crimp or flute the edges.
- Fill and bake as directed per your pie recipe.
Nutrition Disclosure
Nutritional facts are estimates and are provided as a courtesy to the reader. Please utilize your own brand nutritional values to double check against our estimates. Nutritional values are calculated via a third party. Changing ingredients, amounts or cooking technique will alter the estimated nutritional calculations.
Leave a Reply