

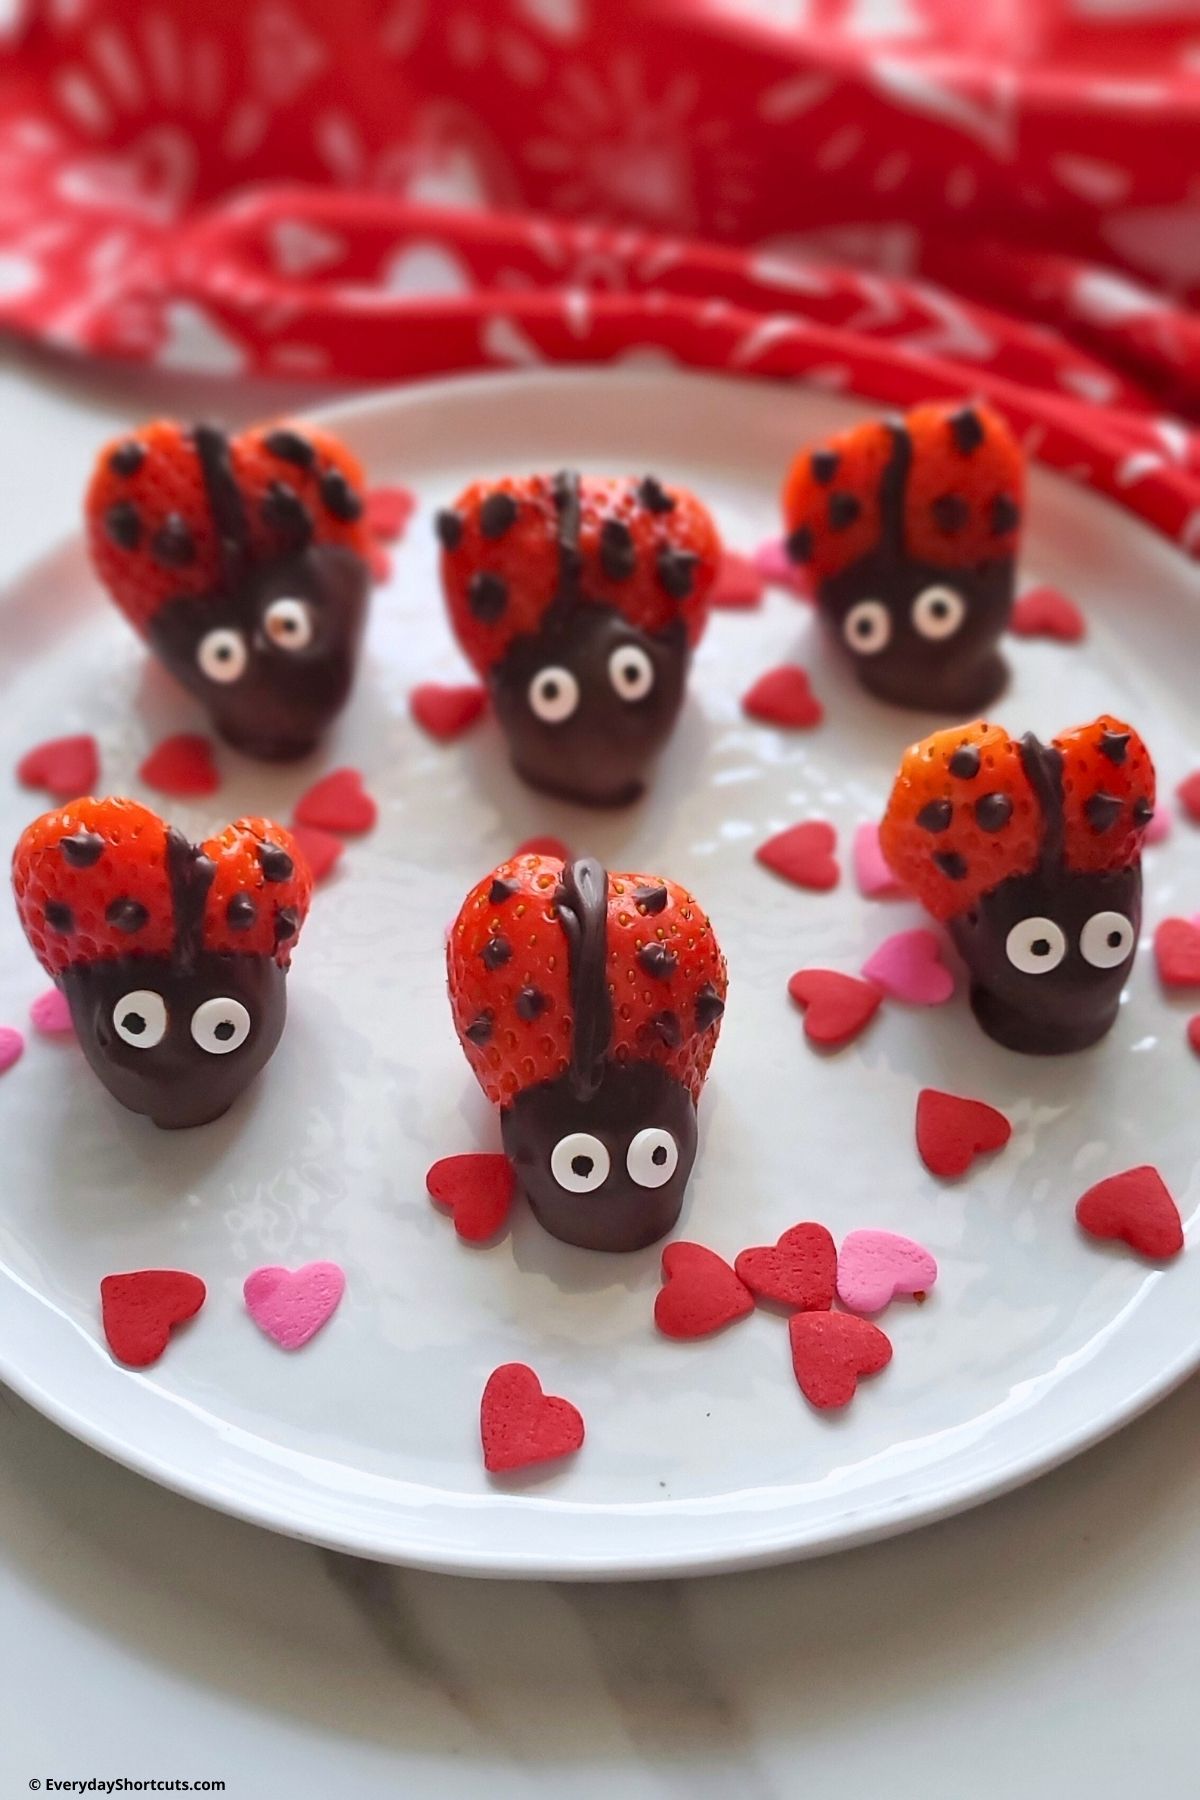
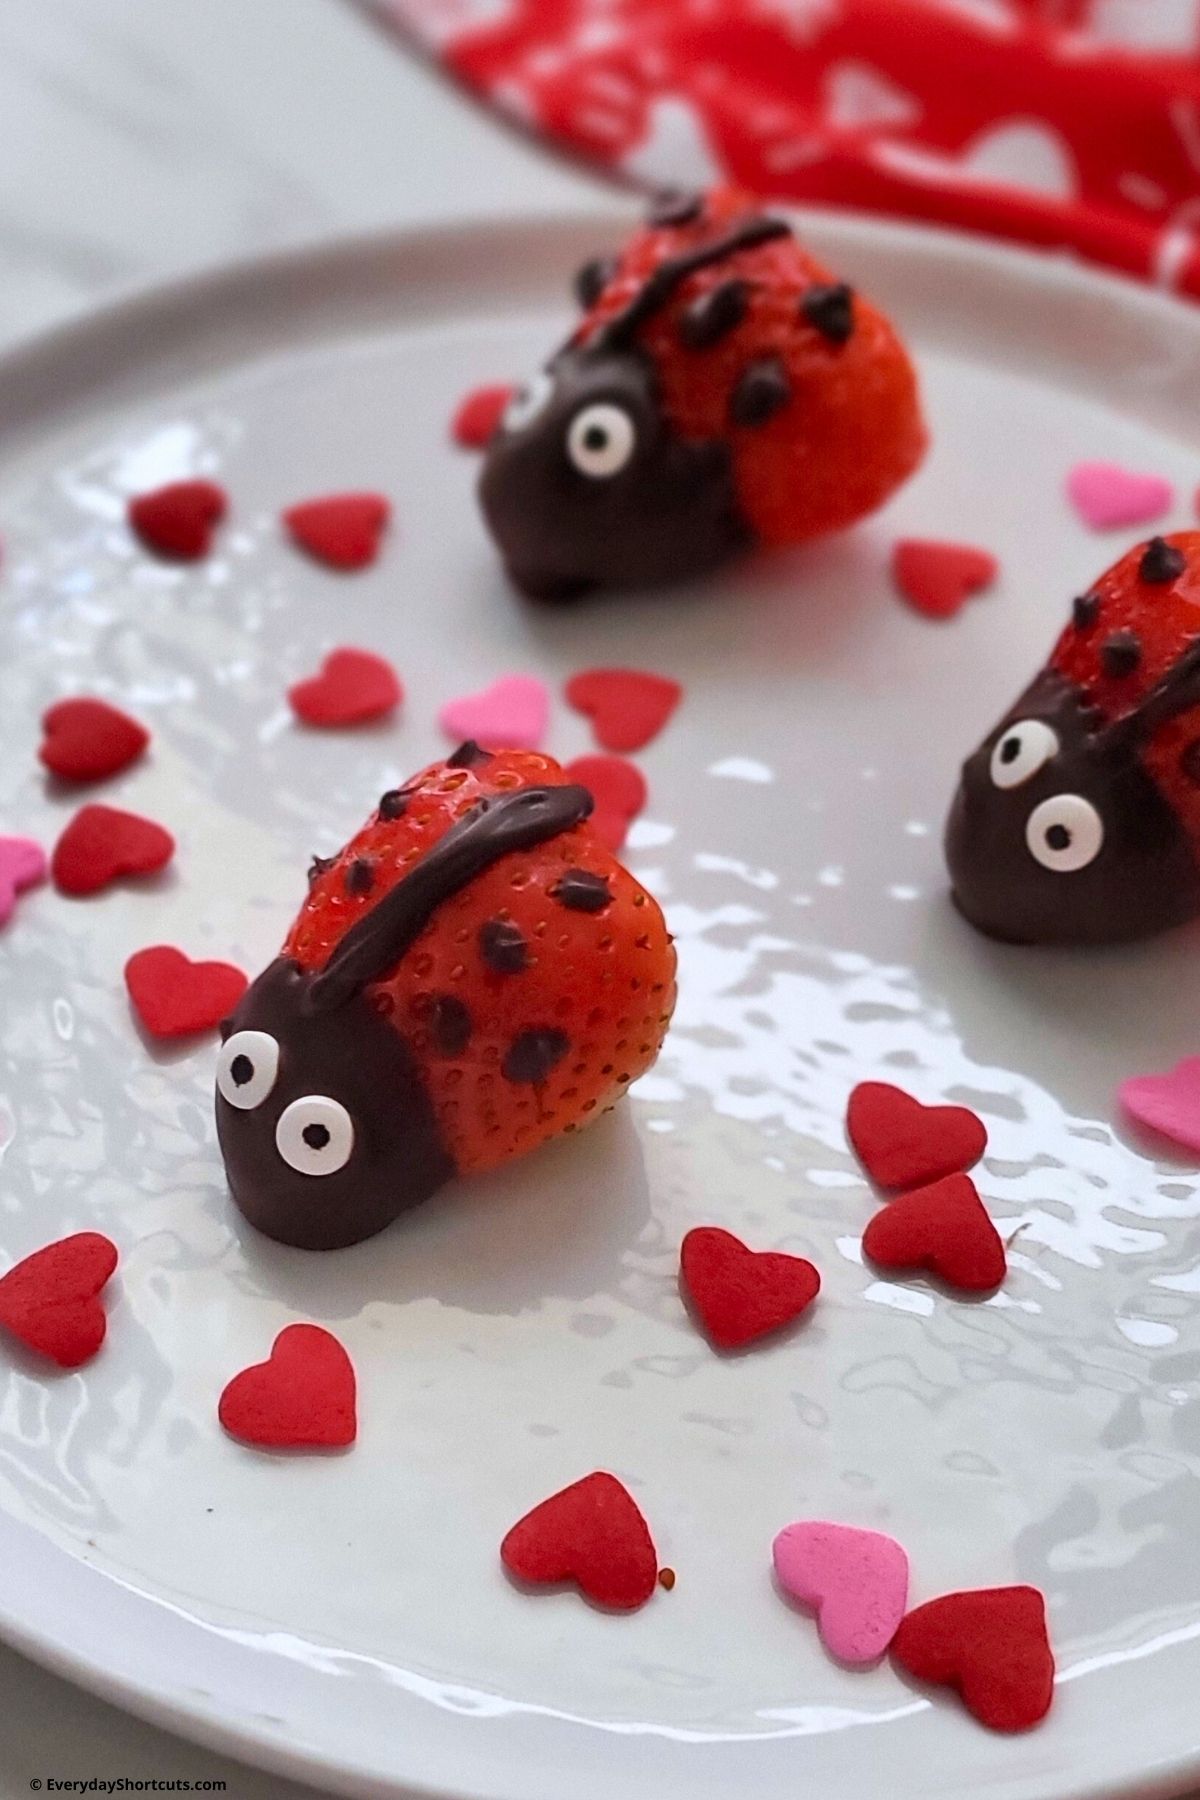
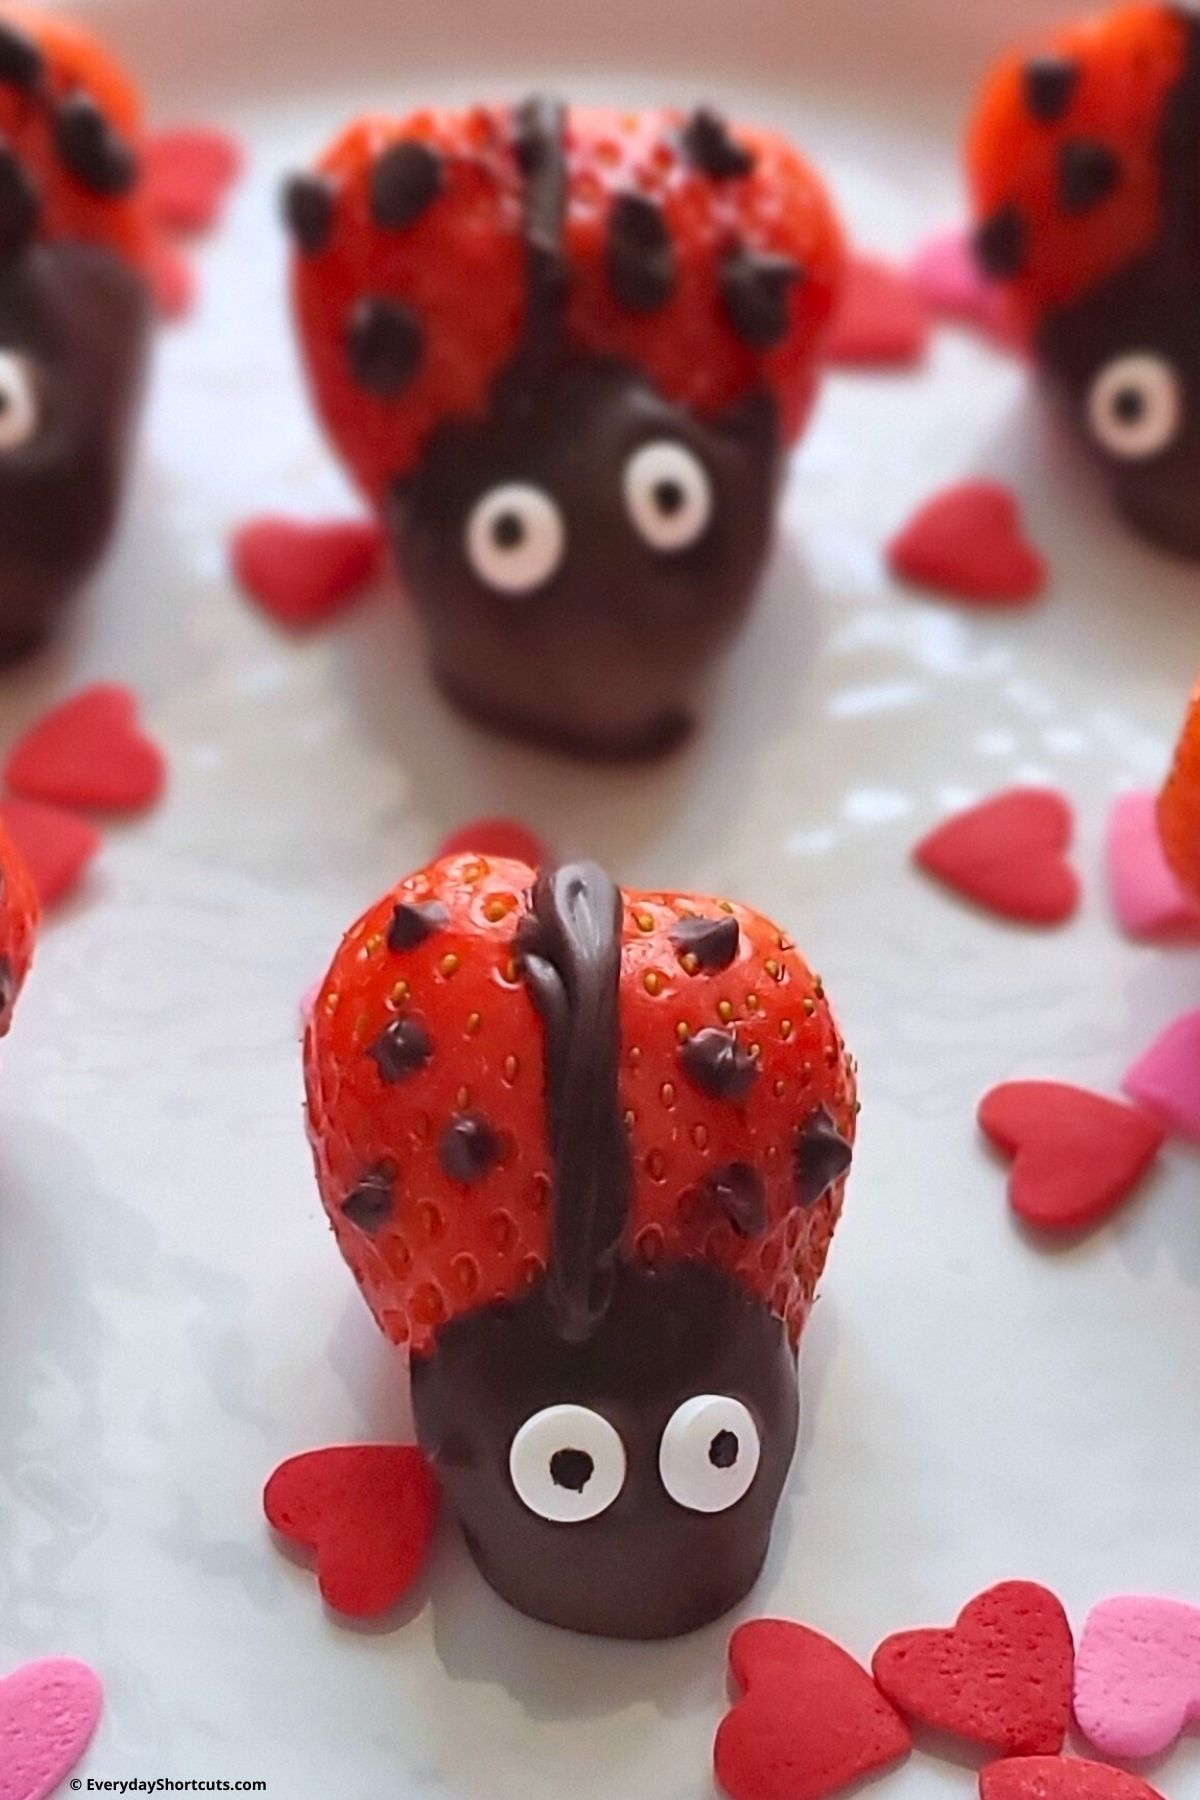
Chocolate Strawberry Ladybugs are a fun fruit snack to make for Valentine’s Day or an after school snack with just a few ingredients and fresh strawberries.
If you have trouble getting your kids to eat fruit, this is a fun way to get them excited about it. The chocolate and strawberry combination is always a hit, and the ladybug design adds a playful touch that will make them want to try these cute little bugs.
Not only is this a delicious snack but also an adorable activity to do with the kids. Best of all, this fruity creation requires no baking, making it the perfect project for little hands to help with.
Love bugs come in all shapes and sizes - but none quite as delicious as these Chocolate Covered Strawberry Ladybugs!
Jump to:
Chocolate Strawberry Ladybug Ingredients
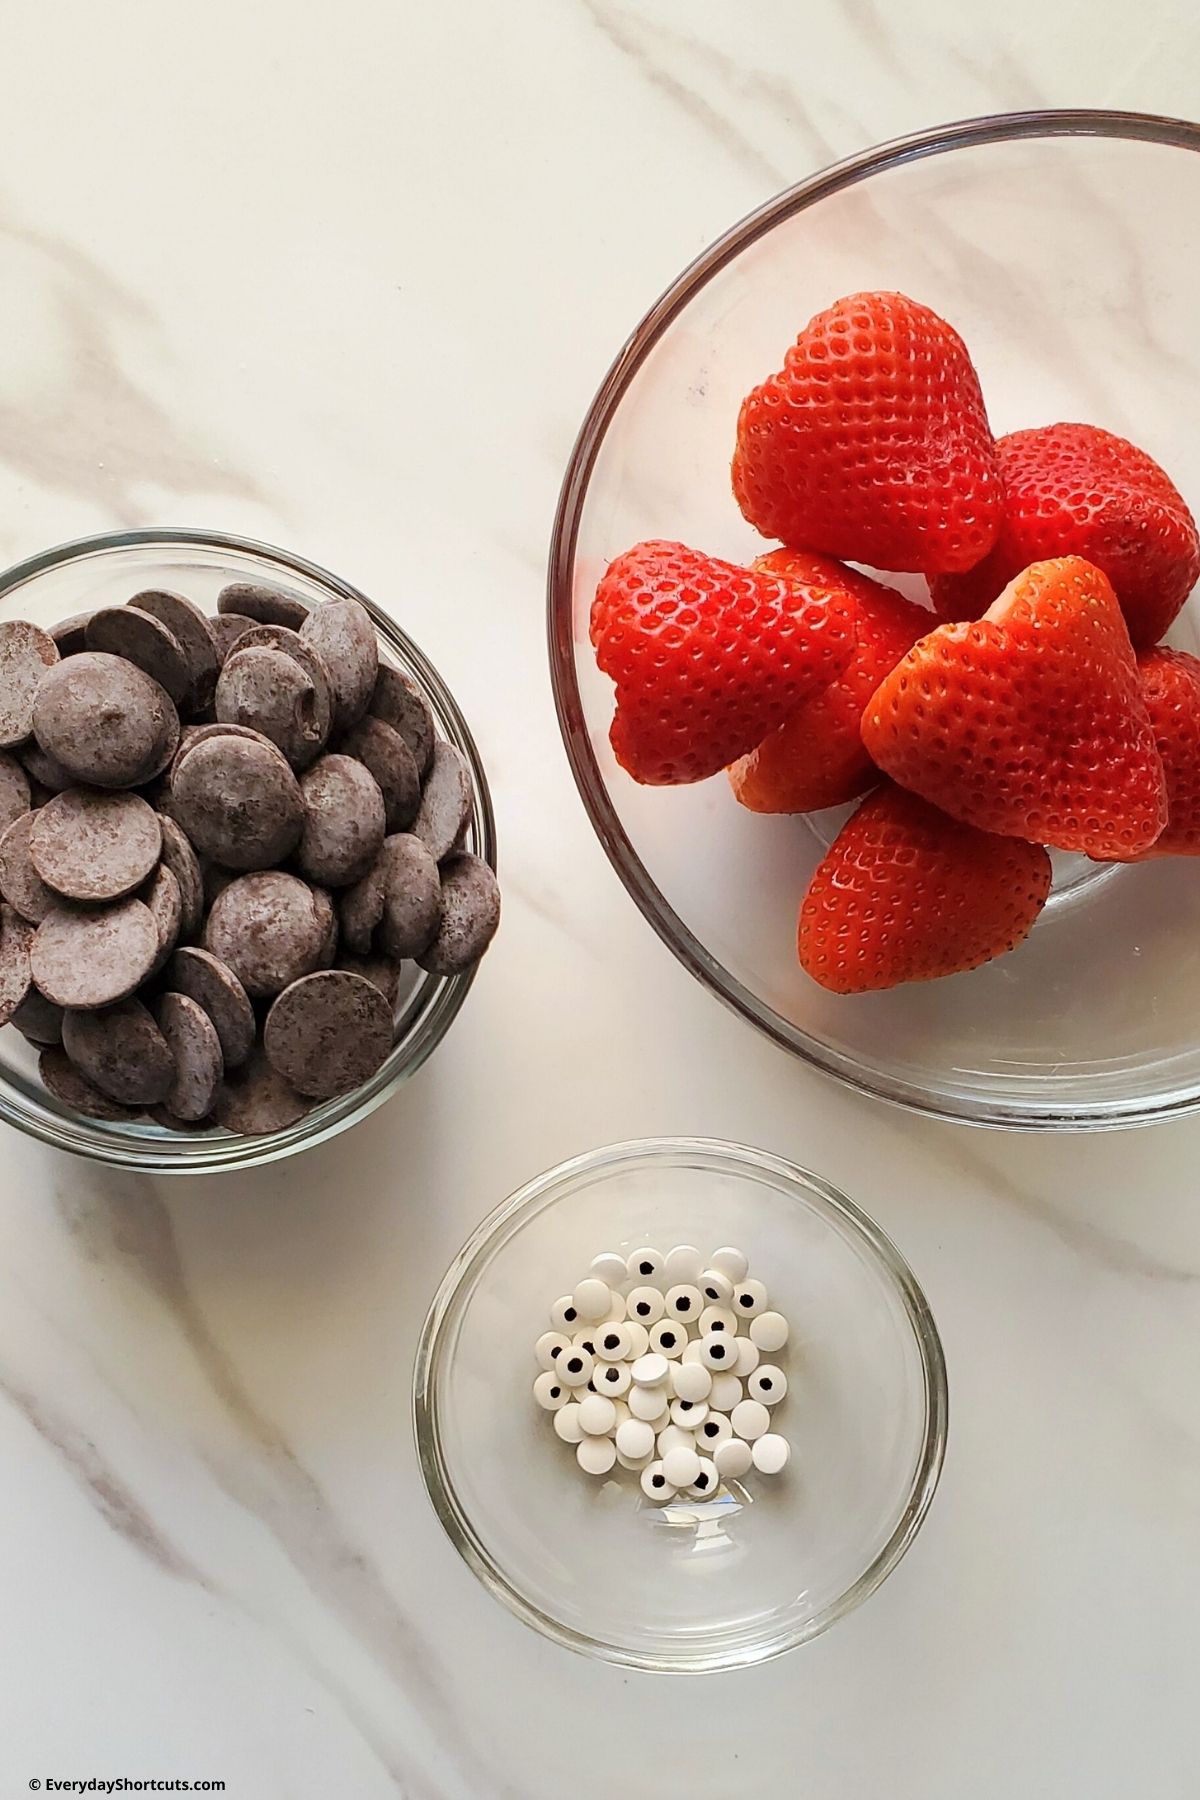
- Fresh strawberries: Choose plump, ripe strawberries for the best flavor.
- Dark or milk chocolate candy melts: This will be used for drawing on the ladybug’s features such as its head, back and spots. I opted for dark chocolate chips as they provide a richer taste but you can also use black chocolate melts.
- Miniature candy eyes: These little eyes bring our ladybugs to life!
How to Make Chocolate Ladybug Strawberries
Line a countertop with parchment paper.
Wash and dry the strawberries thoroughly. It’s important to remove any excess moisture to ensure that the chocolate adheres properly.
Cut off stem and make a small slit at the stem end to create the bug shape.
Melt your desired amount of chocolate in a microwave-safe bowl or using a double boiler. If using the microwave, heat in 30 second intervals, stirring between each one until smooth and melted.
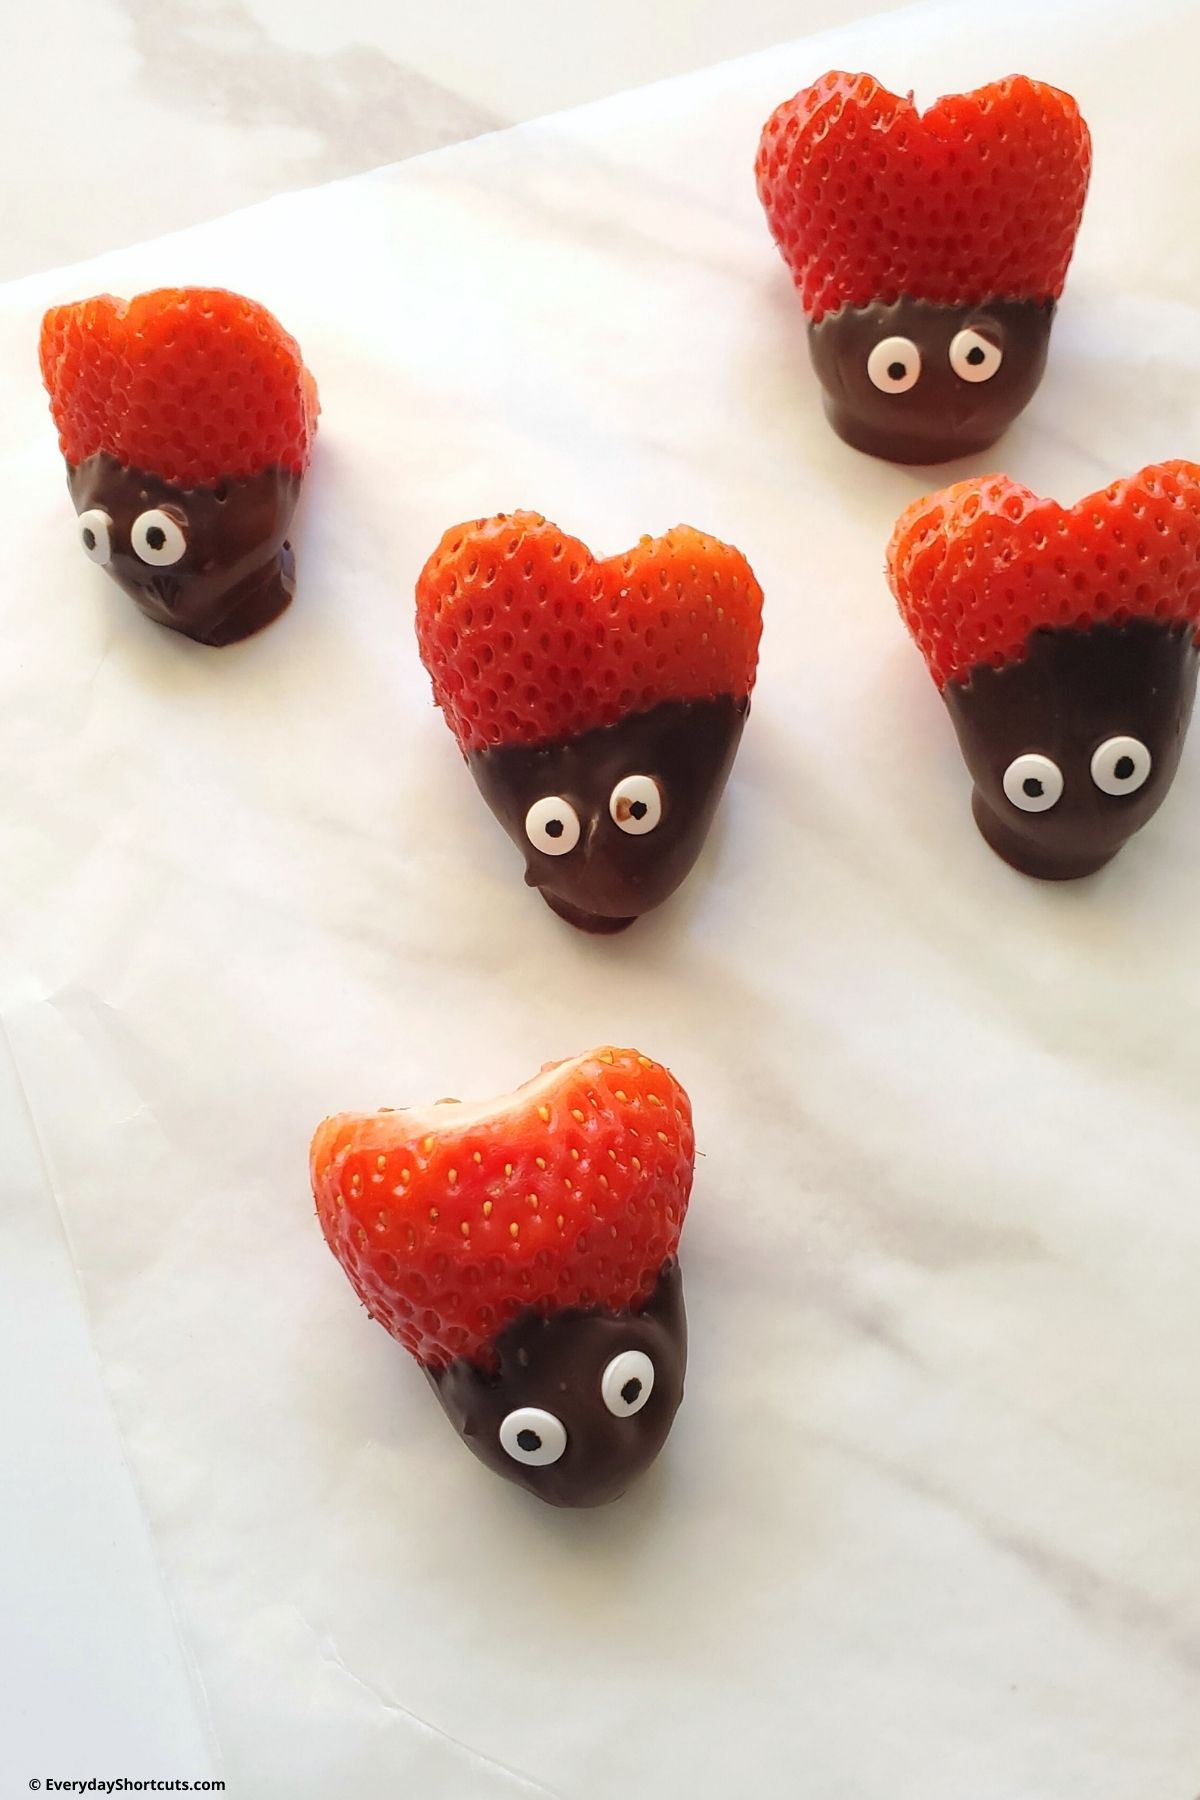
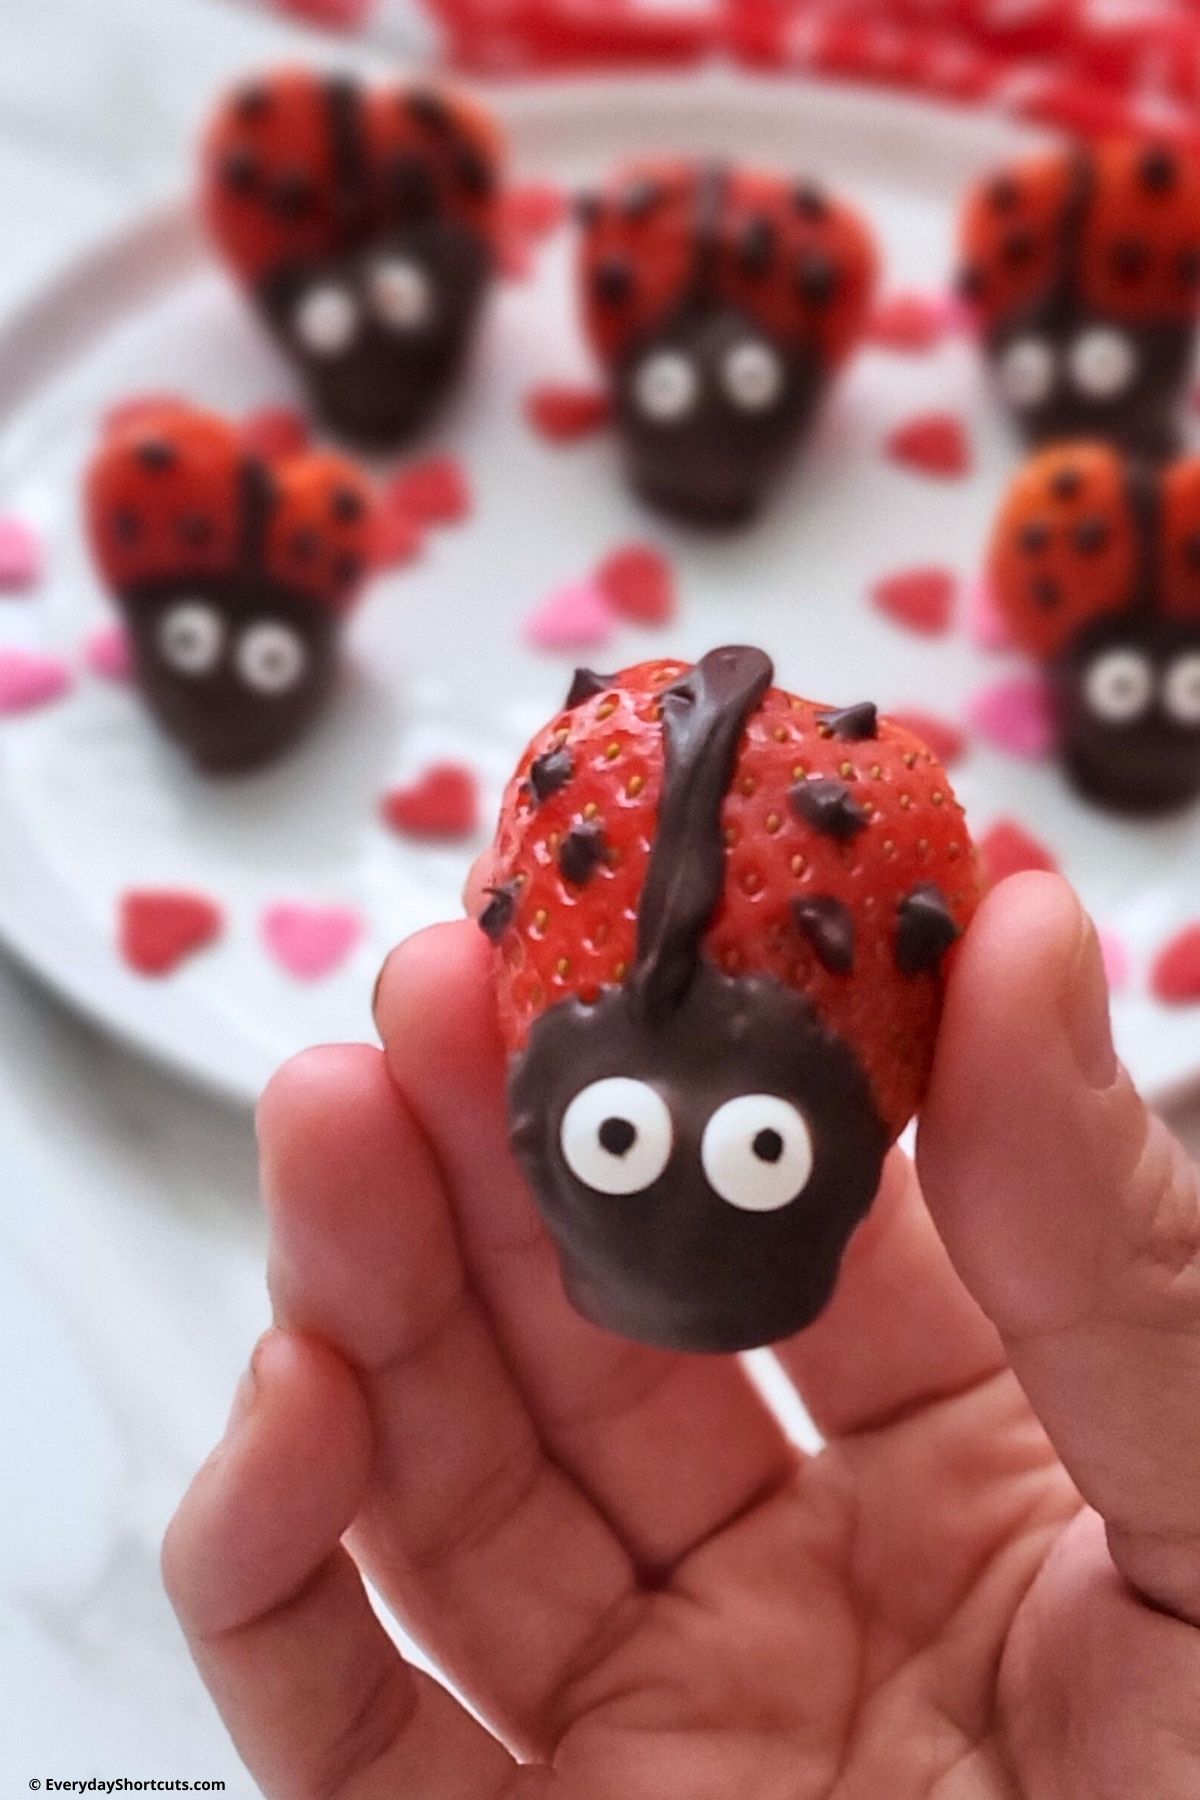
Dip the end of each strawberry into the melted chocolate, allowing any excess to drip off and immediately put the candy eyes in place. Set them on top of the parchment paper to harden. Can also refrigerate for about 15 minutes to set.
While the strawberries are setting, melt some milk, dark or black candy melts in the microwave in 30 second intervals stirring in between until creamy and smooth. Transfer the melted candy into a piping bag or Ziploc bag with a small hole cut in one corner.
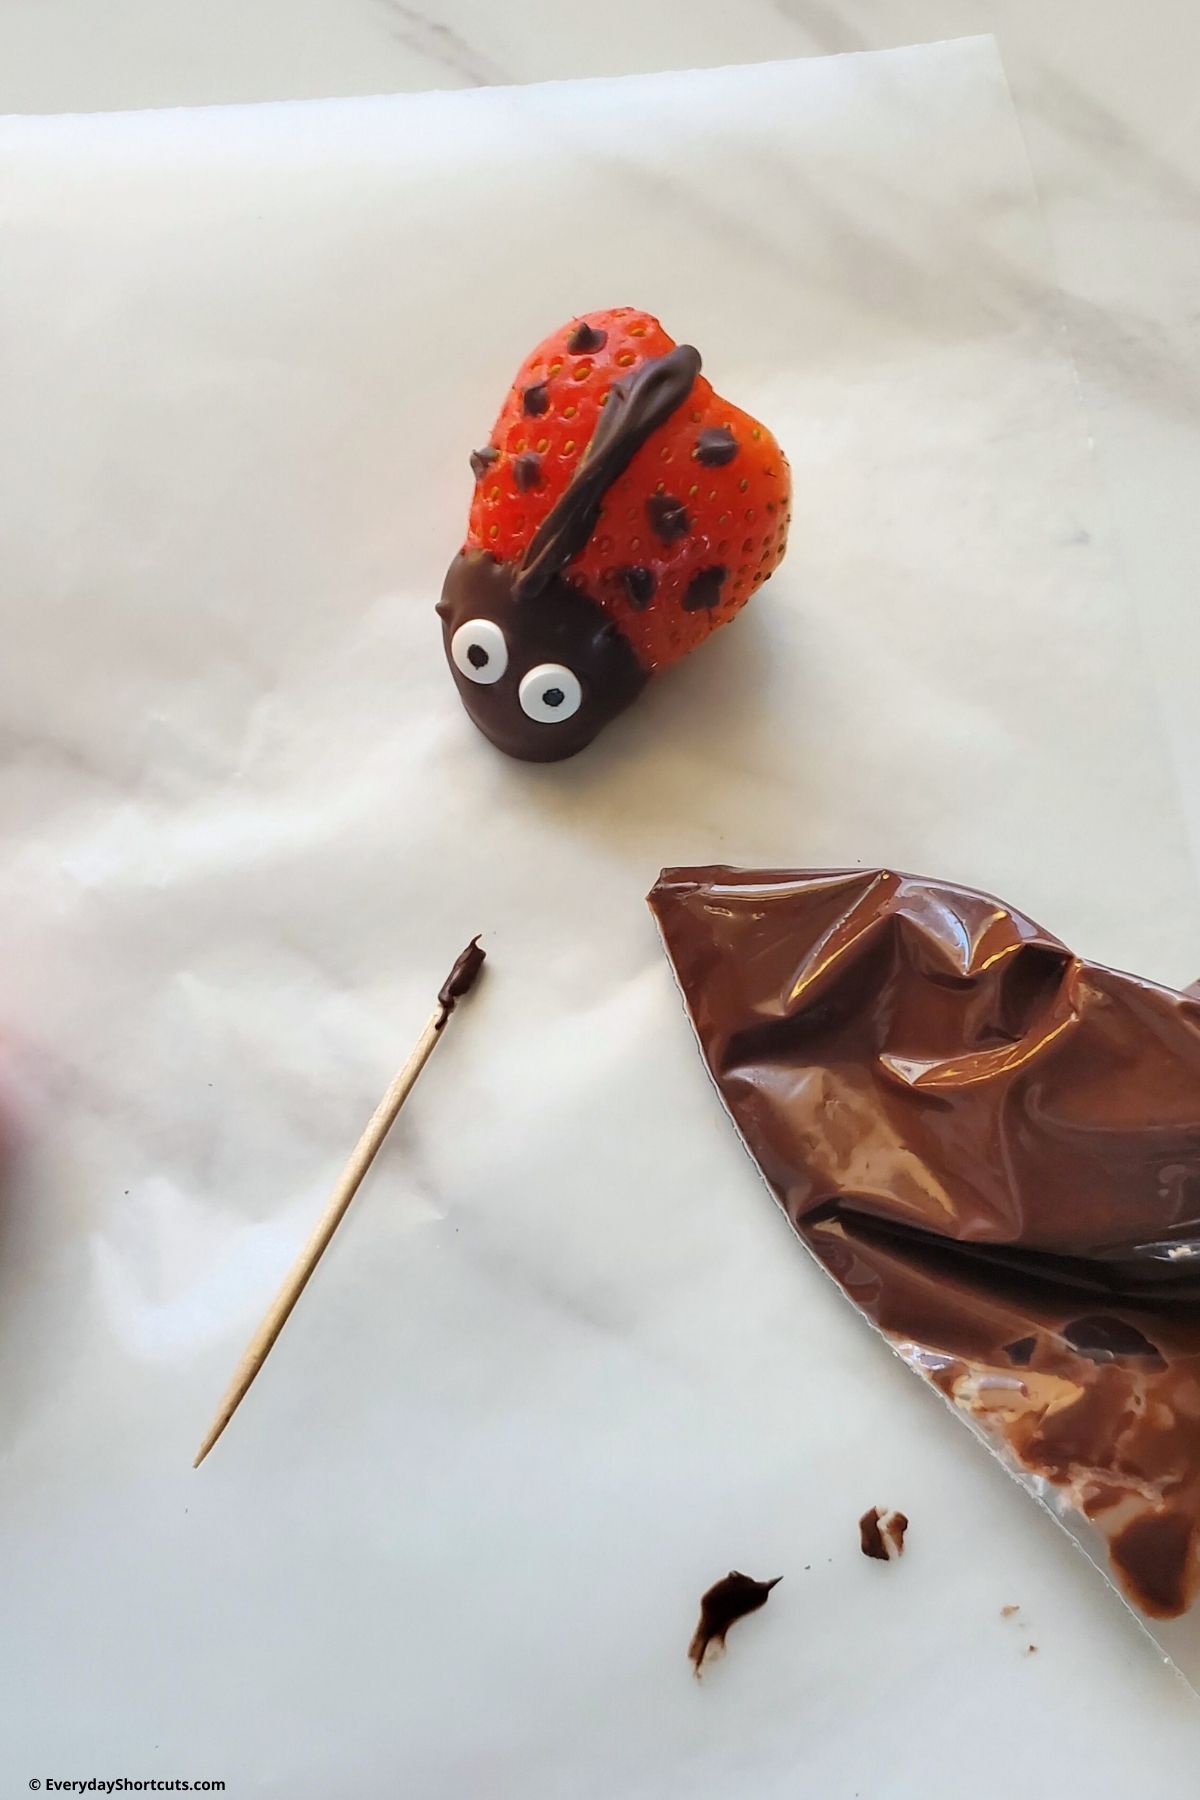
Draw a line down the center of the strawberry to create the ladybug’s body. Pipe small dots onto their backs for ladybug spots.
Allow to harden and enjoy!
Helpful Tips and Variations
- Choose strawberries that are plump and free from any blemishes or bruises. The shape and size of the strawberry will contribute to the overall appearance of your ladybugs.
- Use high-quality chocolate chips or melting wafers for smooth, glossy results. Microwave in short intervals, stirring in between until fully melted. Avoid overheating as it can cause the chocolate to become clumpy.
- Dip strawberries evenly into the melted chocolate for a seamless finish. Allow any excess chocolate to drip off before placing them on parchment paper or a silicone mat.
- Make your ladybugs stand out by changing up the colors such as using pink candy melts for the bodies.
- Can use a toothpick to add the spots and body features.
- Break up pretzel sticks into small pieces for antennas and add two at one end.
How to Store
Store the chocolate covered strawberries in an airtight container in the refrigerator for up to 2-3 days. You can also place them on a tray lined with parchment paper and freeze them for up to 3 months. Thaw in the refrigerator before serving.
Creative Ways to Enjoy Chocolate Strawberry Ladybugs
- Arrange the ladybugs on a platter, surrounded by other bite-sized fruits like grapes and blueberries.
- Add them to your kids lunchboxes with a heartfelt note.
- Pair with yogurt or cottage cheese. The creamy texture complements the sweetness of the fruit, for a balanced snack option.
- Place them atop frosted cupcakes or layer cakes for an eye-catching finishing touch.
More Kid-Friendly Treats
- Turkey Leg Cookie Dinner
- Rice Krispie Treat Pumpkins
- Air Fryer Uncrustables Donuts
- Snow Ice Cream
- Ice Cream Cone Chocolate Cake Pops
Recipe

Chocolate Strawberry Ladybugs
Ingredients
- 1 pint strawberries
- chocolate candy melts
- candy eyes
Instructions
- Line a countertop with parchment paper.
- Wash and dry the strawberries thoroughly. It’s important to remove any excess moisture to ensure that the chocolate adheres properly.
- Cut off stem and make a small slit at the stem end to create the bug shape.
- Melt your desired amount of chocolate in a microwave-safe bowl or using a double boiler. If using the microwave, heat in 30 second intervals, stirring between each one until smooth and melted.
- Dip the end of each strawberry into the melted chocolate, allowing any excess to drip off and immediately put the candy eyes in place. Set them on top of the parchment paper to harden. Can also refrigerate for about 15 minutes to set faster.
- While the strawberries are setting, melt some milk, dark or black candy melts in the microwave in 30 second intervals stirring in between until creamy and smooth. Transfer the melted candy into a piping bag or Ziploc bag with a small hole cut in one corner.
- Draw a line down the center of the strawberry to create the ladybug’s body. Pipe small dots onto their backs for ladybug spots.
- Allow to harden and enjoy!
Notes
Nutrition Disclosure
Nutritional facts are estimates and are provided as a courtesy to the reader. Please utilize your own brand nutritional values to double check against our estimates. Nutritional values are calculated via a third party. Changing ingredients, amounts or cooking technique will alter the estimated nutritional calculations.


Leave a Reply