

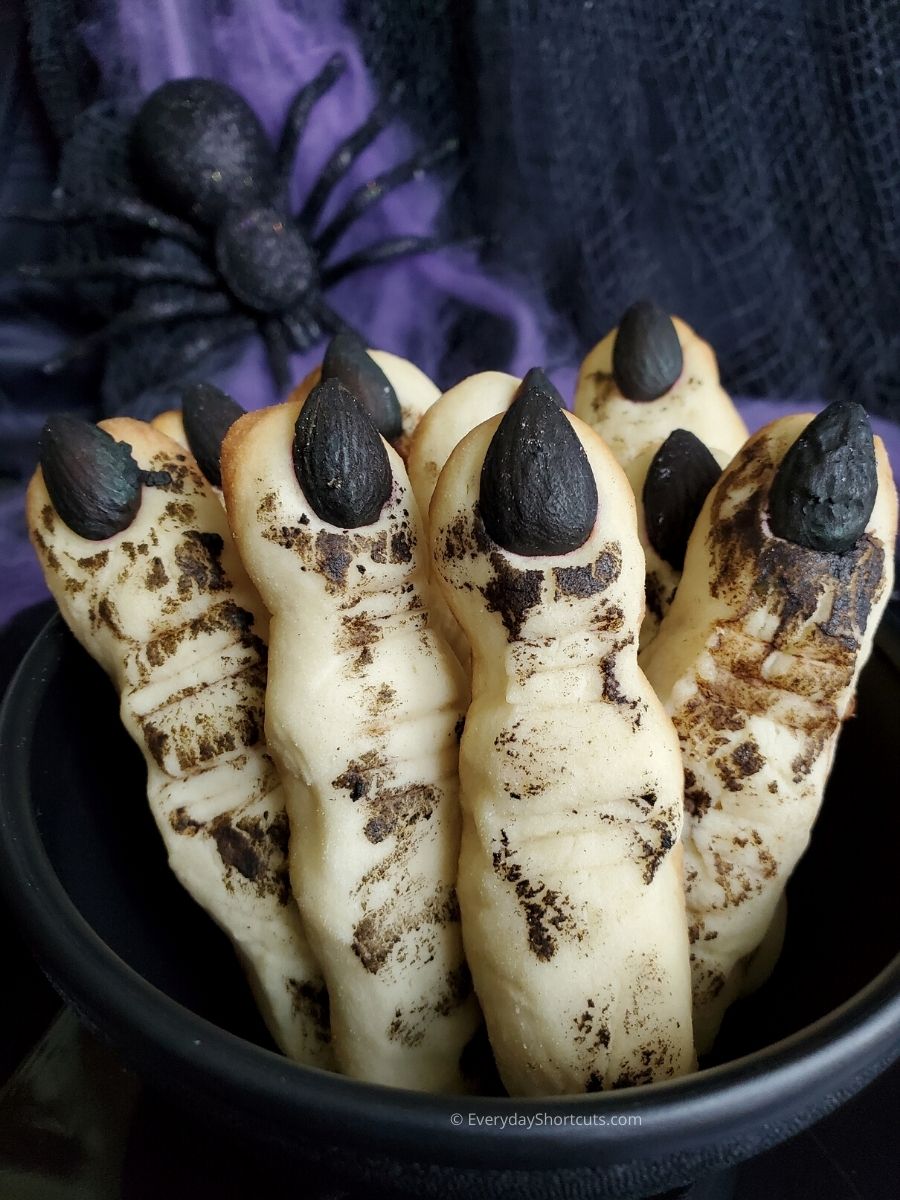
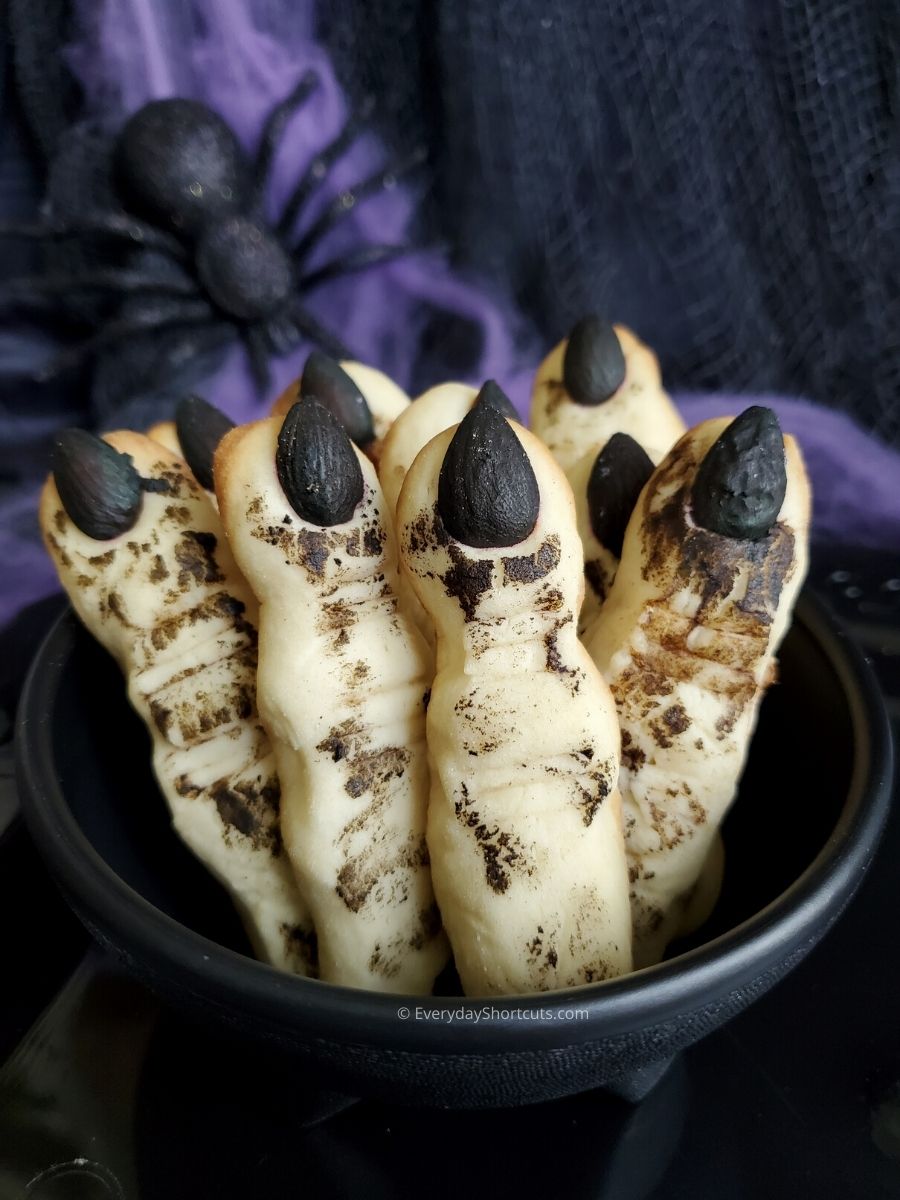
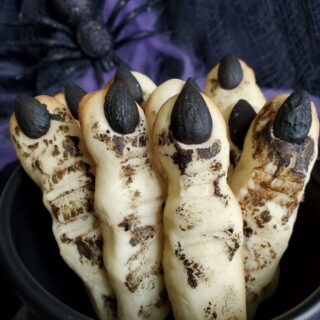
These Witch Finger Cookies are sure to be a hit at your Halloween party! They’re fun, easy to make, and much tastier than they look! I dare you to eat them!
It's that time of year again! The spookiest day is just around the corner so you need to be ready with some delicious treats for all your neighbors and friends on Halloween.
Witch finger cookies are spooky, but also delicious! These treats have a simple dough that can be flavored with any type of extract you want. The best part is the cookies themselves look like actual fingers – perfect for parties or just a night in watching horror movies alone!
Place them on a spooky serving platter using spider webs and plastic spiders to tie the whole look together!

Why You’ll Love Witch Finger Cookies
- Great for kids and adults of all ages!
- Sure to impress your guests!
- Easy to make!
- Perfect for Halloween.

Tips for the Best Cookies
- Make sure to dough is cold and work quickly. This ensures the cookies will hold their shape during baking. If it gets warm, place back in the fridge for a bit.
- To save on time you can use store bought sugar cookie dough.
- Make sure your dough isn’t too sticky or crumbly (too sticky means it won't be easy to roll into a ball; too crumbly means the cookies won't hold together when you try to pick them up).
- Flour your surface, but not too much. Keep a light hand with it so that you don’t end up making dough balls seem dry or unevenly textured before baking.
- Make the cookie shape small in size as they will expand. I suggest the size of your pinky (width and length). If you make them too thick they will expand and look like pancakes.
- Cool cookies completely before eating or storing them to avoid from falling apart.
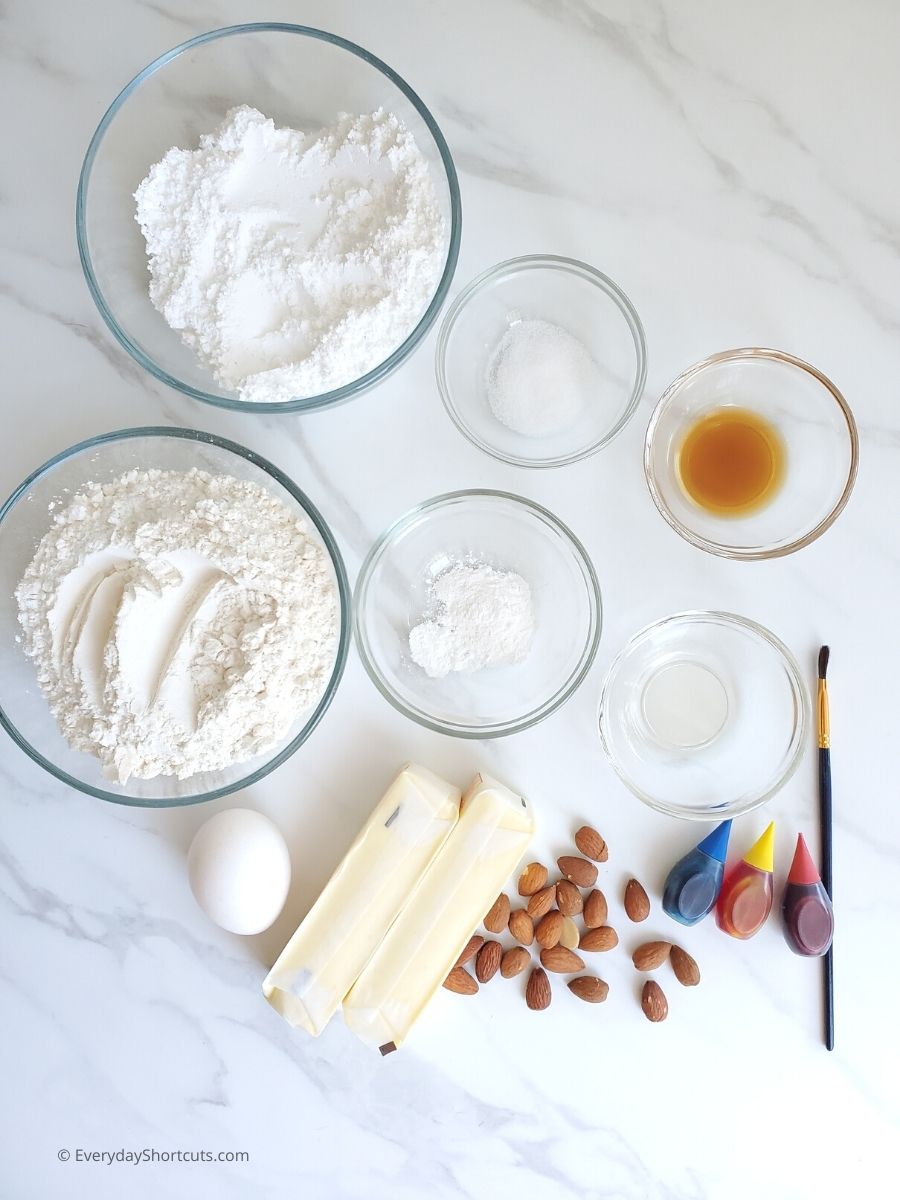
Ingredients
Makes about 24 cookies
1 stick butter, softened
1 tsp baking powder
1 cup powdered sugar
2 ⅔ cups all-purpose flour
1 tsp salt
1 egg
1 teaspoon almond extract
1 teaspoon vanilla extract
24 Almonds
Red, Blue, Yellow food coloring
Will Also Need
Paintbrush
Bowl
Additional all-purpose flour
Cookie sheet
Parchment paper
Sharp knife
How to Make Witch Finger Cookies
Preheat oven to 325 F degrees.
Soften the butter slightly and add to a large mixing bowl with egg, powdered sugar, vanilla extract and almond extract. Using an electric mixer beat together until combined.
In another bowl add flour, baking powder and salt. Gradually add this mixture to the other bowl while you continue beating until dough forms.
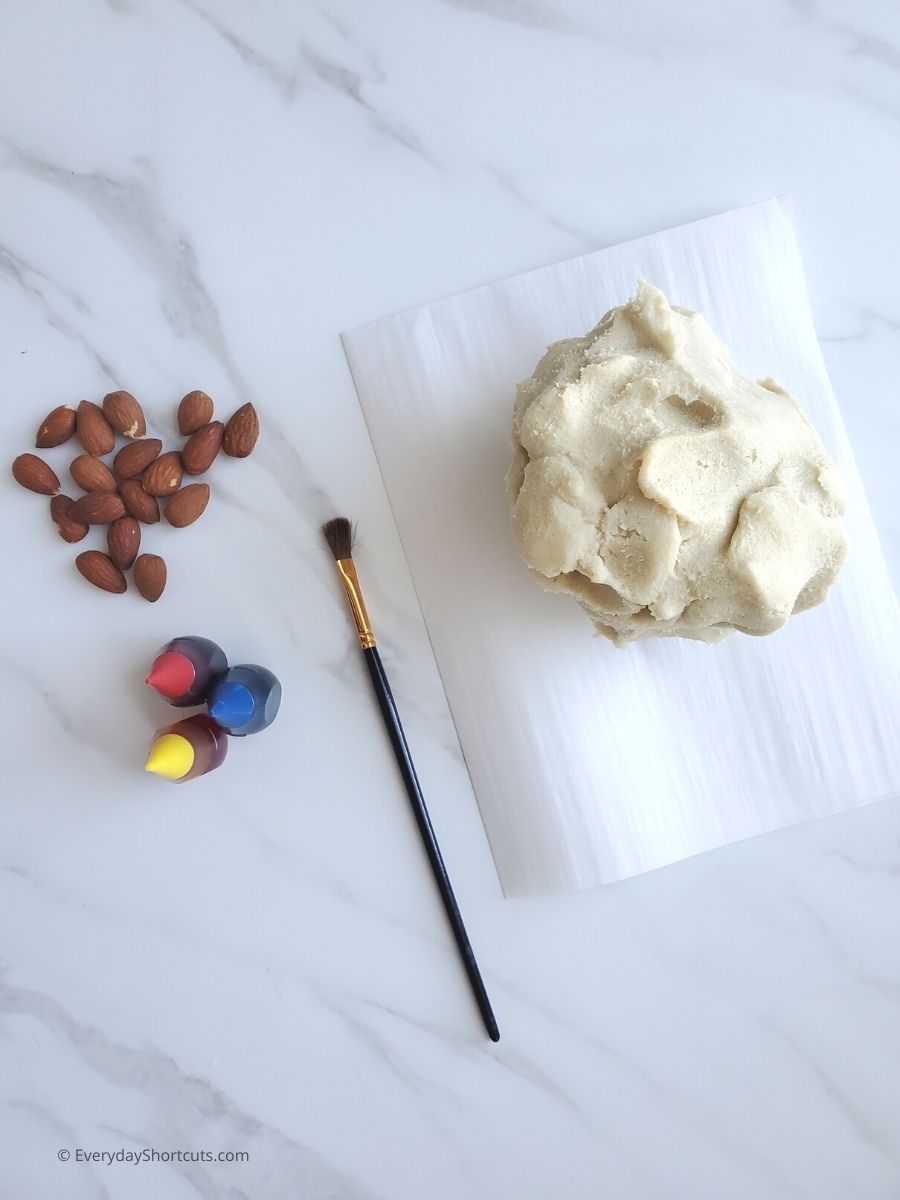
Roll dough into a large ball and wrap plastic wrap around it. Refrigerate dough for 30-40 minutes.
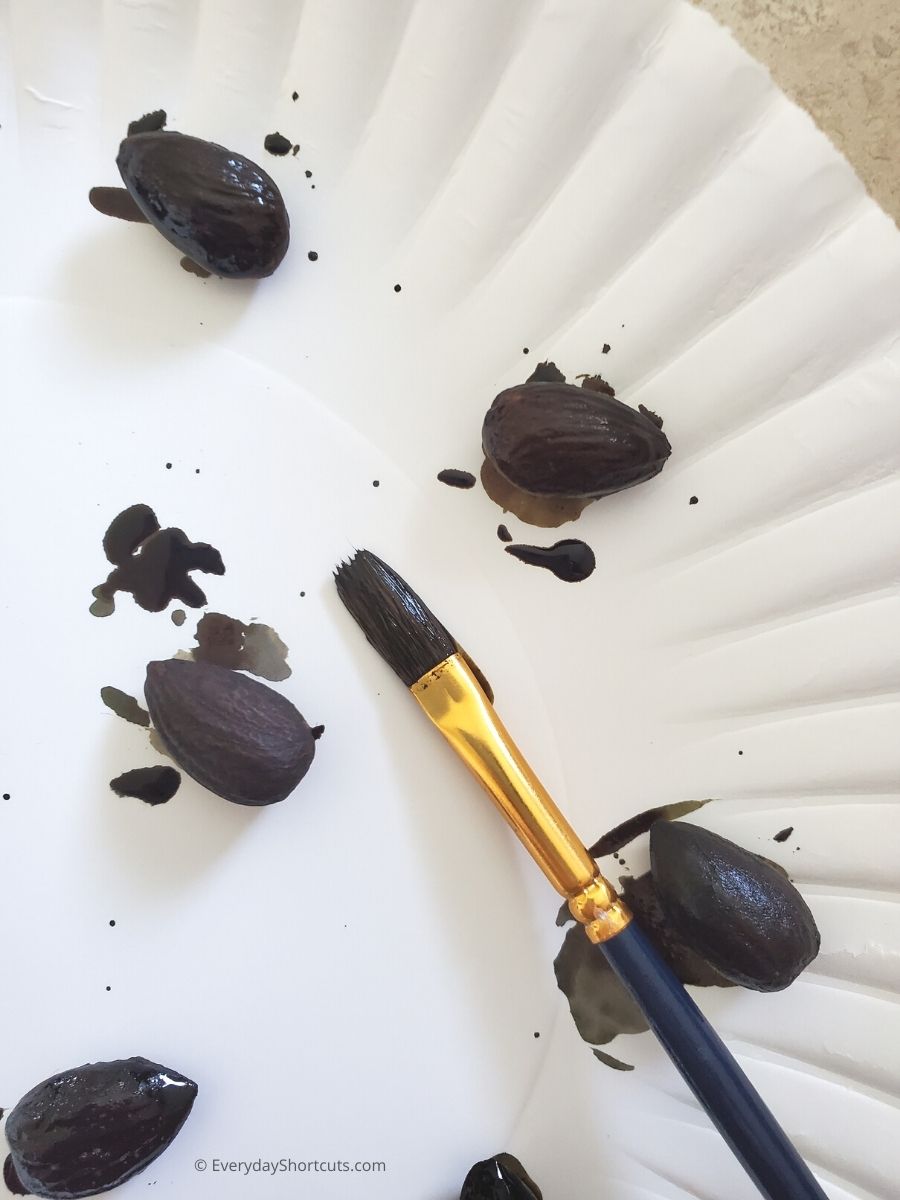
In a small bowl, add equal amounts of red, blue and yellow food coloring. Only a few drops of each is all you need. Mix together to make a black color. Place almonds on a paper plate and paint the almonds black for the fingernails and allow to dry.
Remove dough from fridge. Place a piece of parchment paper on counter, add flour on top of the parchment paper and unwrap dough. Take small amounts of dough (may need to add some flour to dough if sticky) and roll into witch fingers. You don’t need a lot of dough about the size of you pinky (width and length).
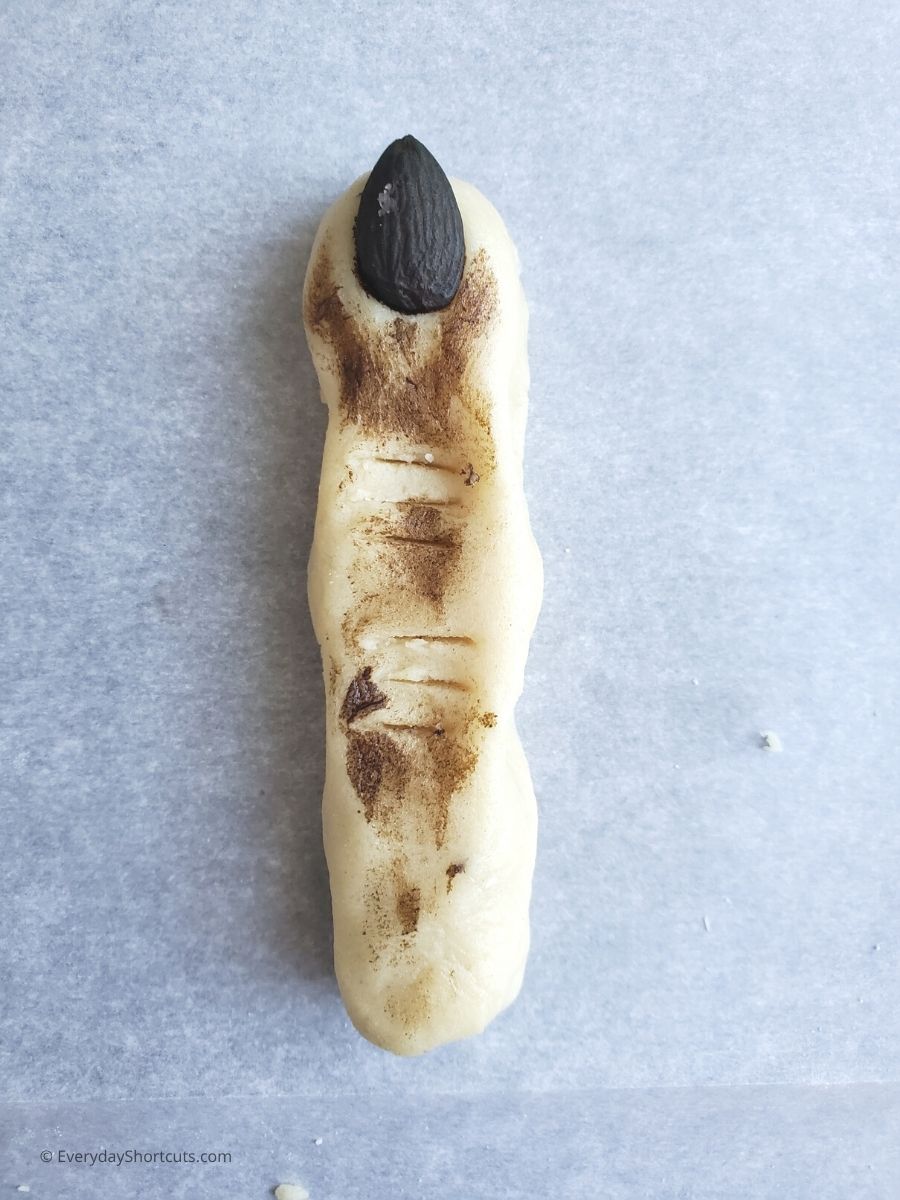
Create indentations for the knuckles and sides to make it look like a witch finger. Press an almond at the tip of the cookie for the fingernail. Paint some black food coloring on the finger and around the nail. Lightly tap or rub it in to make it look like dirt on the finger.
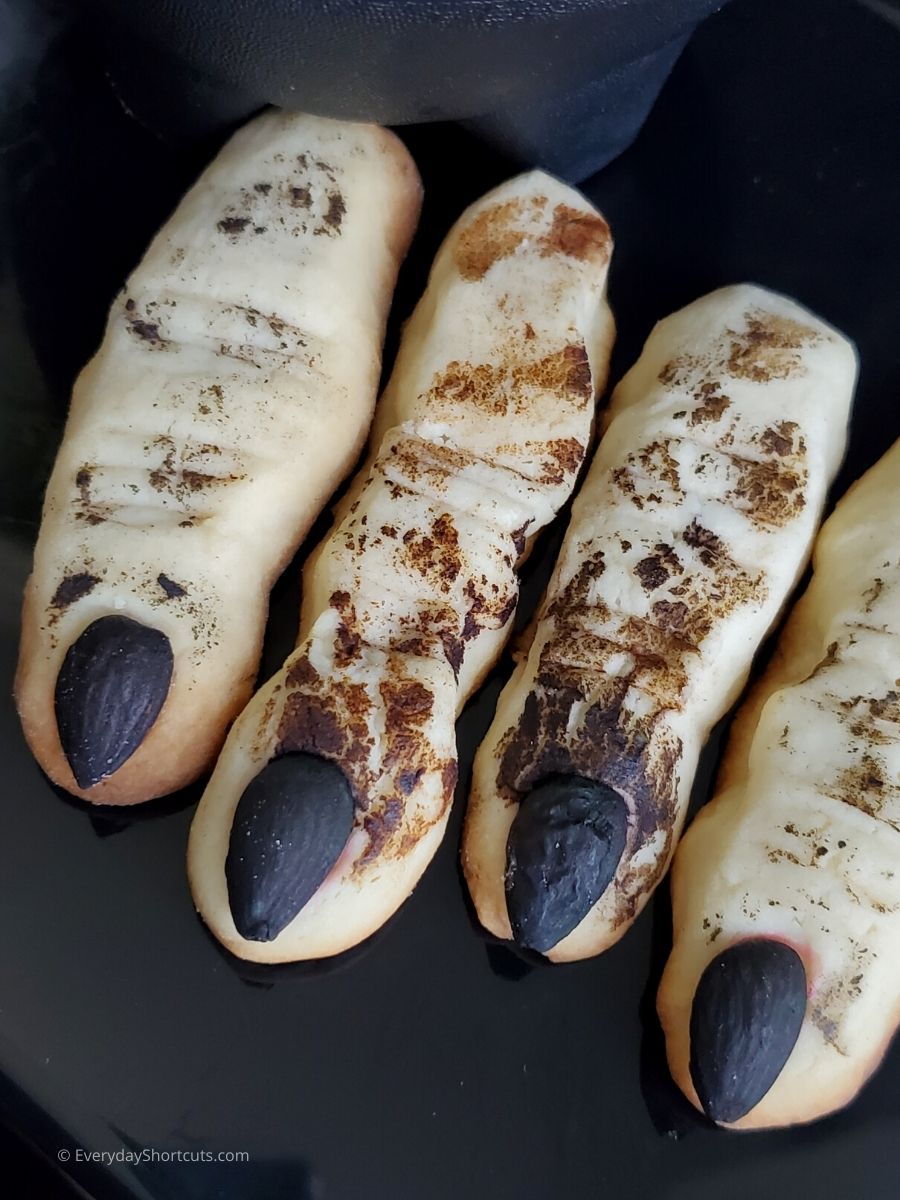
Using a sharp knife cut 3 lines in both knuckles. Bake cookies for about 15-20 or until golden brown. Allow cookies to cool and enjoy!
Recipe
Witch Finger Cookies
Ingredients
- 1 stick butter softened
- 1 tsp baking powder
- 1 cup powdered sugar
- 2 ⅔ cups all-purpose flour
- 1 tsp salt
- 1 egg
- 1 teaspoon almond extract
- 1 teaspoon vanilla extract
- 24 Almonds
- Red Blue, Yellow food coloring
Will Also Need
- Paintbrush
- Bowl
- Additional all-purpose flour
- Cookie sheet
- Parchment paper
- Sharp knife
Instructions
- Preheat oven to 325 F degrees.
- Soften the butter slightly and add to a large mixing bowl with egg, powdered sugar, vanilla extract and almond extract. Using an electric mixer beat together until combined.
- In another bowl add flour, baking powder and salt. Gradually add this mixture to the other bowl while you continue beating until dough forms.
- Roll dough into a large ball and wrap plastic wrap around it. Refrigerate dough for 30-40 minutes.
- In a small bowl, add equal amounts of red, blue and yellow food coloring. Only a few drops of each is all you need. Mix together to make a black color. Place almonds on a paper plate and paint the almonds black for the fingernails and allow to dry.
- Remove dough from fridge. Place a piece of parchment paper on counter, add flour on top of the parchment paper and unwrap dough. Take small amounts of dough (may need to add some flour to dough if sticky) and roll into witch fingers. You don't need a lot of dough about the size of you pinky (width and length).
- Create indentations for the knuckles and sides to make it look like a witch finger. Press an almond at the tip of the cookie for the fingernail. Paint some black food coloring on the finger and around the nail. Lightly tap or rub it in to make it look like dirt on the finger.
- Using a sharp knife cut 3 lines in both knuckles. Bake cookies for about 15-20 or until golden brown. Allow cookies to cool and enjoy!
Notes
Tips for the Best Cookies
- Make sure to dough is cold and work quickly. This ensures the cookies will hold their shape during baking. If it gets warm, place back in the fridge for a bit.
- To save on time you can use store bought sugar cookie dough.
- Make sure your dough isn't too sticky or crumbly (too sticky means it won’t be easy to roll into a ball; too crumbly means the cookies won’t hold together when you try to pick them up).
- Flour your surface, but not too much. Keep a light hand with it so that you don't end up making dough balls seem dry or unevenly textured before baking.
- Make the cookie shape small in size as they will expand. I suggest the size of your pinky (width and length). If you make them too thick they will expand and look like pancakes.
- Cool cookies completely before eating or storing them to avoid from falling apart.
Nutrition Disclosure
Nutritional facts are estimates and are provided as a courtesy to the reader. Please utilize your own brand nutritional values to double check against our estimates. Nutritional values are calculated via a third party. Changing ingredients, amounts or cooking technique will alter the estimated nutritional calculations.
Leave a Reply