

Impress your guests with a spooky yet delicious Bleeding Skull Cake! This cake is sure to be a hit at any Halloween party, and fun to make!
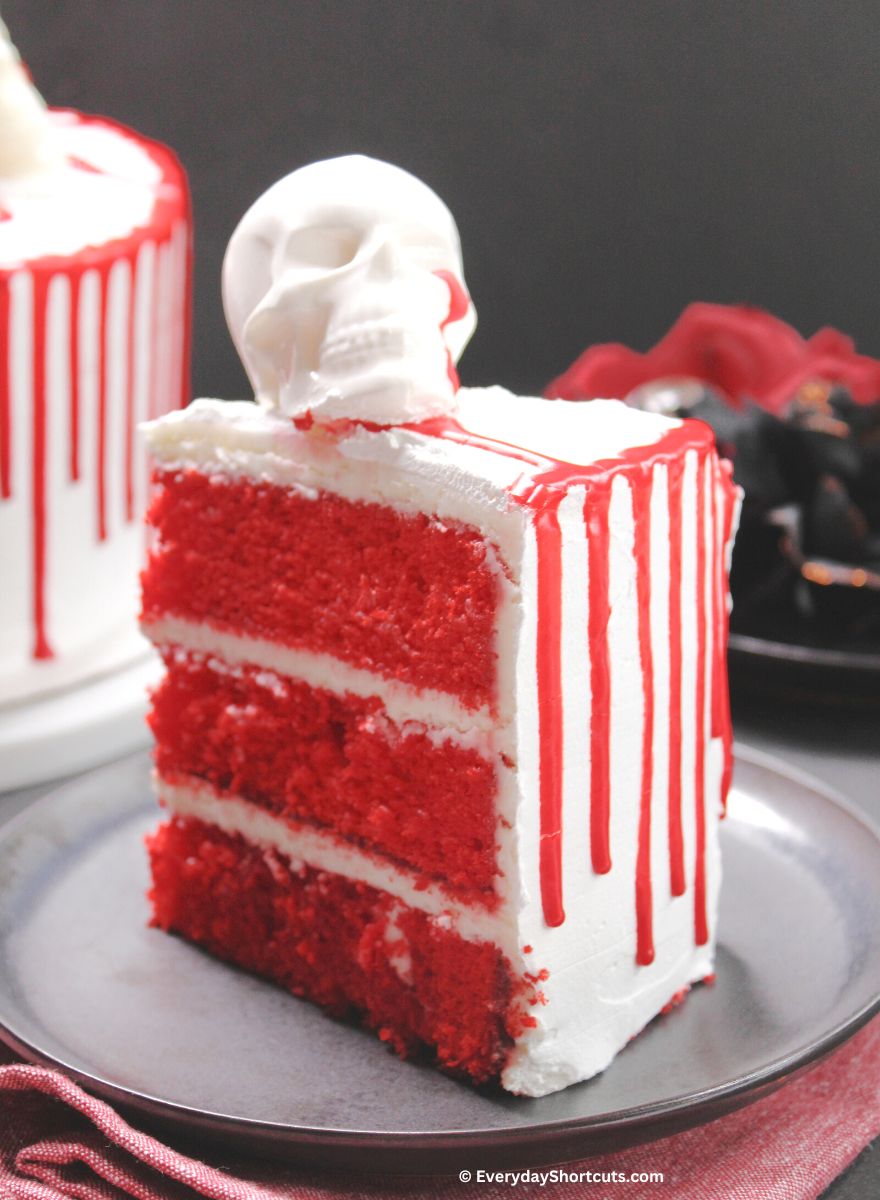
This Halloween, try your hand at making a Bloody Skull Cake!
Made with red velvet cake, buttercream frosting, and 3D chocolate skulls, this cake will be loved by adults and kids alike. Follow the recipe below to learn how to make your own Bleeding Skull Cake.

Why You’ll Love This Halloween Cake
- It’s Delicious: The cake is made with red velvet, which is a rich and flavorful cake that everyone loves.
- Fun & Exciting: The white chocolate skulls are both cute and scary, and they add an extra level of excitement to the cake.
- Spooky but Festive: The blood-red filling makes the cake even more gruesome and irresistible.
- Simple to Make: This cake is easy to make, so you can spend more time enjoying Halloween festivities with your friends and family!
What You Will Need
For the Cake
- Red Velvet cake mix: You can use any other cake mix of your choice too.
- Large eggs: Use at room temperature.
- Unsalted sweet cream butter: Softened at room temperature.
- Whole milk: To mix the batter to creamy perfection.
For the Frosting
- Unsalted sweet cream butter: Softened at room temperature for easy mixing.
- Powdered sugar: To add a bit of sweetness.
- Heavy whipping cream: To add consistency to the frosting.
- Vanilla extract: Flavor booster for frosting.
- Tubes of red cookie icing: For that bleeding effect!
For the White Chocolate Skulls
- Wilton white candy melts: To make the chocolate skulls.
- Skull mold: Large and small size.
Equipment Used
How to Make a Bleeding Skull Cake
Full instructions is in recipe card at the bottom of the post.
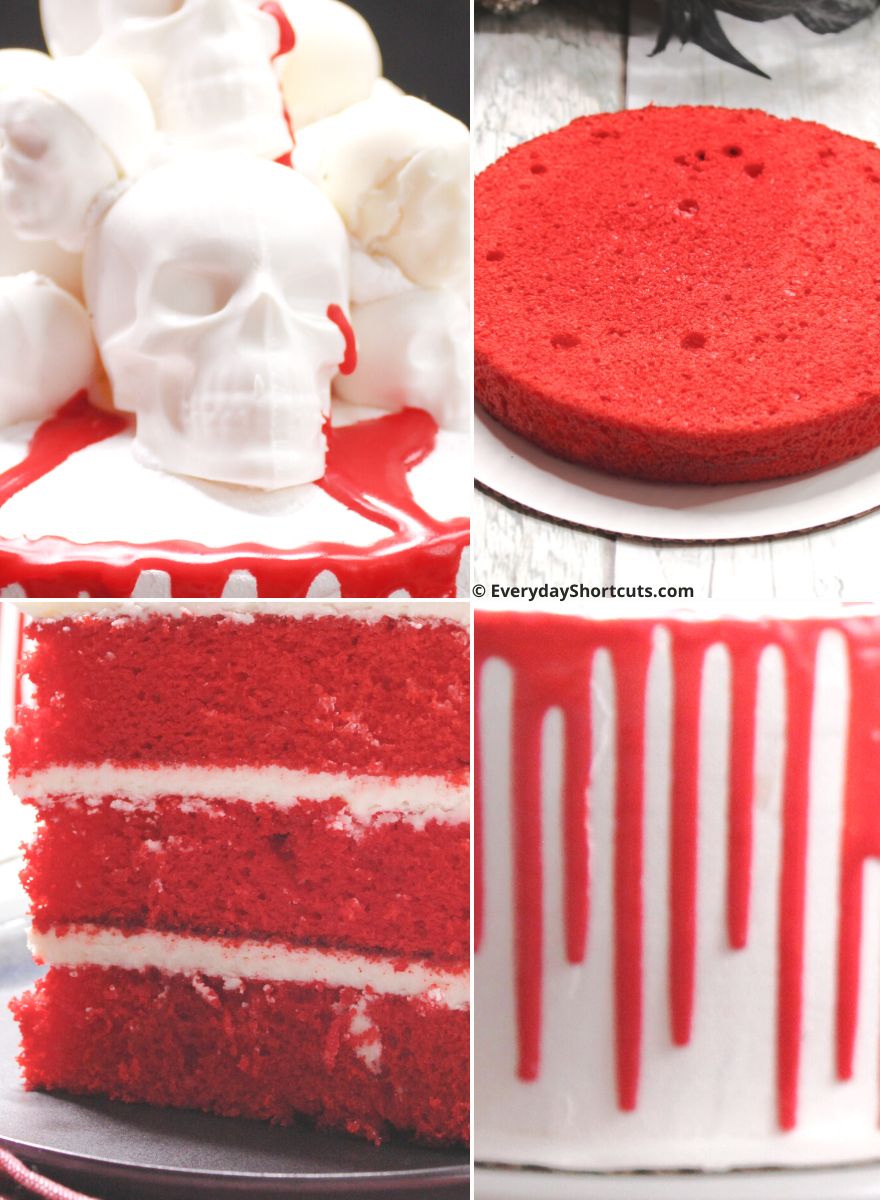
Step One - Make the chocolate skulls. Melt the candy melts and spoon into molds. Allow to harden in fridge/freezer and carefully remove from mold.
Step Two - Build the chocolate skulls. Join the two chocolate halves together and set aside to harden.
Step Three - Make the cake layers. Preheat oven to 350 degrees. Mix all of cake ingredients together and bake for 25-28 minutes. Set aside to allow to cool completely.
Step Four – Level the cakes. Remove the cakes from the cake pans and onto the cake boards. Using a cake leveler or serrated knife, remove the tops of the cakes to make them even in size.
Step Five - Make the frosting. Mix the ingredients for the frosting until creamy and stiff.
Step Six - Build & frost the cake. Frost the top of one cake layer. Place second layer on top frost and repeat with third layer. Frost entire cake and allow to harden in fridge.
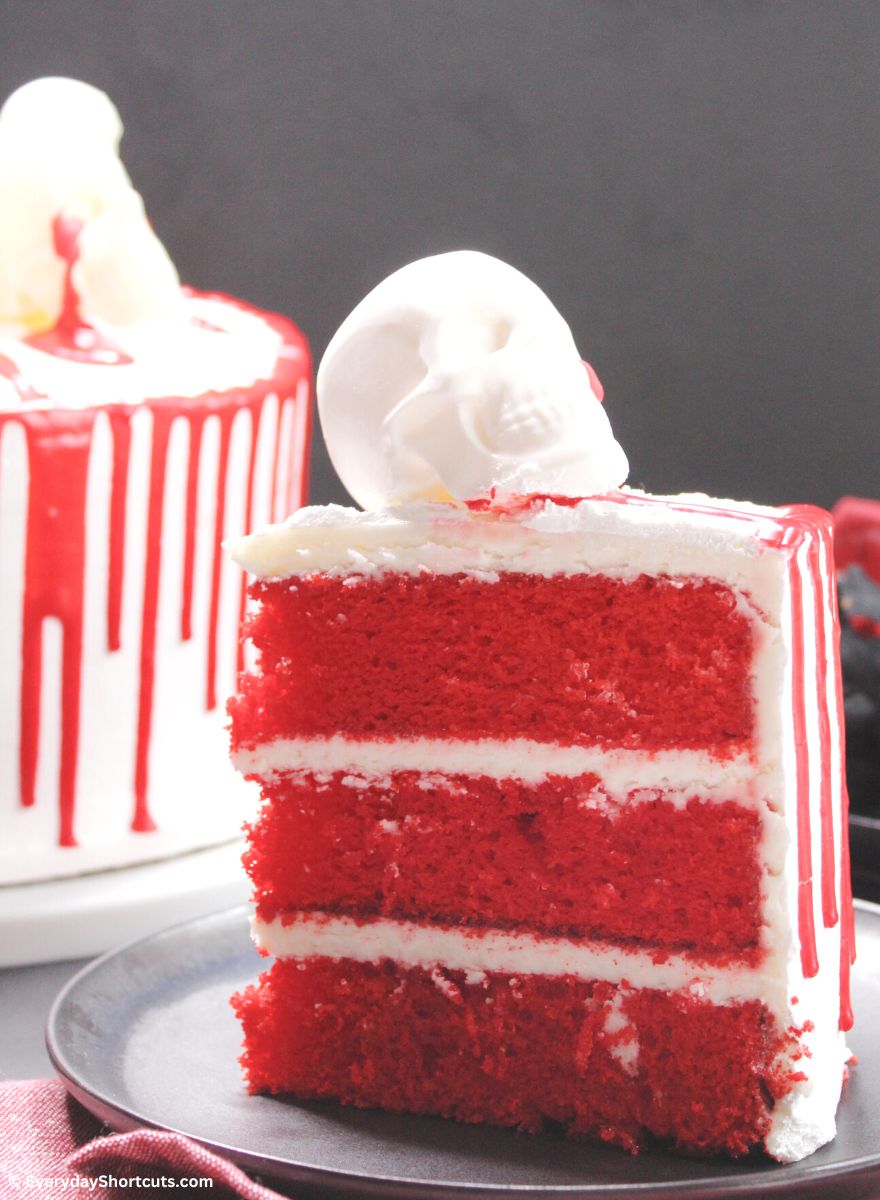
Step Seven – Decorate the cake. Create a drip effect by squeezing the red icing around the top edge of the cake Build a mound of skulls in the center of your cake, using any remaining frosting as a glue for the skulls to stack on top of each other. Cut, serve and enjoy!
How to Cut a Layered Cake
Cutting a layered cake can be tricky, but with a few simple tips you can easily achieve perfectly clean slices every time.
- Use a sharp knife: A sharp knife is key for getting clean cuts through a layered cake. If your knife is dull, it will crush the cake as you cut it, resulting in messy, ragged edges. Be sure to use a serrated knife for best results.
- Score the top layer: Before cutting into the cake, lightly score the top layer with your knife to create a guide for slicing. This will help you get nice, even slices without having to worry about the layers shifting around.
- Start at the center: When cutting the cake, start from the center and work your way outwards. This will help prevent the layers from sliding out of place as you cut them.
- Go slowly and carefully: Take your time when cutting the cake – rushing will only result in messy, uneven slices. Cut slowly and carefully following your guides (the scored lines on the top layer and the outer edge of the cake), and you’ll end up with perfect slices every time!
How to Store a Layered Cake
- Layer cakes are best stored in an airtight container in the fridge for up to 5 days.
- If you want to store your cake for more than a day or two, you can freeze it for up to 2 months. When you're ready to eat it, thaw the cake overnight in the fridge.
FAQs
Can I use any type of chocolate for the skulls?
Yes, you can use any type of chocolate that you like. However, we recommend using white chocolate because it gives the skulls a nice contrast against the red velvet cake.
How do I make the bleeding effect for the skulls?
The best way to create the bleeding effect is to use red cookie icing.
What is the best way to store white chocolate?
White chocolate should be stored in a cool, dry place. If it is exposed to heat or moisture, it can become lumpy or oily.
Do I have to use red velvet cake mix?
No, you don’t have to use red velvet cake mix. You can make your own red velvet cake from scratch.
More Halloween Desserts
Recipe

Bleeding Skull Cake
Ingredients
White chocolate skulls
- 3 8 oz bag wilton white candy melts
- Small skull mold
- Large skull mold
Cake Ingredients
- 3 – Red Velvet cake mix
- 6 large eggs
- 1 ½ C unsalted sweet cream butter softened
- 3 C whole milk
- 3 9 in round cake pans
- 3 10 in round cake boards
Vanilla frosting ingredients
- 2 C unsalted sweet cream butter softened
- 6 C powdered sugar
- 1 tbsp pure vanilla extract
- 7 tbsp heavy whipping cream
- 3 tubes of red cookie icing
Instructions
Make the Chocolate Skulls
- Add candy melts (will need about 30 candy melts) to a microwave safe bowl and melt in microwave in 30 second increments stirring in between until creamy and smooth.
- Spoon melted candy melts into the molds making sure to only fill the sides of the mold all the way to the top and keeping the inside hollow. Use the back of a spoon to guide the chocolate throughout the mold. You will need about 15 small skulls and 5 – 6 large skulls.
- Place molds in the freezer for about 10-15 minutes or fridge for 30 minutes, until they are easy to pop out. Very carefully remove the chocolate from the mold. If they don't pop out easily, place back in fridge/freezer for a few more minutes.
Make the Cake
- Preheat oven to 350 degrees and prepare your cake pans with cooking spray.
- Using a standing mixer or hand mixer, combine all cake ingredients and beat until combined and smooth
- Pour the cake batter evenly into each cake pan and bake for 25-28 minutes or until a toothpick comes out clean.
- Set aside and allow to cool completely.
Make the Frosting
- Using a standing or hand mixer, beat the butter, powdered sugar, vanilla and heavy whipping cream with paddle attachment until combined, creamy and stiff.
Build the Cake
- Remove a cake from cake pan and onto cake board. Level the top of the cake with a leveler or serrated knife.
- Scoop 1 cup of frosting onto the cake layer and spread evenly. Place a second cake layer on top, level and add a layer of frosting. Repeat steps with third layer.
- Using the remaining frosting, frost the entire cake.
- Once cake has been frosted, place into the fridge for a few hours to allow the frosting to get hard and cold.
Decorate the Cake
- Using the red icing, create a drip effect by squeezing the red icing around the top edge of the cake.
- Build a mound of skulls in the center of your cake, using any remaining frosting as a glue for the skulls to stack on top of each other.
- Cut, serve and enjoy!
Notes
How to Store a Layered Cake
- Layer cakes are best stored in an airtight container in the fridge for up to 5 days.
- If you want to store your cake for more than a day or two, you can freeze it for up to 2 months. When you're ready to eat it, thaw the cake overnight in the fridge.
Nutrition Disclosure
Nutritional facts are estimates and are provided as a courtesy to the reader. Please utilize your own brand nutritional values to double check against our estimates. Nutritional values are calculated via a third party. Changing ingredients, amounts or cooking technique will alter the estimated nutritional calculations.


Leave a Reply