

 If you love Nintendo games and characters as much as we do, you’ll love this Nintendo Clay Craft to make just in time for Easter. Thanks to Nintendo for sending over this fun clay craft package.
Gaming is where it’s at in our house. Since quarantine, I’ve been obsessed with playing Animal Crossing creating my own world cause you can never have enough furniture in your house or vegetables in your garden and my kids have been playing Bowser’s Fury since it released. But when I’m not lounging around playing games, I’m getting a workout with Fitness Boxing 2 or getting my groove on with Just Dance 2021 – two great workouts you can do at home! We’re super pumped for the new games of Pokémon Snap, Knockout City, Miitopia, Mario Golf: Super Rush, Fall Guys: Ultimate Knockout all coming out soon and can’t wait to play them.
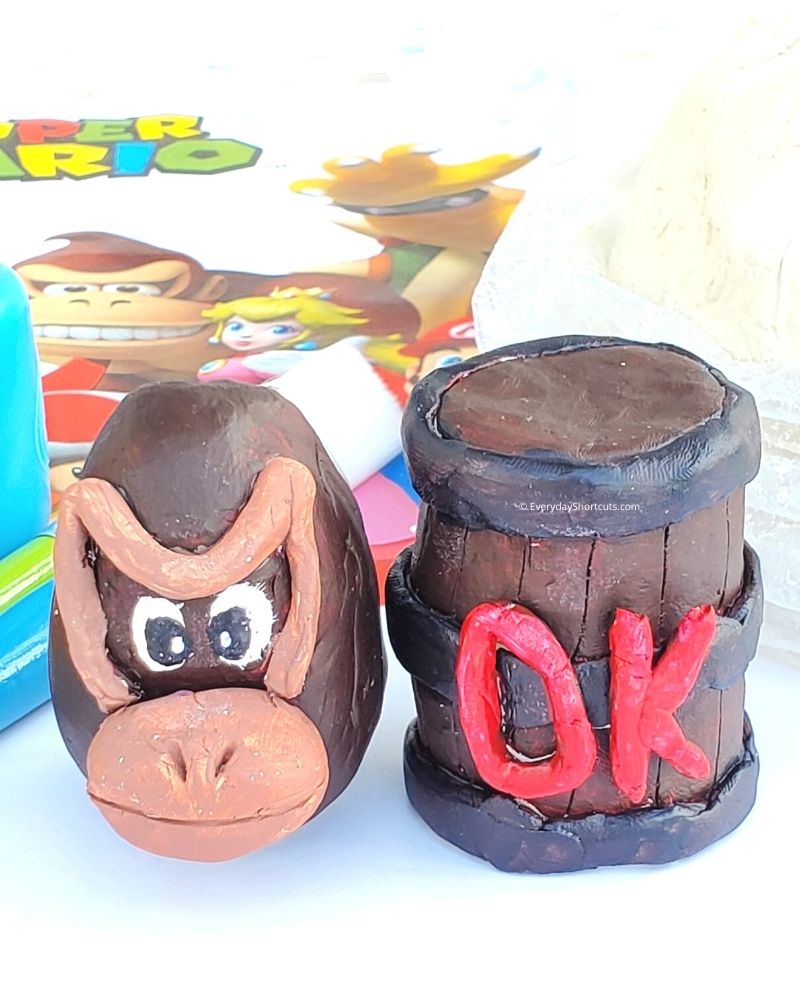
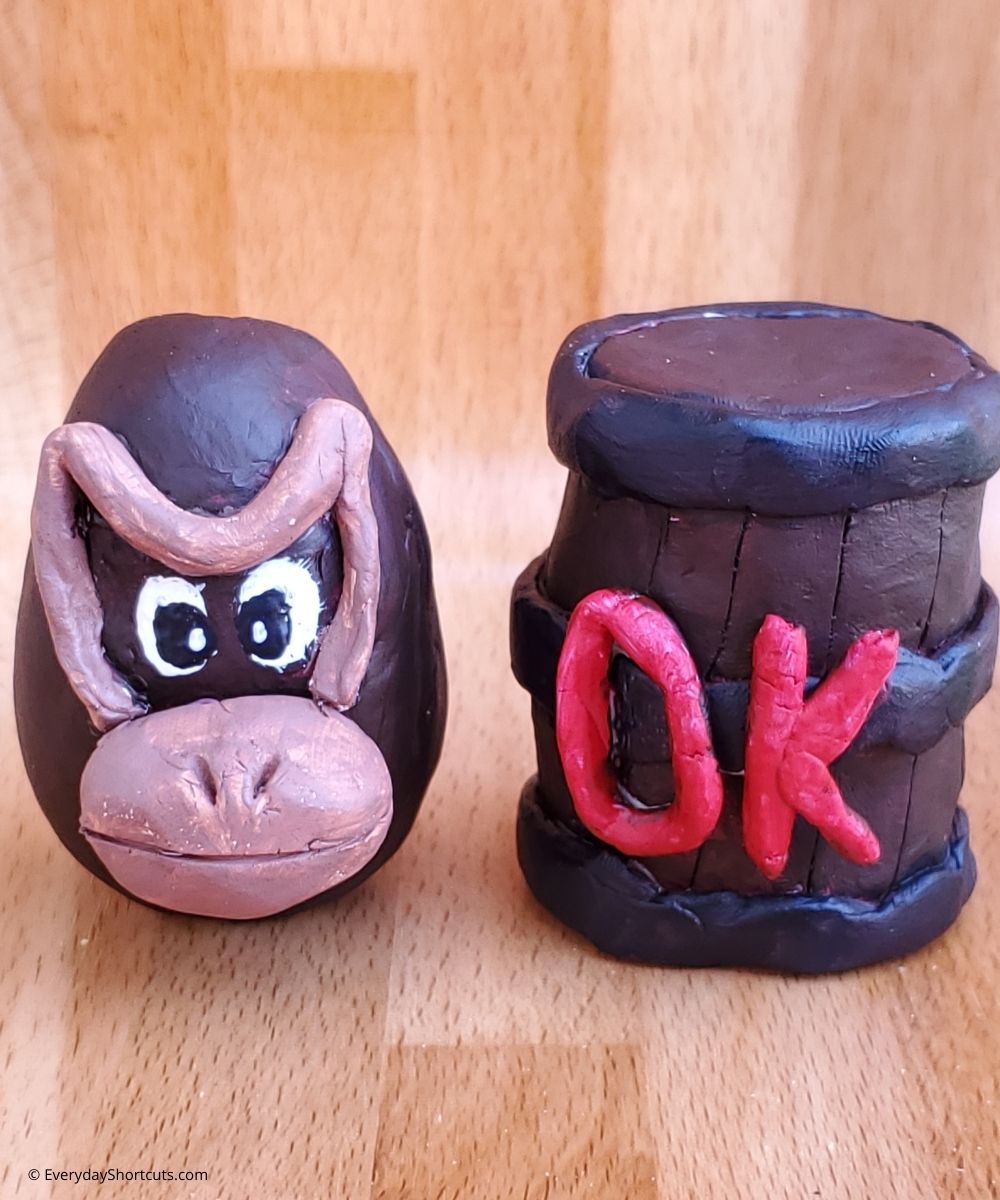
Donkey Kong has been one of my favorite classic games to play. I remember playing it since I was a little kid trying to save the princess and even conquered it several times. I made this Donkey Kong Clay Egg & Barrel with the care package Nintendo sent over and it turned out so cute. It’s perfect to set out for Easter and so fun to make. Enjoy!
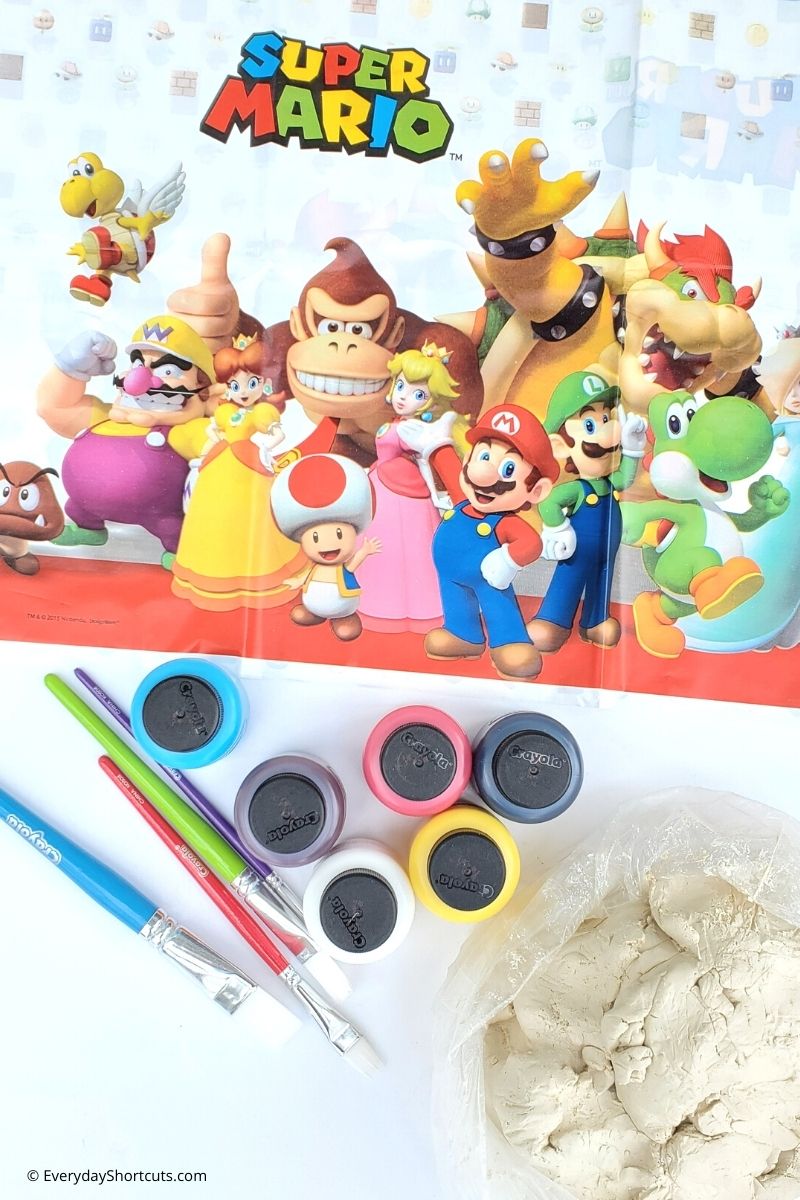
Supplies Needed
Air Drying Molding Clay
Acrylic paint
Paint brushes (sizes small to medium)
Tablecloth to prevent messes
Paper plates for mixing colors
Cup of water to clean paint brushes
Paper towels to wipe off excess paint and dry brushes
How to Make a Donkey Kong Clay Easter Egg
There are several steps to making a Donkey Kong Easter Egg out of clay. First, you need to mold the egg into shape, build the facial features, add the facial features to the clay egg, allow to harden overnight and then paint. I’ve broken it down into steps to make it easy to follow. Have fun!

Mold the Egg Shape
First you want to make the egg shape out of the clay. Start by grabbing a palm sized amount (about 3 inches) of air drying molding clay.
Roll the clay around in your hands until you get a nice round ball. May need to use water to smooth out and remove any cracks.
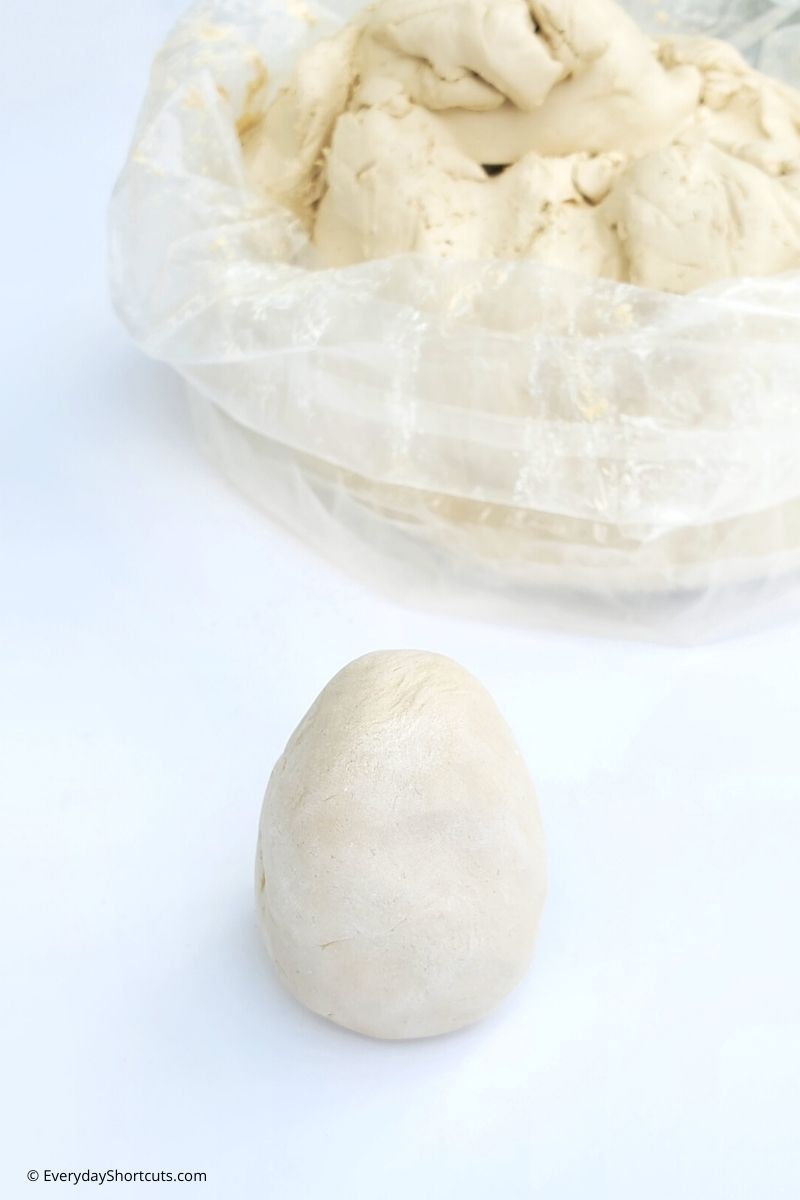
Pinch and top one end of the ball to create a subtle point. Continue to shape the point until it looks like an egg.
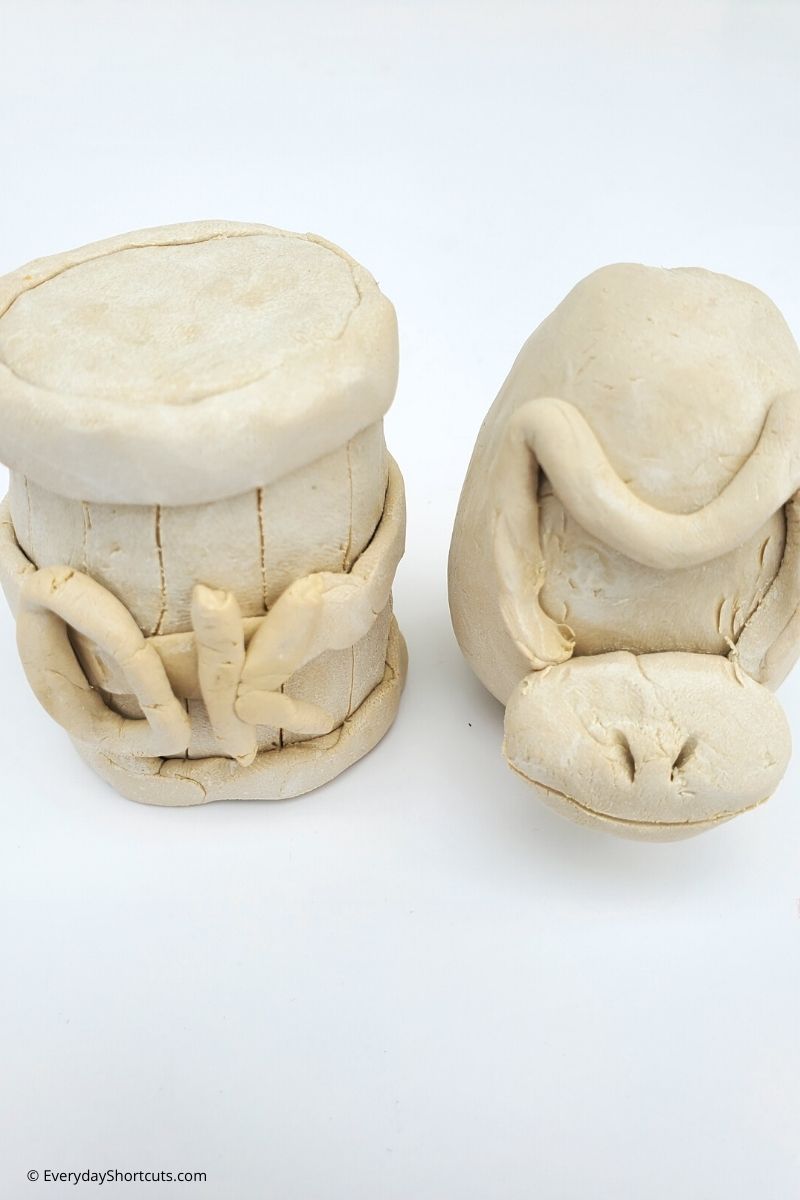
Build the Facial Features
To make the outline of the face, grab a small amount of air drying molding clay and roll between your hands till it’s small like a snake. Shape the face into a half bone shape and push it onto the clay egg. Break off any access clay.
Next make the mouth by grabbing about 1 inch of clay and molding it into a wide half circle. Use a toothpick and draw a line in the middle from corner to corner for the mouth. Then, add 2 small lines with the toothpick at the top of the mouth for the nostrils. Place the mouth right under the end lines for the face outline and push onto the clay egg for it to stay.
Let the egg sit overnight or until fully harden. Once fully harden, it’s time to paint.
Paint the Clay Craft
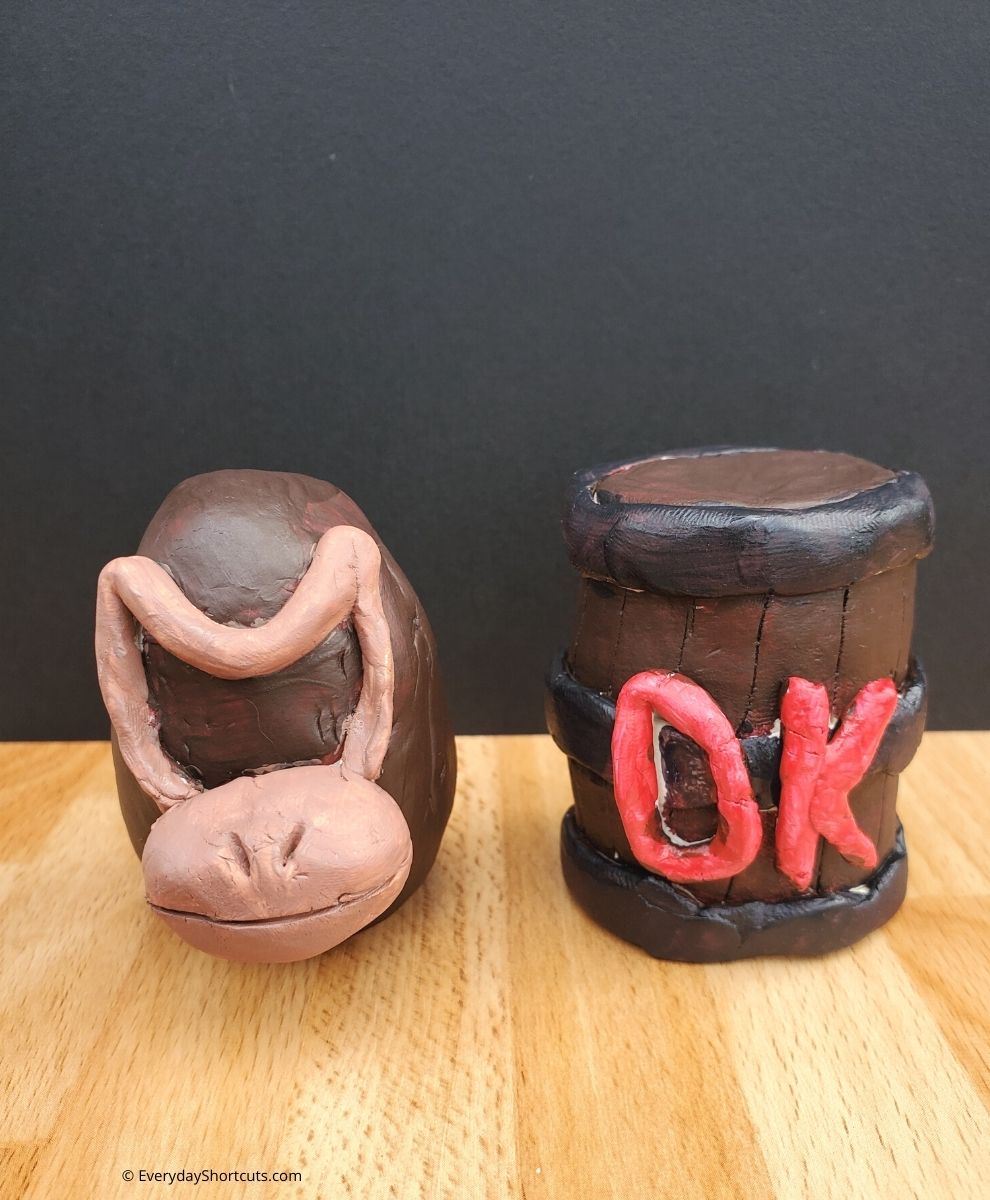
Use dark brown acrylic paint and paint the egg parts being careful not to paint the facial features.
Mix together dark brown and white acrylic paint to make a light brown color and paint the face outline and mouth.
Then paint white circles for the eyes, add the pupils using the black paint and then a tiny white dot in the middle of the pupil. Allow the paint to dry.
How to Make a Donkey Kong Clay Barrel
Grab a large amount of air drying molding clay (about 3-4 inches) and mold into a barrel.
Make 3 bands for the barrel but rolling the clay into long skinny snakes and pushing flat. Wrap each band around the barrel (top, middle & bottom) and push flat against the barrel.
Grab some more clay and make the letters “D” and “K” but rolling into long skinny snakes and mold into the letters. Push them onto the middle of the barrel. Use a toothpick and draw the lines on the barrel to make it look like wood. Allow the clay to dry overnight.
Paint the barrel using the dark brown acrylic paint for the barrel, black for the bands and red for the letters. Allow to dry overnight.
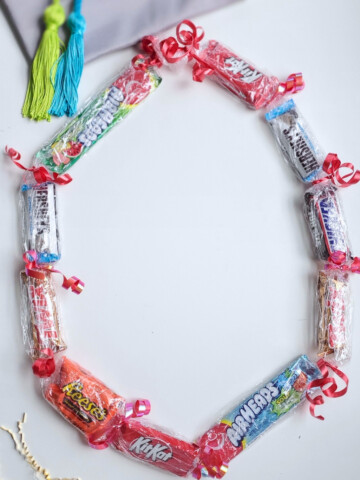
I hope you had fun making this Donkey Kong Clay Egg & Barrel clay craft! If you’re looking for more Nintendo Easter crafts, check out these Mushroom Kingdom and Animal Crossing: New Horizons Egg Holders – perfect for holding colorfully decorated clay or real eggs!
How to Make Donkey Kong Clay Egg & Barrel
Materials
- Air Drying Molding Clay
- Acrylic paint
- Paint brushes sizes small to medium
- Tablecloth to prevent messes
- Paper plates for mixing colors
- Cup of water to clean paint brushes
- Paper towels to wipe off excess paint and dry brushes
Instructions
- Mold the Egg Shape
- First you want to make the egg shape out of the clay. Start by grabbing a palm sized amount (about 3 inches) of air drying molding clay.
- Roll the clay around in your hands until you get a nice round ball. May need to use water to smooth out and remove any cracks.
- Pinch and top one end of the ball to create a subtle point.
- Continue to shape the point until it looks like an egg.
- Build the Facial Features
- To make the outline of the face, grab a small amount of air drying molding clay and roll between your hands till it's small like a snake. Shape the face into a half bone shape and push it onto the clay egg. Break off any access clay.
- Next make the mouth by grabbing about 1 inch of clay and molding it into a wide half circle. Use a toothpick and draw a line in the middle from corner to corner for the mouth. Then, add 2 small lines with the toothpick at the top of the mouth for the nostrils. Place the mouth right under the end lines for the face outline and push onto the clay egg for it to stay.
- Let the egg sit overnight or until fully harden. Once fully harden, it's time to paint.
- Paint the Clay Craft
- Use dark brown acrylic paint and paint the egg parts being careful not to paint the facial features.
- Mix together dark brown and white acrylic paint to make a light brown color and paint the face outline and mouth.
- Then paint white circles for the eyes, add the pupils using the black paint and then a tiny white dot in the middle of the pupil. Allow the paint to dry.
- How to Make a Donkey Kong Clay Barrel
- Grab a large amount of air drying molding clay (about 3-4 inches) and mold into a barrel.
- Make 3 bands for the barrel but rolling the clay into long skinny snakes and pushing flat. Wrap each band around the barrel (top, middle & bottom) and push flat against the barrel.
- Grab some more clay and make the letters "D" and "K" but rolling into long skinny snakes and mold into the letters. Push them onto the middle of the barrel. Use a toothpick and draw the lines on the barrel to make it look like wood. Allow the clay to dry overnight.
- Paint the barrel using the dark brown acrylic paint for the barrel, black for the bands and red for the letters. Allow to dry overnight.


Leave a Reply