

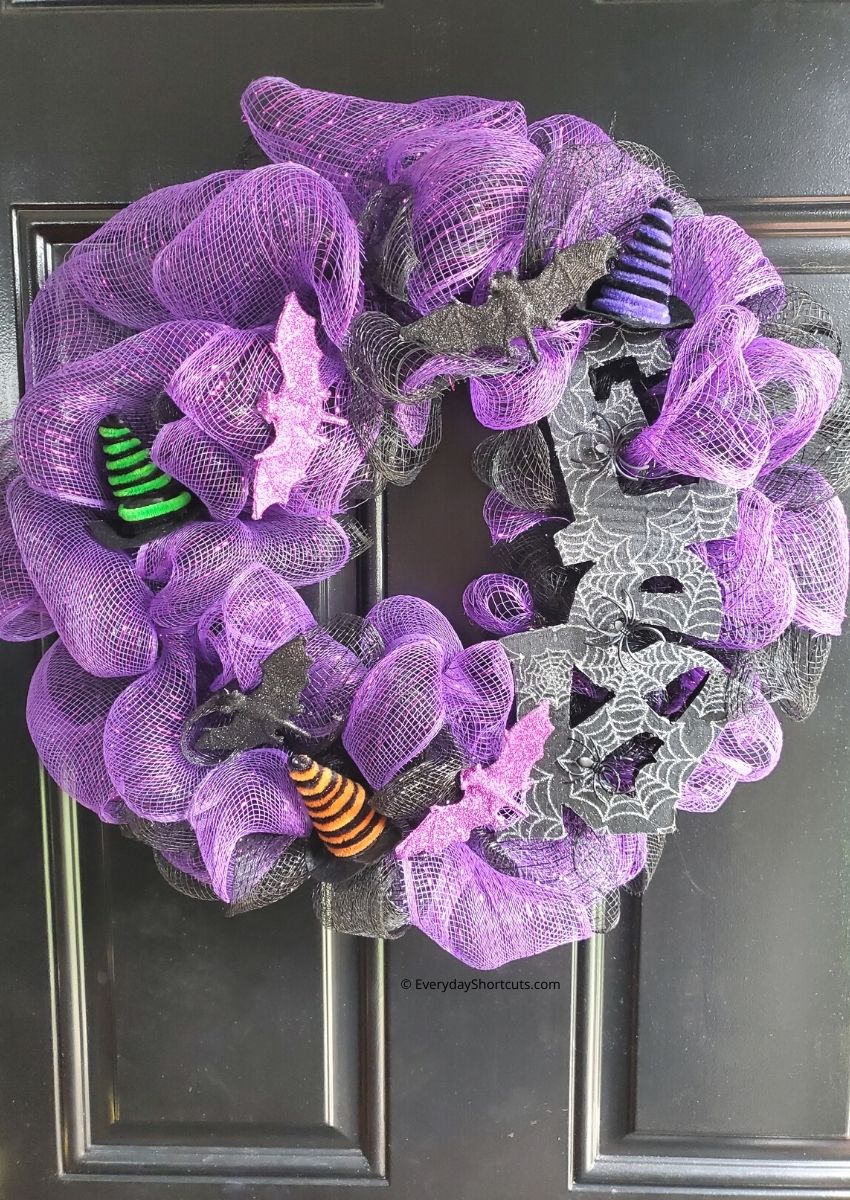
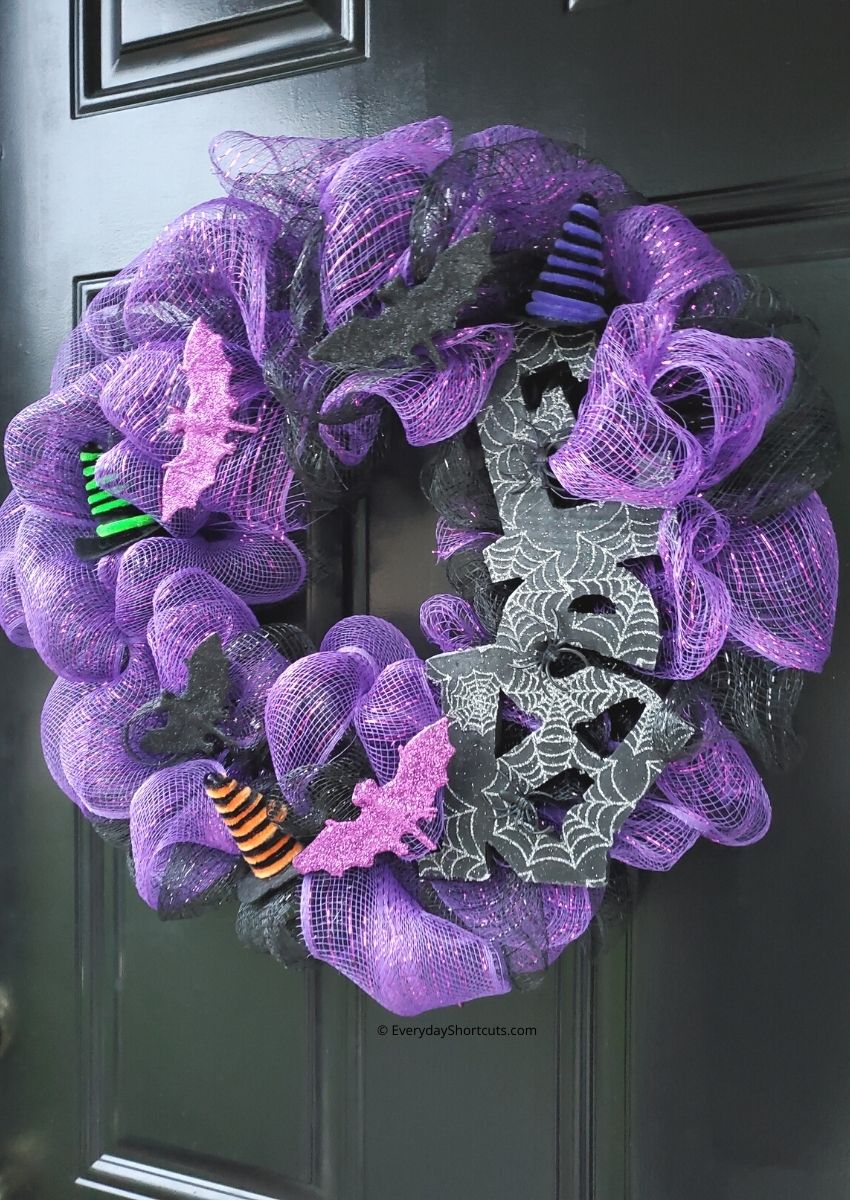
This DIY Dollar Tree Halloween Wreath is a spooky and decorative fall wreath for your front door. This is an easy project that you can do on the cheap with just some supplies from the Dollar Tree. All materials needed cost less than $20 dollars – no kidding!
Dollar Tree is seriously the best place to get Halloween decorations and the price is always right. You can find all sorts of items to get creative and crafty with. You’ll get an idea of what they have by looking at their website at DollarTree.com or visit a local store to check out everything they have to offer as each store carries different items.
We have 2 local Dollar Tree stores in our area and I visit them at least once a week to see what new came in to spruce up my home decor with. From supplies like glue or paint to DIY projects such as these Dollar Tree Tumbling Tower Christmas Ornaments, there are endless ways that anyone can make their home more fun and colorful! You’ll be amazed at all the cool stuff you can make with dollar tree crafts. From art to clothing, there are so many different items for kids and adults alike! Let the crafting begin!
What You’ll Need
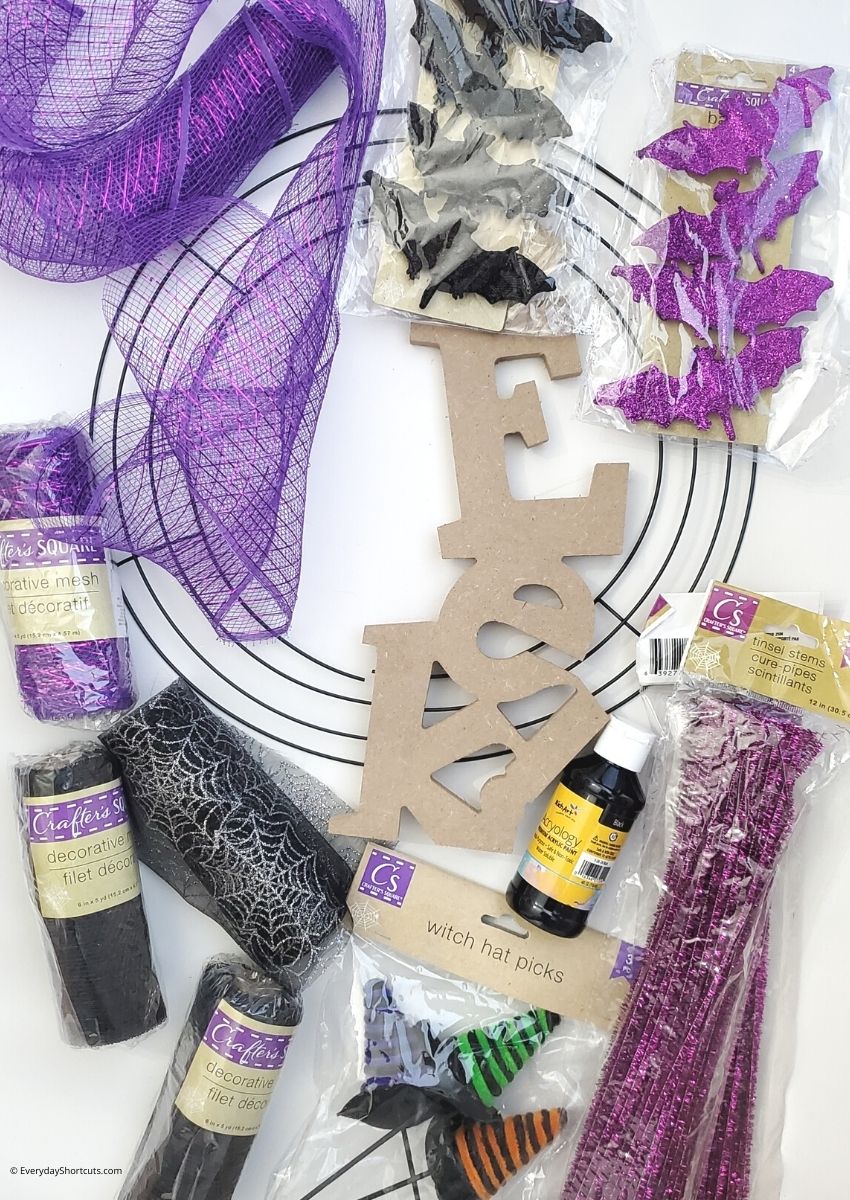
14" Metal Wreath Form
2 Rolls of Each Black and Purple Decorative Mesh
1 Roll of Spider Web Sparkle Mesh
EEK! Wooden Sign
1 Pack Witch Hat Picks
Hot Glue Gun
Hot Glue Sticks
Spider Rings
1 Package of Glitter Chenille Stems
2 4-pk. Glitter Bat Clips (Black & Purple)
Black Acrylic Paint
2 Paint Brushes or Craft Sponge Brushes
Scissors
Mod Podge
How to Make a Dollar Tree Halloween Mesh Wreath
Prepare the Wooden Sign
Paint the wooden EEK! sign using a paint brush and black acrylic paint. Allow to dry.
Once the wooden sign is dry, take the spider web sparkle mesh and lay it over top the wooden sign. Adjust how you want it to lay and cut the access mesh off with scissors.
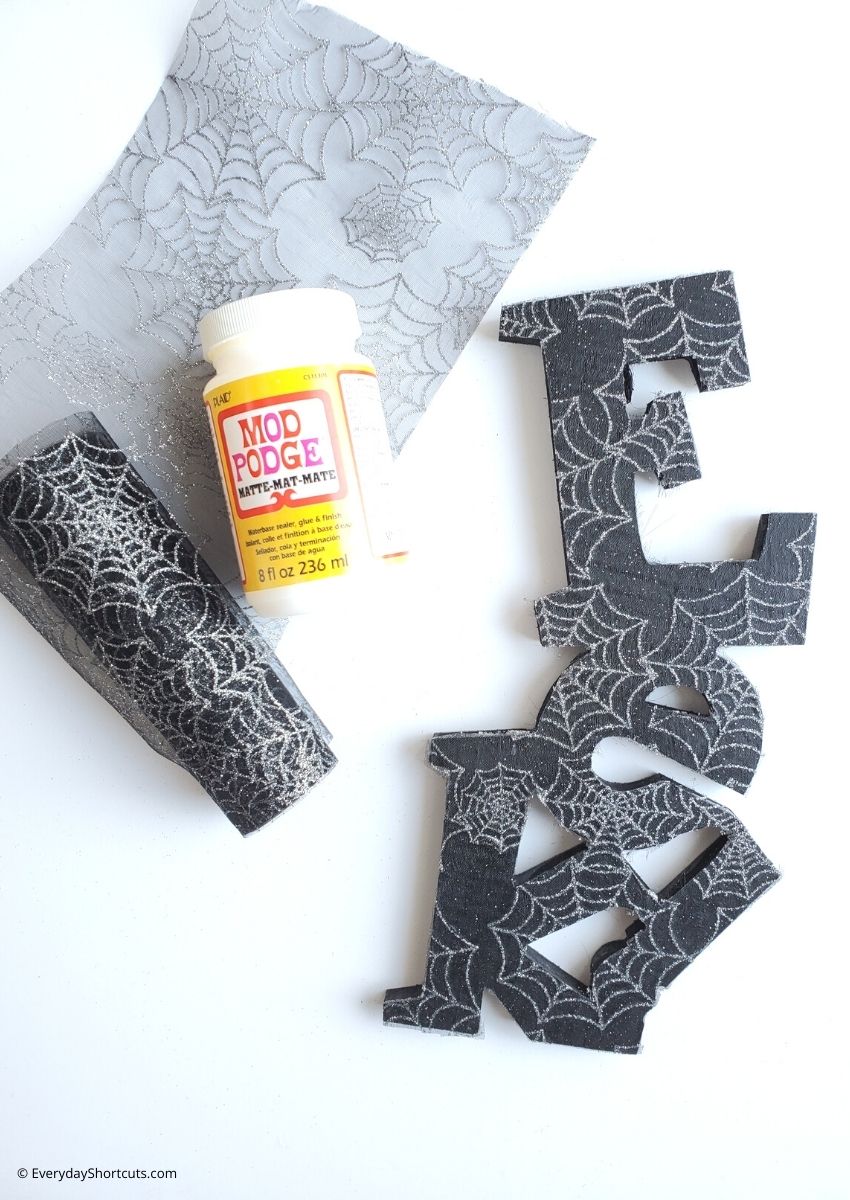
Take off the sparkle mesh and cover the front of the wooden EEK! sign with Mod Podge and lay the sparkle mesh over top smoothing out all wrinkles. Don’t worry about it overlapping as that will get cut off later. Brush Mod Podge over top of the sparkle mesh and allow to dry overnight.
Create the Wreath
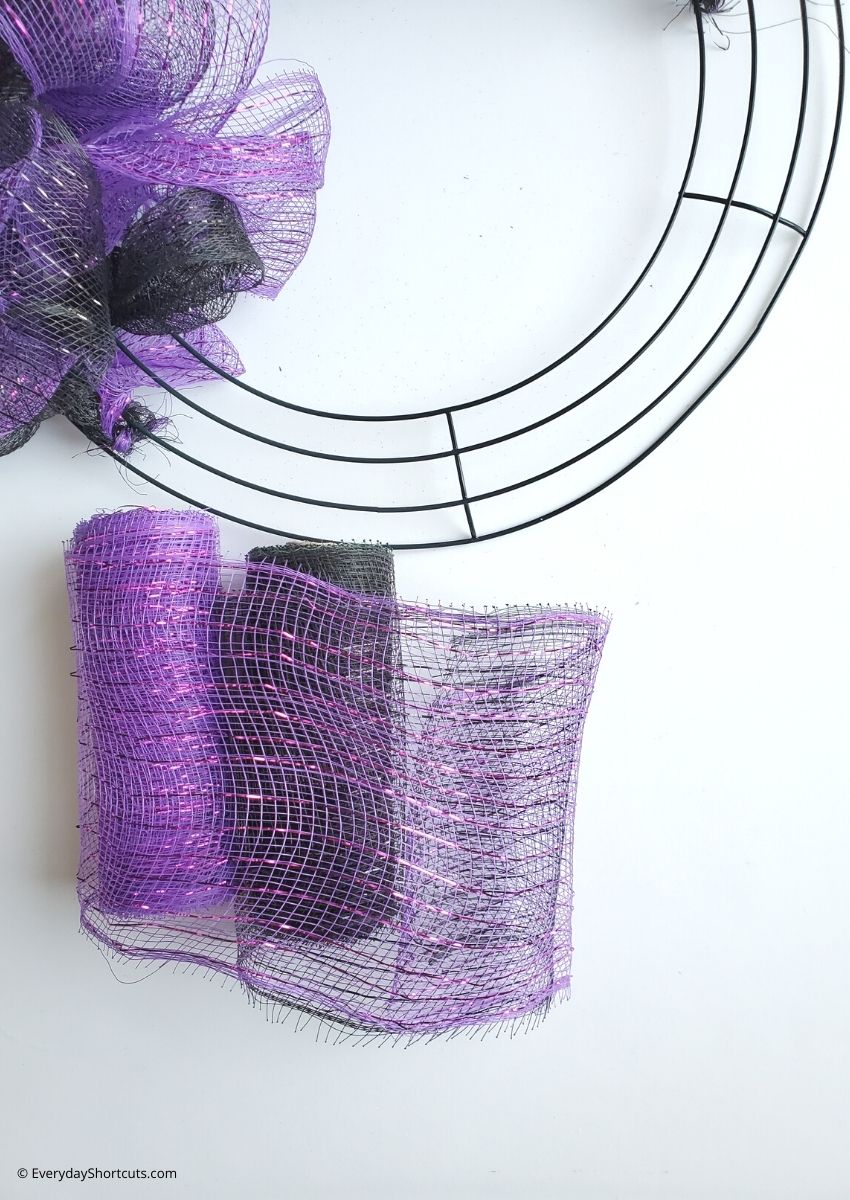
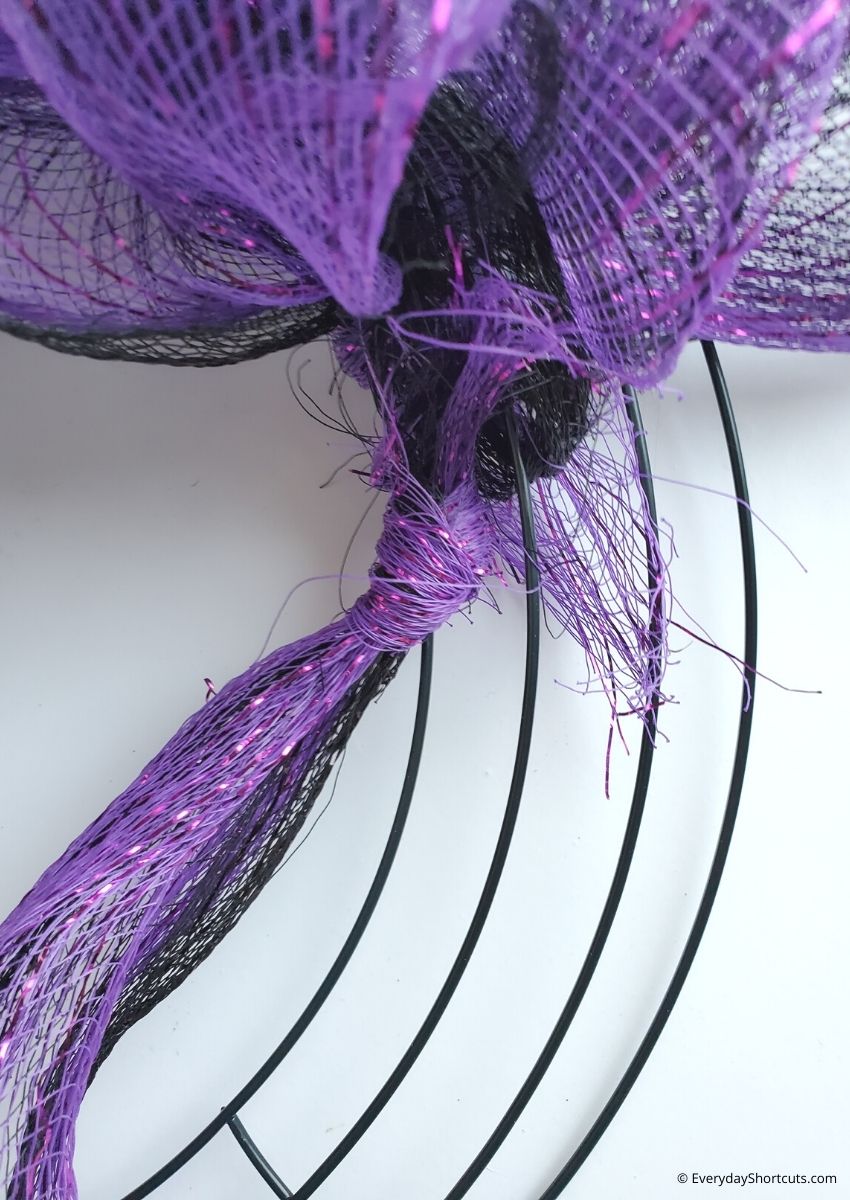
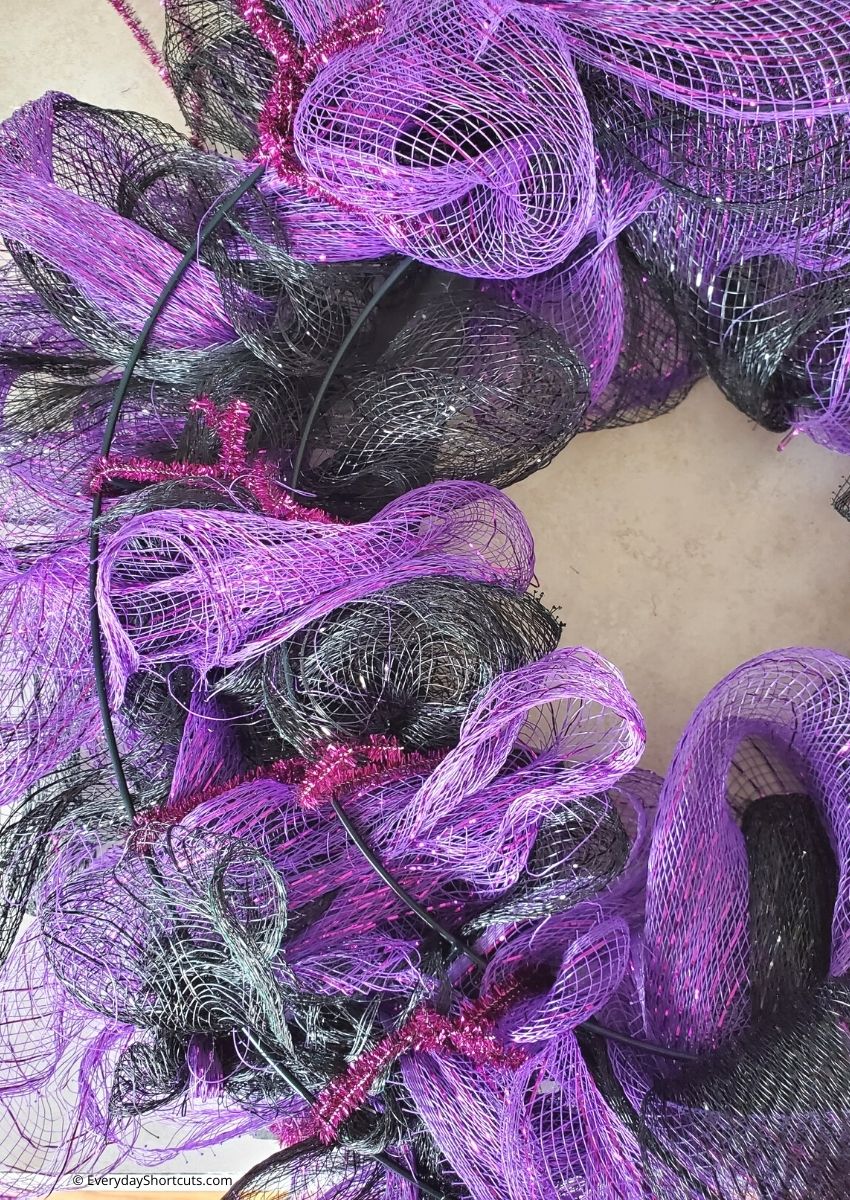
Take one roll of the purple decorative mesh and lay it on top of a roll of the black decorative mesh. Tie the end to the inside of the wire wreath.
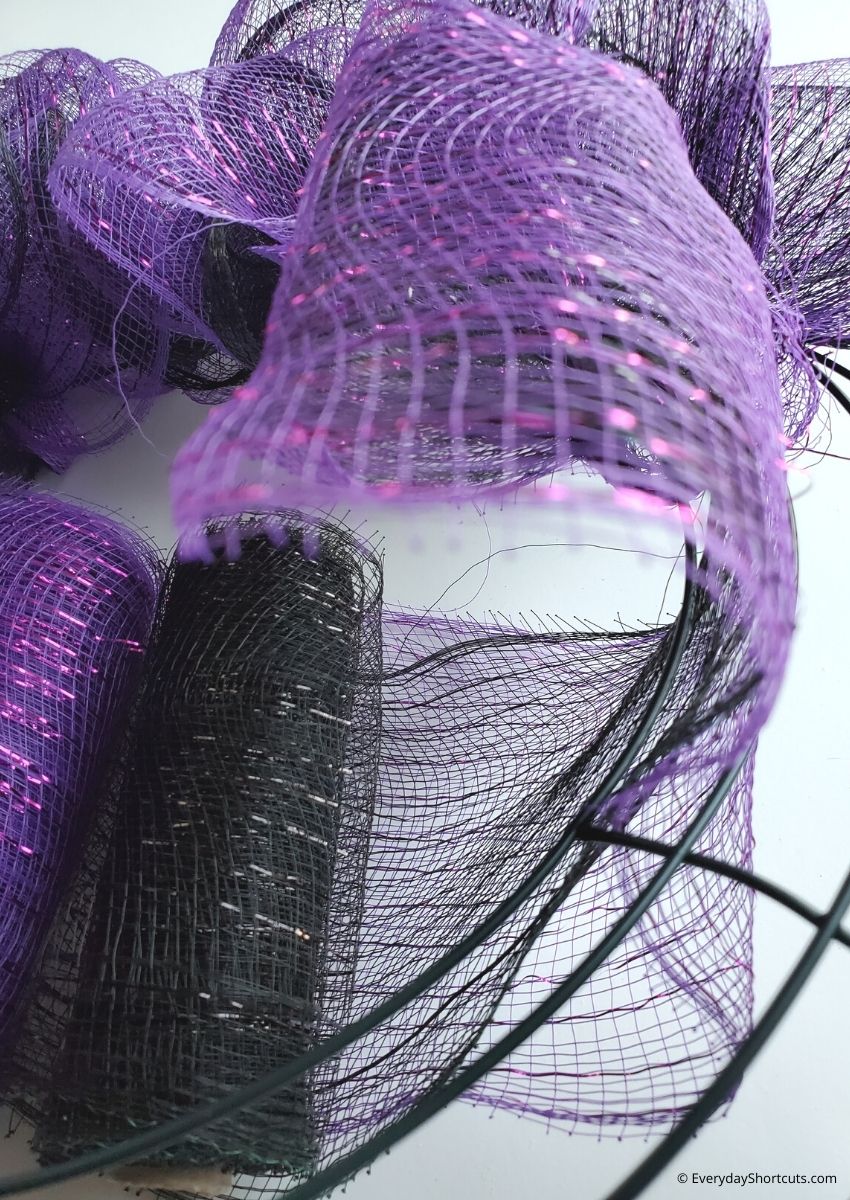

Weave in both overlapping colors of the mesh into the first inside opening of the wire wreath, then do the same through the second and then the third opening.
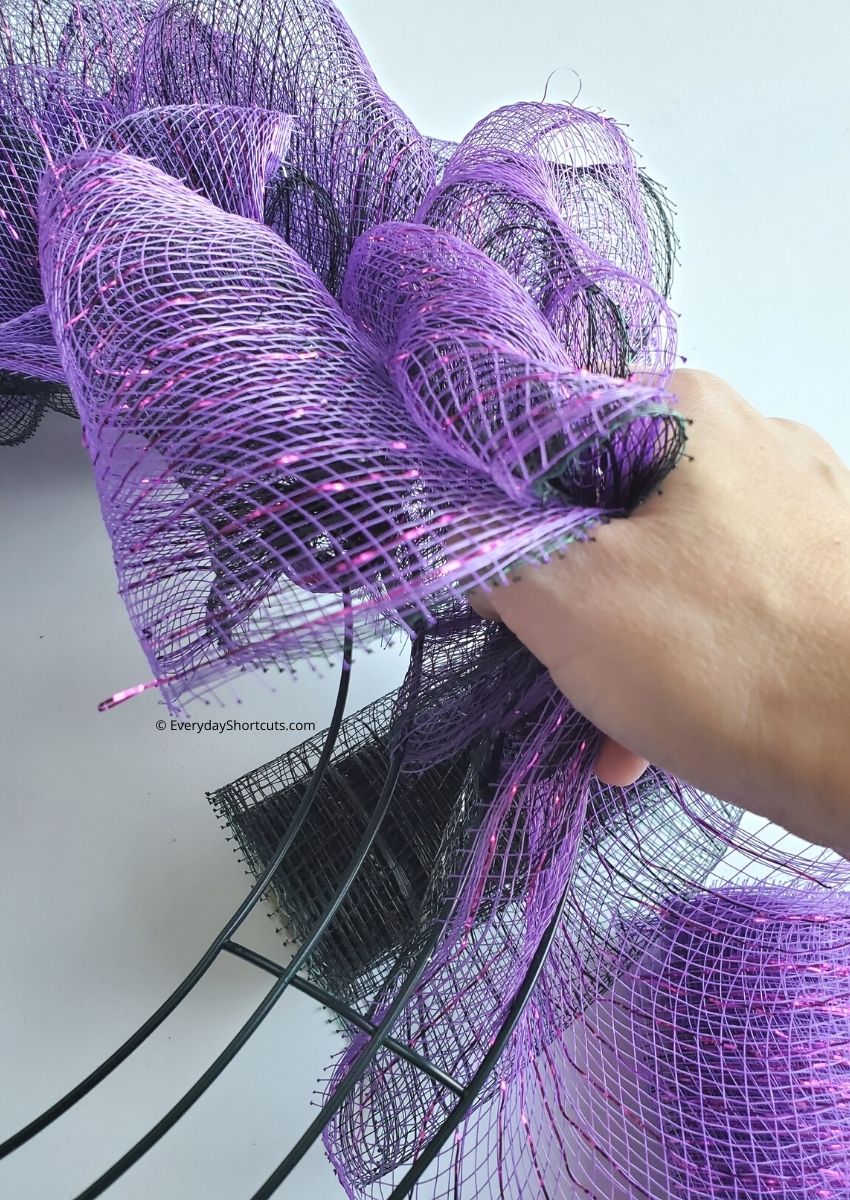
Gather together and push up. Repeat again so there are 2 mesh bundles in each section of the wreath. Continue this process till you fill the entire wreath.

Tie the end to the wire wreath and fluff out all the mesh till you get it how you want it.
Decorate the Wreath
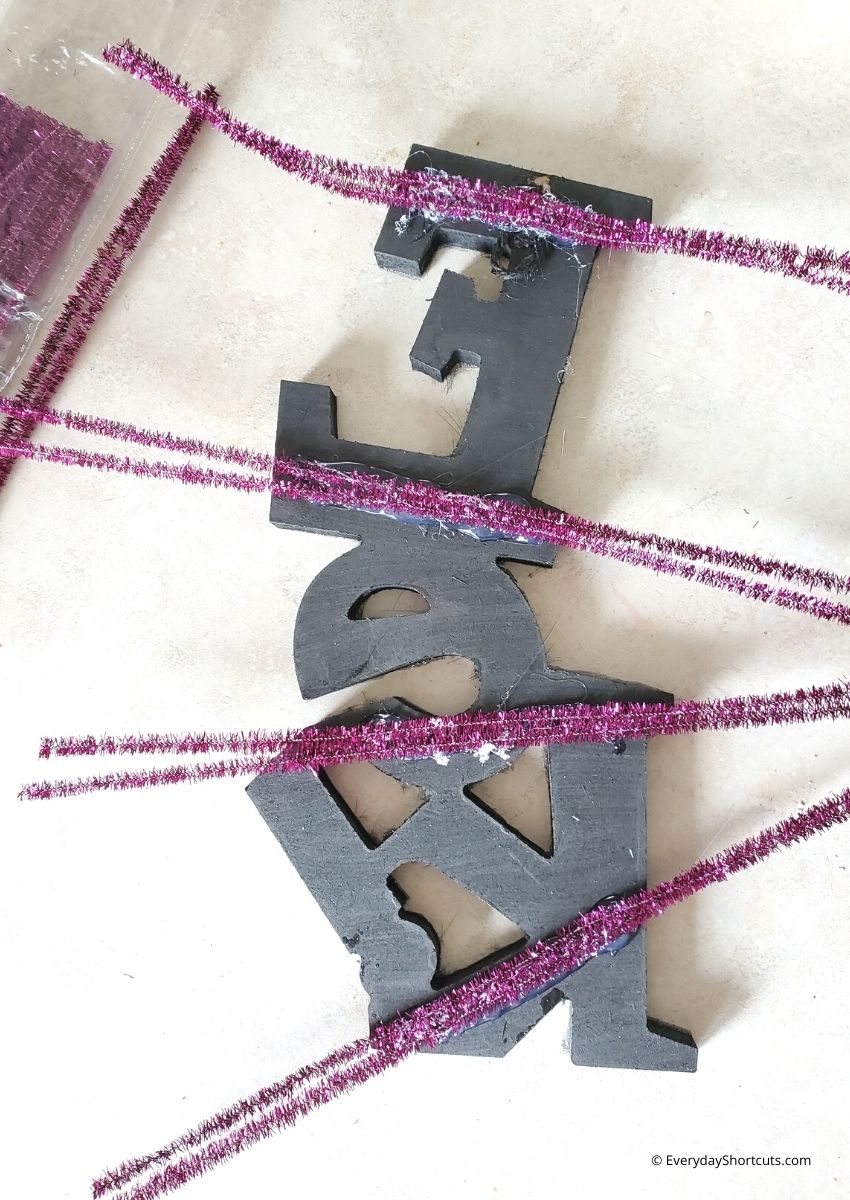
Using a hot glue gun, glue 4 rows of Glitter Chenille Stems on the back of the EEK! wooden sign and allow to dry.
Attach the wooden sign to the wreath and secure in the back by twisting the Glitter Chenille Stems.
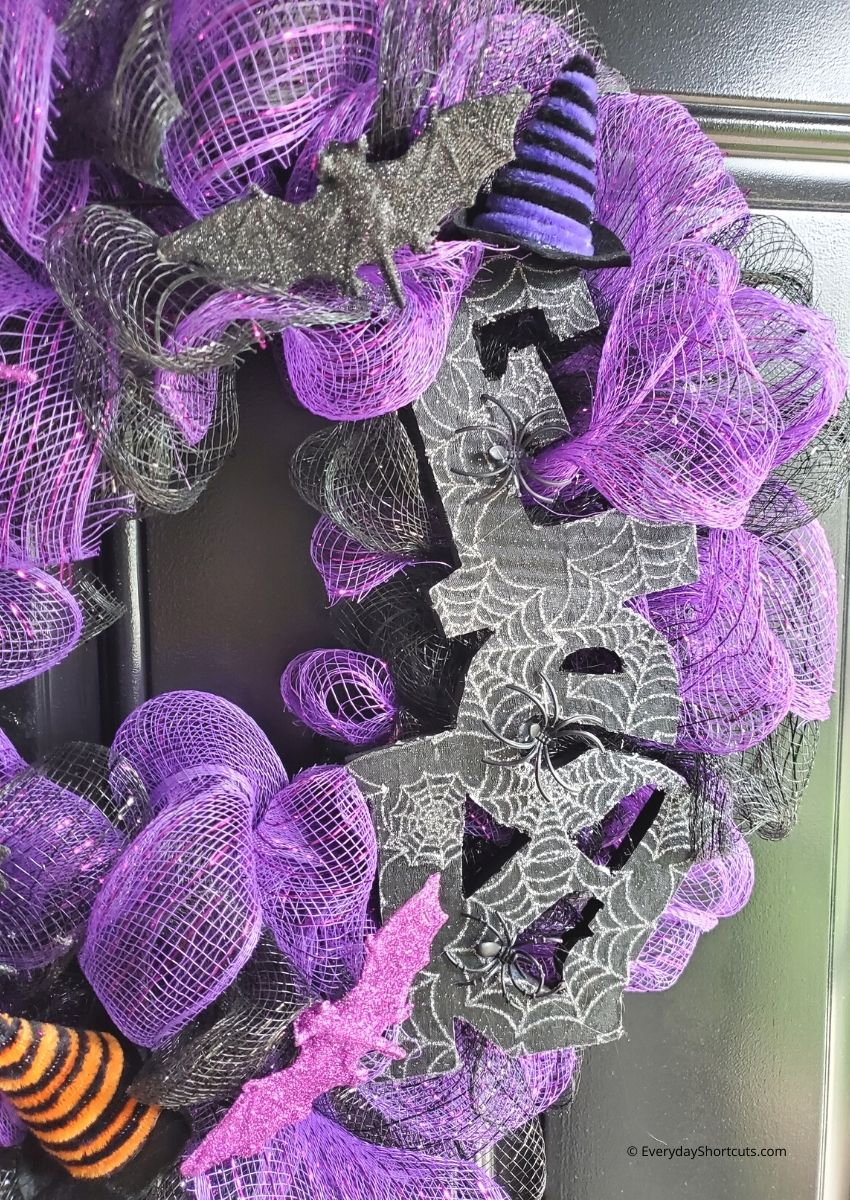
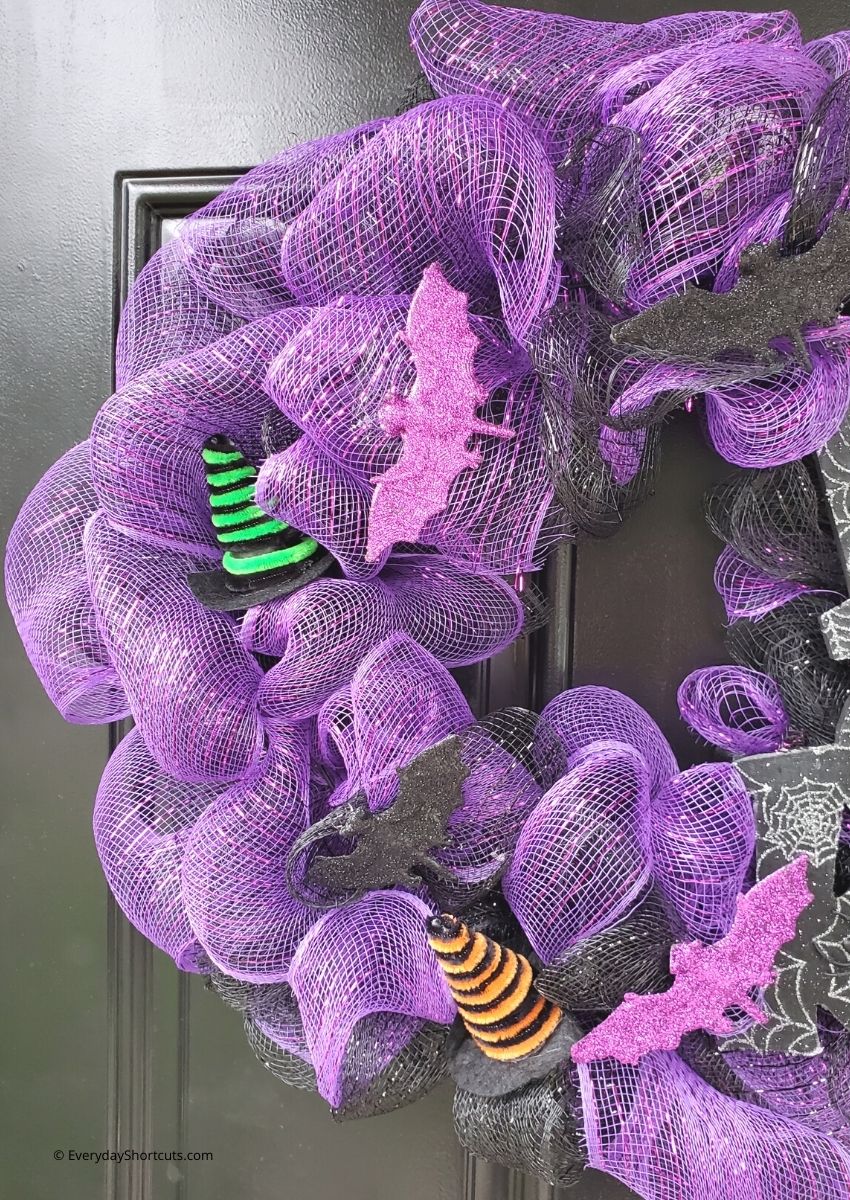
Continue decorating the wreath using the witch hat picks (I took the picks off and glued the hats on), glitter bats and spider rings and gluing them down with the hot glue gun to where you want them.
Make a hook to hang on the back using the Glitter Chenille Stems and securing it with a twist. Display your DIY Dollar Tree Halloween Wreath on your front door for all to see.


Leave a Reply