

Turn your ugly stairs into something beautiful with this DIY Stairs Makeover: From Carpet to Wood step by step tutorial!
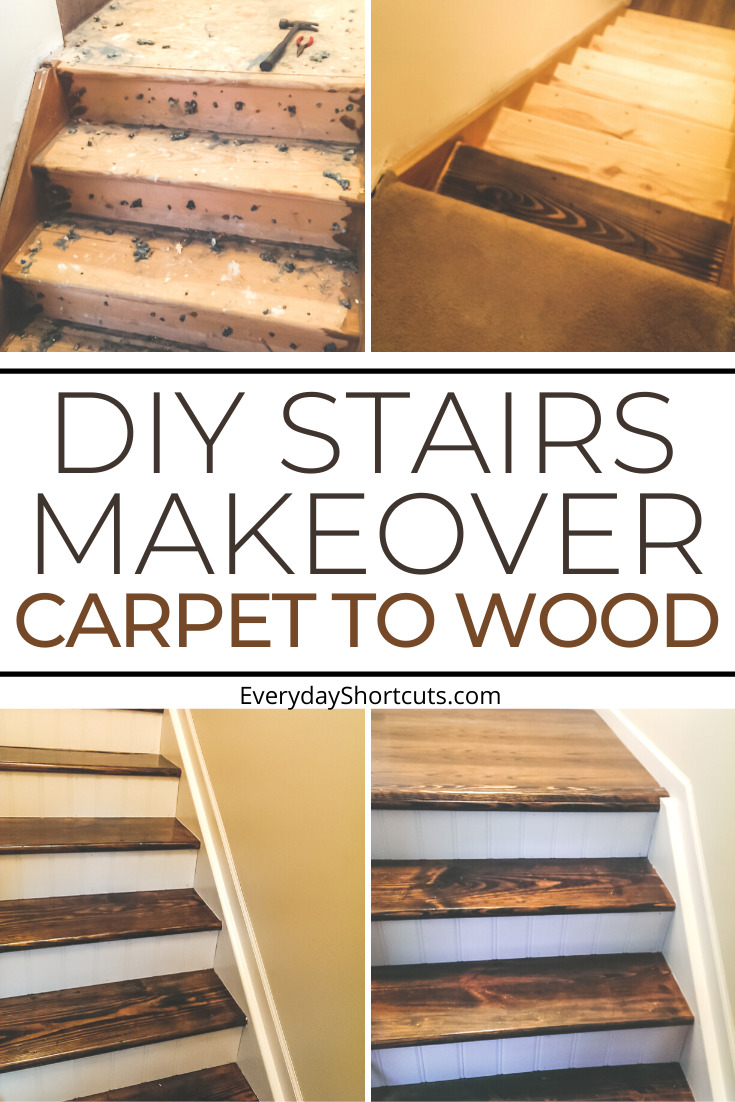
DIY projects are never ending at least in my household. I’m constantly thinking of things to improve and it’s usually after watching a few episodes of HGTV. Our latest project was updating our stairs going from carpet to hardwood. I will say that it was a bit of a challenge mostly getting all of the staples out but we got lucky having the stair treads already in place under the carpet which saved us some time and money.
We ended up completing the whole project in about a week because of waiting in between days of the stain to dry on the stairs but the overall outcome turned out amazing.
Supplies Needed
Pliers
Power cord
Circular saw
Marking pencil
Tape measure
Nail gun
Nails
Electric sander
Sand paper
Wood stain
Stain rags
Paint
Beadboard
Shop-Vac
Polyurethane
DIY Stairs Makeover: From Carpet to Wood Directions
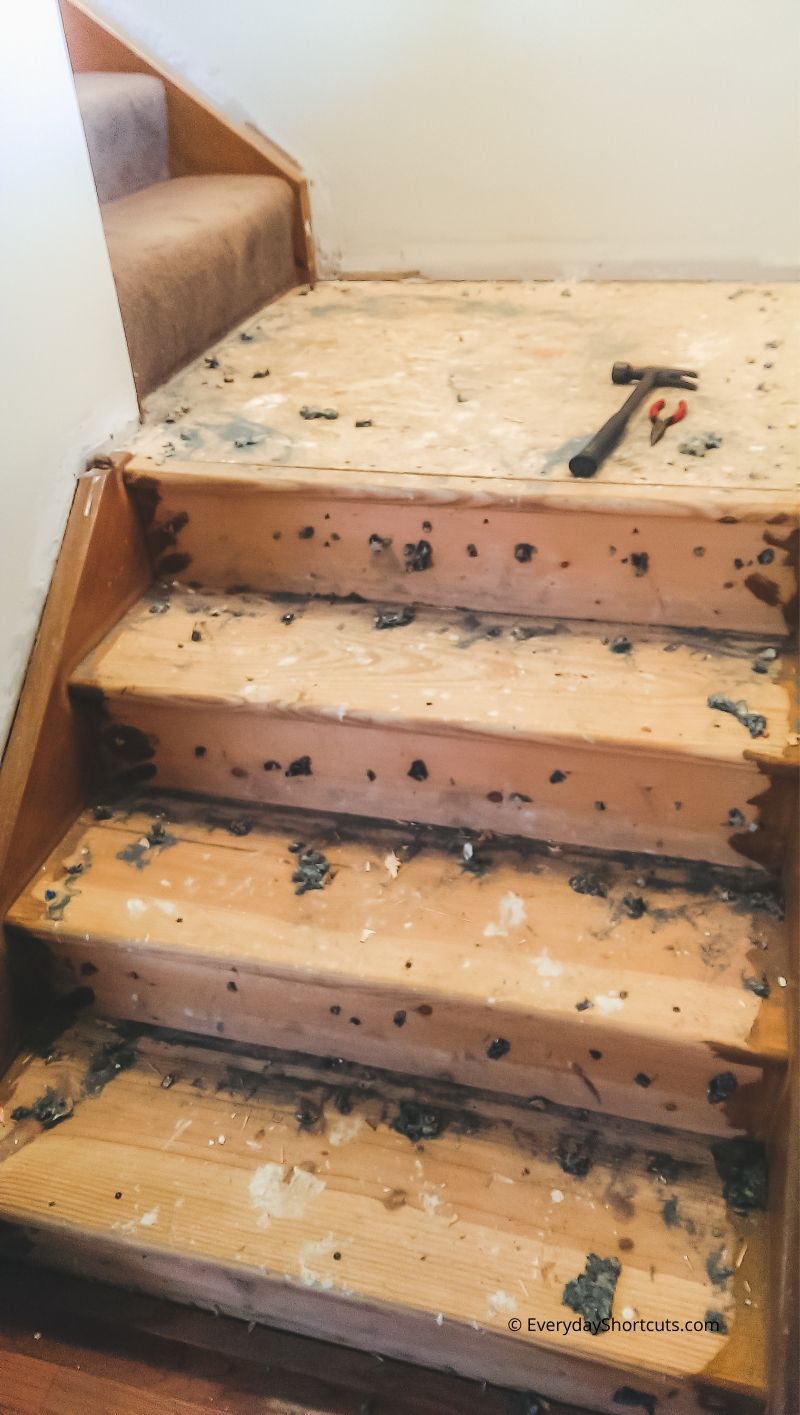
Remove the carpet, padding, and tack strips from the stairs and throw away. Use pliers to remove all tack strips and staples from the stairs.
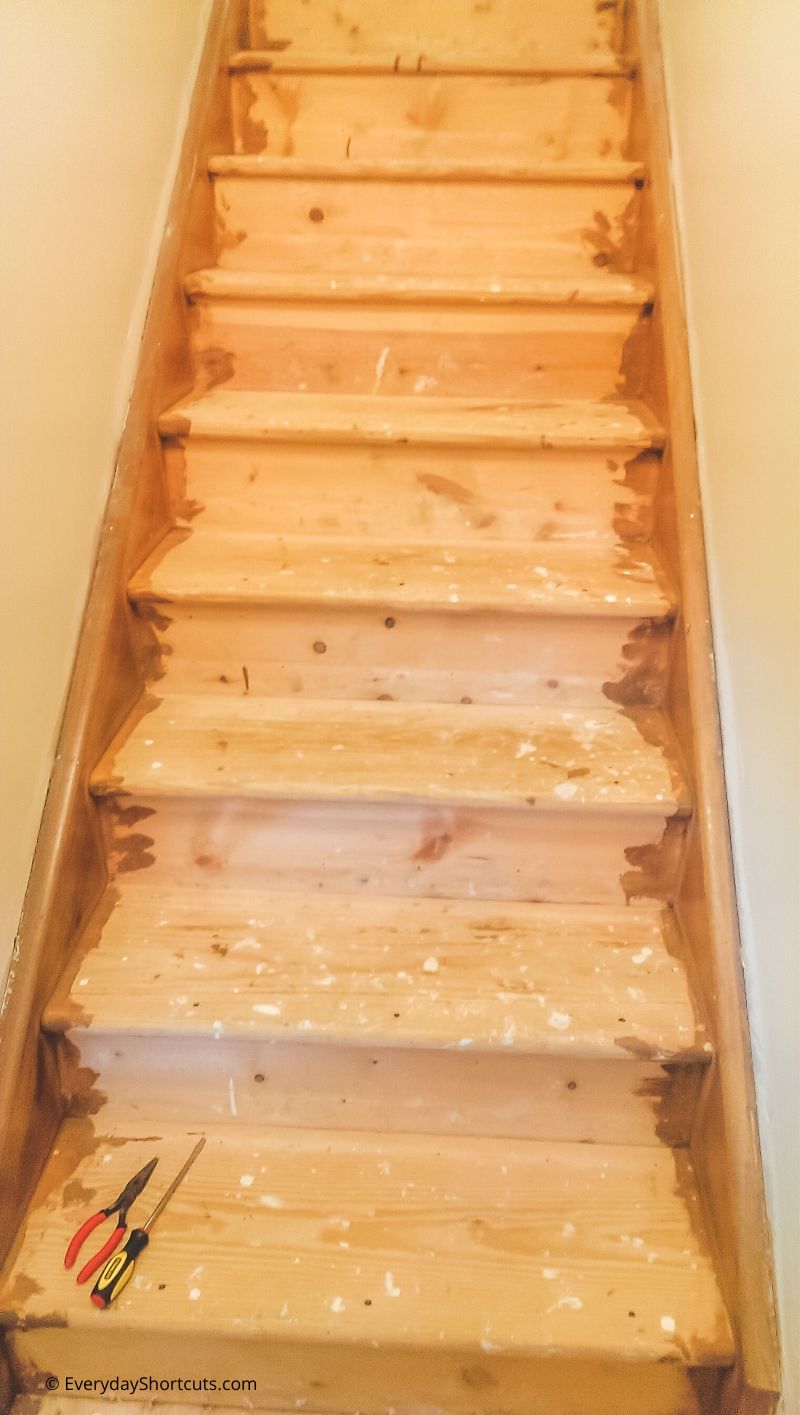
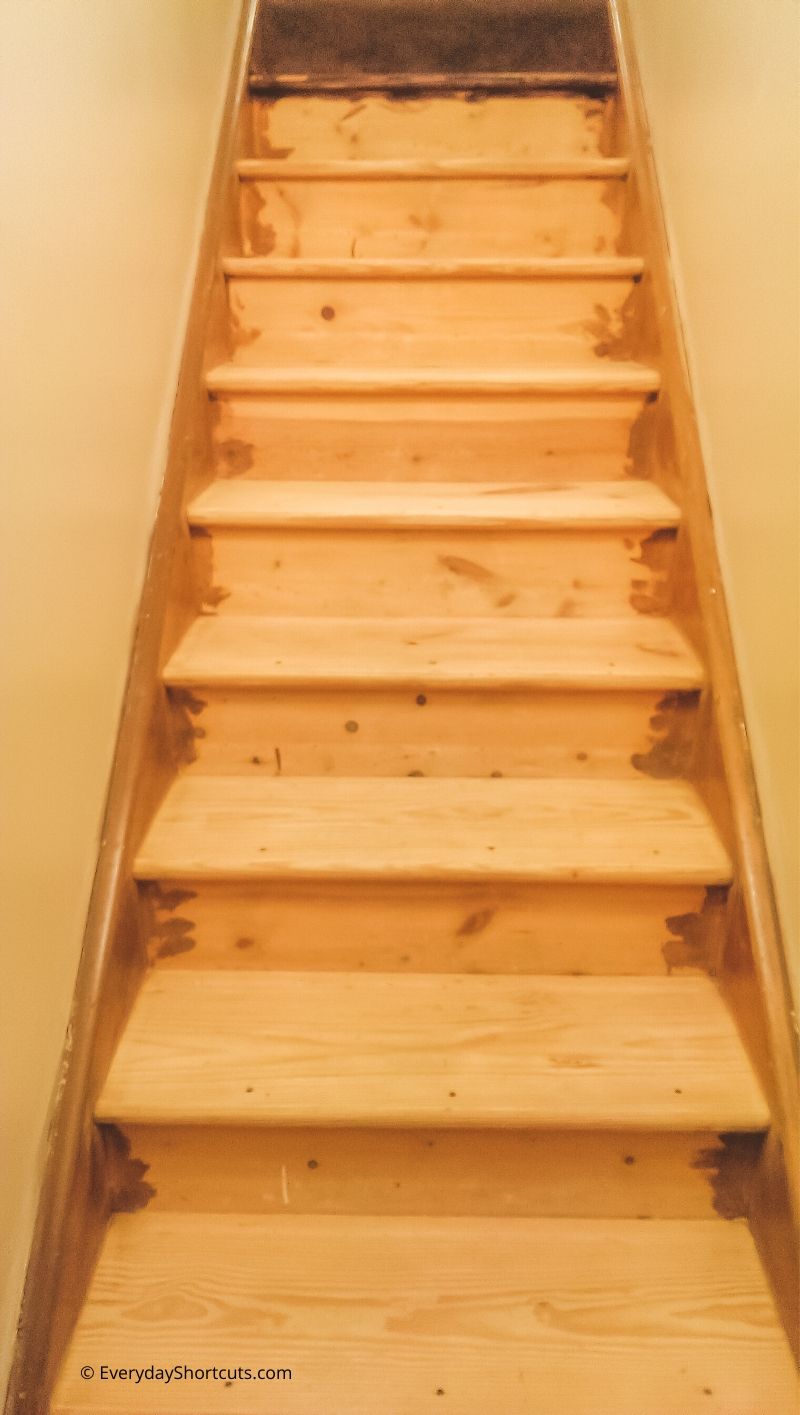
Place the sandpaper on the electric sander and sand the top and front of each step. Remove the dust from the stairs by using shop vac making sure you get all of the dust and dirt off of them and wipe with a dry clean cloth.

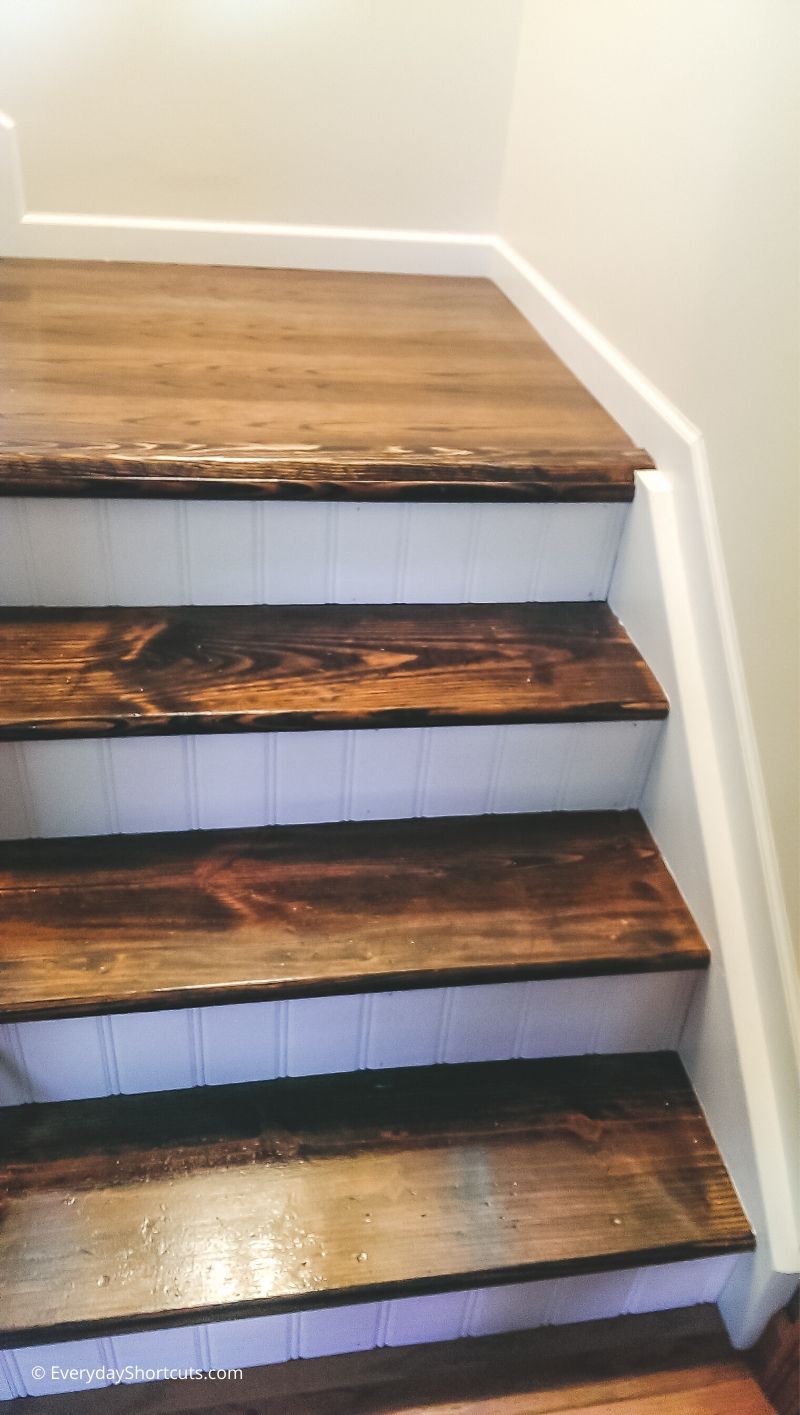
Apply stain to a clean rag and stain every other stair treads and then the landing. Allow to dry for 2 days or per stain can instructions. Apply stain to the remaining stairs using a clean rag and allow to dry for at least 2 days.
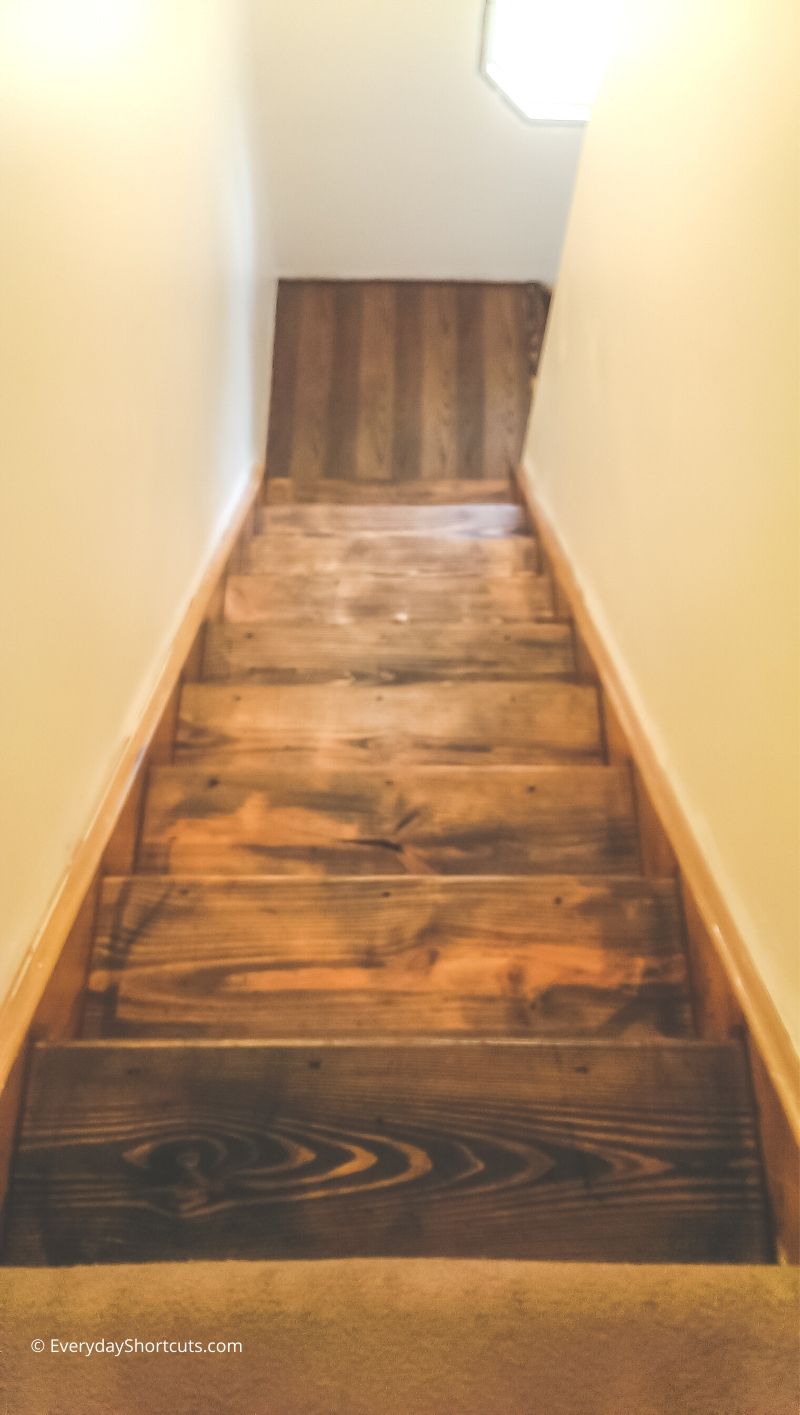
Apply Polyurethane using a clean synthetic bristle brush on every other stair and landing and allow to dry according to can directions but usually at least one day. Apply Polyurethane to remaining stairs and allow to dry for at least one day.
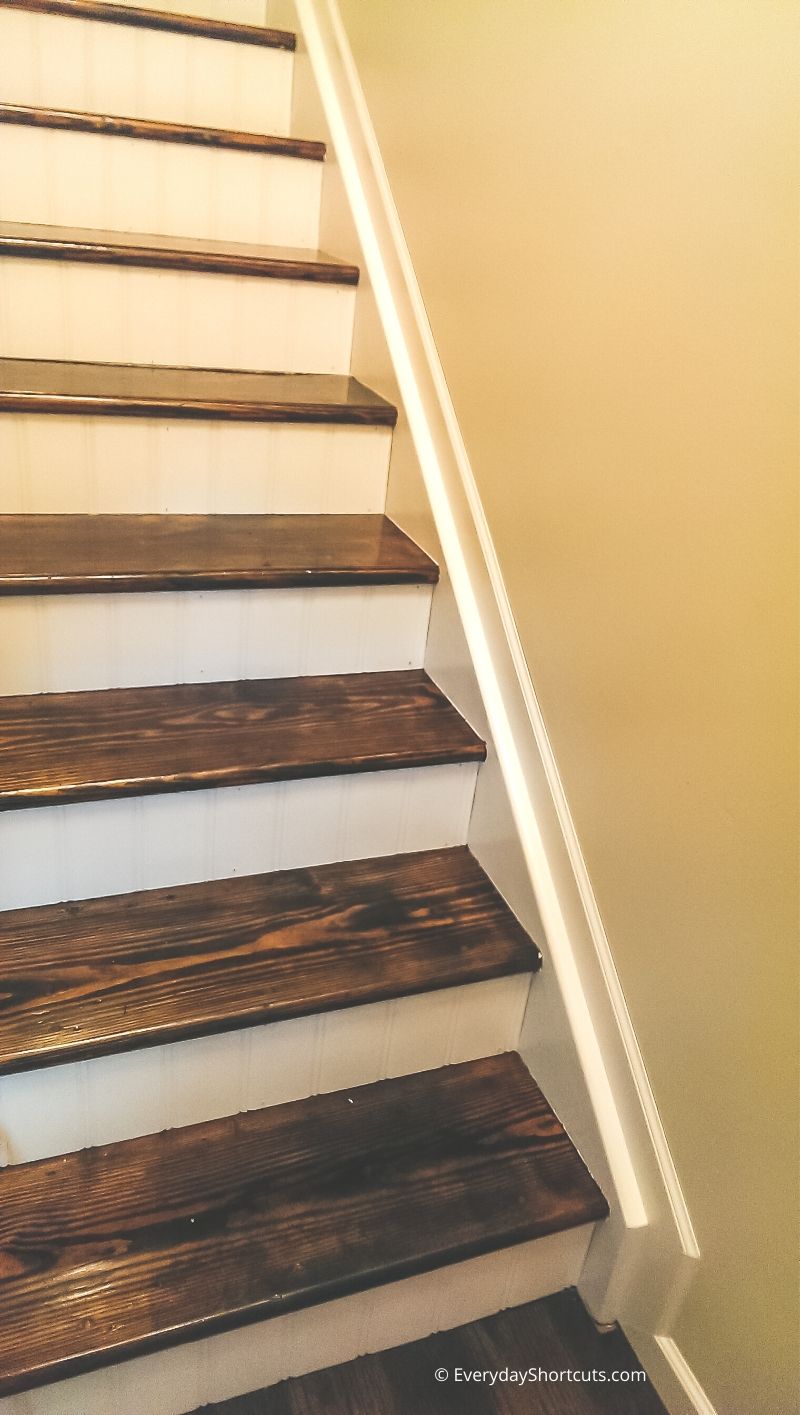
Cut beadboard to fit the rise of all stairs. Paint the sides of the stairs tapping off the ends. Paint the boards that you made for the rise and install with a nail gun after they dry. Touch up paint where you used the nail gun.
To clean, use a broom to get the dust off and the use a steam mop.
Note: Although your landing may have the right piece of wood, our landing was not suitable for refinishing the wood so we had to cover it and install an ⅛″ plywood and then finish it.

DIY Stairs Makeover: From Carpet to Wood
Equipment
- Pliers
- Circular Saw
- Nail gun
- Electric Sander
Materials
- Power cord
- Marking pencil
- Tape measure
- Nails
- Sand paper
- Wood stain
- Rags
- Paint
- Beadboard
- Shop-Vac
- Polyurethane
Instructions
- Remove the carpet, padding, and tack strips from the stairs and throw away. Use pliers to remove all tack strips and staples from the stairs.
- Place the sandpaper on the electric sander and sand the top and front of each step. Remove the dust from the stairs by using shop vac making sure you get all of the dust and dirt off of them and wipe with a dry clean cloth.
- Apply stain to a clean rag and stain every other stair treads and then the landing. Allow to dry for 2 days or per stain can instructions. Apply stain to the remaining stairs using a clean rag and allow to dry for at least 2 days.
- Apply Polyurethane using a clean synthetic bristle brush on every other stair and landing and allow to dry according to can directions but usually at least one day. Apply Polyurethane to remaining stairs and allow to dry for at least one day.
- Cut beadboard to fit the rise of all stairs. Paint the sides of the stairs tapping off the ends. Paint the boards that you made for the rise and install with a nail gun after they dry. Touch up paint where you used the nail gun.
- To clean, use a broom to get the dust off and the use a steam mop.

Cross Carpets says
What a great transition and it looks really nice. What kind of hardwood is that?
Alison says
I’m not sure. It was what our house came with.
B wiesner says
Your staining looks terrible! You should have used a prestain conditioner on that pine……that’s why it looks so splotchy. Plus that , 1/8 inch plywood on the landing? Bad choice…….its gonna look like you’ve pounded it with a ball peen hammer in no time. Sad that your site is making you sound like you really know what you’re doing…….you don’t!
Alison says
Sorry you feel that way. My stairs still look good as the day we did them and not splotchy or dented. We don’t claim to be professionals just showing what we did.
John A Contino says
It does not appear to be hardwood. Those stock stairs are typically pine. Pine is a very soft wood. I would not wear shoes on those stairs. Looks like pine grain to me. I am faced with the same issue. I am trying to find reasonably priced alternatives to pine. Alternative hardwoods are quite expensive.
Wendy says
I love what you did with the stairs. Dumb question does the risers really need to be installed? I wanna try this but hesitating.
Alison says
No they don’t. Ours does not have risers.
Eve says
I thought I saw breadboard as ur risers?
Alison says
We glued beadboard to the risers not the run.
Sherry says
How did you do the landing with 1/8” ??
Alison says
I laid the 1/8″ plywood down first and then trimmed it out and used a piece a molding across the front where the stairs are.
Valerie says
We just ripped the carpet up from our stairs and I came across your post. What did you do about the nails that are keeping the stairs held together? Our nails are flush with the wood so there’s no pulling them out without damaging the wood and trying to inset them has not worked.
Alison says
We just nailed them in a little further and puttied over them.
Liling says
Say we take the old carpet,what should we do if the wood underneath is not the right one, thanks, any suggestions
Alison says
You would need to recap it putting wood over it.